|
|
|
|
|
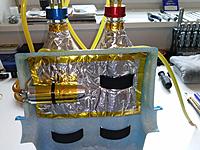
Minor technical adjustments. Heat insulation of tanks and smoke pump. Double aluminum foil, capton tape, isothermal foil gold-silver
 ***winter*** ***winter***
|
|
|
|
|
|
|
Bay City Tx.
Joined May 2006
42 Posts
|
I'm planning on insulating mine as well below the fuel and battery trays.
One question on balance of the 330, do they come out tail or nose heavy building with DA120 headers and KS cannisters front dump. From some reading everything needs to be placed far forward of the CG point correct? Mine is shipping this coming Friday from Chief. I have ordered what I think is everything I need for the build. I'm sure there will be a few bits and pieces that I may need. Motor DA120 70mm drop headers, paired with KS cannisters MKS HV777 x 7 Hitec HS5665MH hi speed for throttle and choke Jeti Central Box w/ 3 R3 recievers and magnetic switch 2x Jeti 5200mah flight packs 1 Jeti 2600mah for smoke pump Sullivan Skywriter Tech Aero IBEC for ignition and failsafe Secraft hardware, tail wheel and dual fuel dot and cannister mounts Titanium axles will be making all my servo leads MPX connectors for wings to fuse from dreamworks. 2 34oz kusa tanks for fuel and smoke Ordered alutex sheets for baffles in cowl. 1.6 mm fiberglass to make second control horn for rudder Carbon fiber balsa 4.5mm and 6.5mm for building mounting plates for cannister mounts Will be doing a somewhat build thread with pictures and information as I progress through my build. I have had CARF and DR Hobbies in the past. Just getting back into planes after flying helis for the past 5 years and am really missing thee planes. Cant wait to get this Krill started. |
|
|
||
|
Bay City Tx.
Joined May 2006
42 Posts
|
Quote:
|
|
|
|
|
|
|
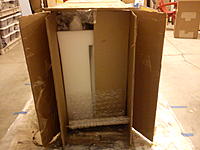
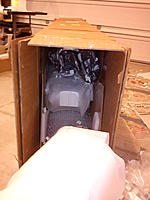
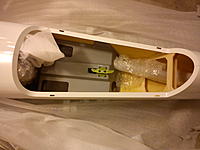
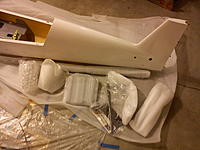
unpacking an all-white version
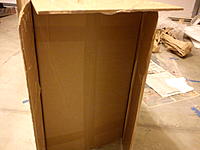
Unpacking photos as promised. Really made a mess in the garage right before bedtime that night
 I noticed the internal tray is grey instead of blue like I've seen previously on this thread. I'm curious if that's their way of keeping track of model year or something? |
|
|
|
|
|
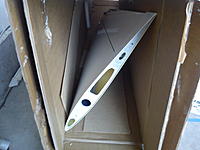
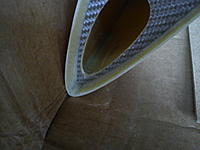
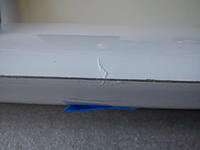
It looks to me that the damage I saw on the wing is shipping damage. I put a piece of blue tape next to the damaged spot on the wing so it'd be easy to locate with the wing inside the box, then I put the wing back into the box. The indentation on the cardboard on the bottom of the box told me where the leading edge was. Sure enough the damaged spot on the wing lined up with a substantial inward protrusion and tear of the box.
And unfortunately I found the right wing has damage similar to the left wing. I talked to Steve at Chief Aircraft. After seeing the pictures, he told me there are basically two options. 1) I repair it and log my hours. UPS pays me. 2) Put these wings back into the same box they were delivered in, and UPS will pick them up. Then new ones will be ordered to replace them. I'm leaning toward the second option as I won't be painting this thing soon, let alone doing the build (other than getting it up on wheels). And time will be very limited for me anytime soon. Without being anywhere near ready to paint, it would be that much more difficult to evaluate a repair. Basically I doubt I can make it as good as new in the time I'm going to have. That said, option 2 does sound pretty wasteful if UPS pays for it and then throws them away. Seems like the best scenario would be to get the customer (me) undamaged parts, and then make the damaged parts available for somebody to buy at a discount... somebody who's prepared to do the repairs. Thoughts? |
|
|
|
|
Bay City Tx.
Joined May 2006
42 Posts
|
Again, I hate to see that, were you home when they delivered? Did you have to sign? Last, did you see the damage to the box when they delivered or after taking possession?
If your not in a hurry I would let them get me a new set of wings. Being all white the repair would be no problem, as you can make a good repair and cover with your paint scheme after getting built. Once built strip it down and paint. Good luck, mine is shipping out from chief tomorrow. Hope it arrives safely... |
|
|
|
|
|
I wasn't home, and no signature was required. The damage on the bottom of the box wasn't obvious. The bottom edge looks decent enough that if I'd been there, I doubt I would've suspected the bottom had an issue worth trying to get a view of. Even if I had had a chance to look at the bottom directly, I probably wouldn't have guessed that the damage was deep enough to affect any parts. The problem is that the leading edge of the wings are basically right on the relatively thinner bottom of the box near the sides. The sides of the box are doubled up compared to the bottom. The particle board and bubblewrap that was under the fusalage was not under the wings, and the wings actually have some downward pressure provided by the fact that the wing root also pushes on the top of the box. It was pretty well wedged in there. I was being careful not wanting to break them! |
|
|
|
|
Bay City Tx.
Joined May 2006
42 Posts
|
I'm sure Steve @ Chief will do whats right if you decide to get new wings,
Mine shipped today, have tracking info from UPS, I will let you know how it arrives on Wednesday. |
|
|
|
|
Joined Oct 2014
25 Posts
|
This aircraft will be equipped with this material
Da 100 ( because i have , be little for this plane?) Canister mtw 75 6 Hitec HS7955 sh for aleron and prof 29 kg 1 HS 7950 th for rudder 35 kg 2 HS 5496 MH for gas and starter Powerbox champion RRS with mag sensor at 7.4 v And secraft, spoton and revoc accesories |
|
|
|
|
Bay City Tx.
Joined May 2006
42 Posts
|
Really nice color scheme. Congrats...
|
|
|
||
|
United States, CA, Loma Linda
Joined Nov 2014
74 Posts
|
Quote:
I've been checking out the helies this past month lol I might get me a mikado logo or a goblin.. If you want to sell any of your old ones hit me up. It would be my first. This hobbie is so damn addictive!! |
|
|
|
||
|
United States, CA, Loma Linda
Joined Nov 2014
74 Posts
|
Quote:
. I was concerned about heat build up on the smoke pump it goes up to 75 C*, Any where else to mount it? |
|
|
|
|
|
United States, CA, Loma Linda
Joined Nov 2014
74 Posts
|
My build is slowly coming along, I contemplate things for days.. I'm very new to this stuff.! But now that I'm in it its a lot of fun. This thread proved to be so useful who needs instructions now right!!
Got done with my tanks , going to toss that secraft fuel dot, gonna use festo check valves like the guys on the German aerobatic site, very creative dudes I have to say! Opened up cooling vents on the bottom and I've been getting into the habit of reinforcing all my joints with flexible hysol. Also increased the throw on my rudder by widening the pocket hinges.. Tonight I'm going to get a bit more done, (hopefully) or maybe I'll just stare at it and try to think of ideas. |
«
Previous Thread
|
Next Thread
»
| Currently Active Users Viewing This Thread: 1 (0 members and 1 guests) | |
| Thread Tools | |


