| Thread Tools |
| This thread is privately moderated by warbee55, who may elect to delete unwanted replies. |
|
|
|
|
United States, NC, Raleigh
Joined Jul 2015
36 Posts
|
Build Log
Scratch built modified Giant Scale P-40 Ziroli
Hello everyone, I am building a giant scale P-40 based on a Ziroli plan. I will post pictures for anyone interested in the process. I have modified some parts of the original plans to make it more "scale" accurate. I have added the trims on the rudder and elevator and added the "metal" cover on front of the stabilizer as well as the baggage' door, visor, wing antenna, under wing access trap, etc…
I also plan to convert it to electric with a sound system including real P40 sound engine and 2 smoke systems - one dynamically linked to the throttle to recreate the smoke from the exhausts and one under the fuselage for "show". Another added modification will be the motorized cockpit and the extra drop fuel tank under the wing. 3 high intensity orange LEDs will be added inside the .50 calibers machine guns and synchronized with sound system. Many other details like rivets, paneling, airbrushing techniques, etc will be described too. I will do my best to describe each process and add pictures that can help anyone wanting to add these features to their own model. I hope you will have as much fun as I do building my giant models from scratch. Thanks for joining. Please don't hesitate to ask questions/comments. |
|
|
|
|
|
|
United States, NC, Raleigh
Joined Jul 2015
36 Posts
|
Getting the plans
First things first, my goal is to create a highly detailed model packed with many fun options at the lower possible cost… So I bought the digital version of the plan on eBay for $5. Can't beat that!
|
|
|
|
|
United States, GA, Atlanta
Joined Dec 2008
2,322 Posts
|
Ambitious, I like it! I look forward to seeing this one come together.
What smoke systems are you planning to use with electric power? What electric motor do you intend to use? |
|
|
|
|
United States, NC, Raleigh
Joined Jul 2015
36 Posts
|
A 6V Sullivan's Sky Writer smoke system seems to be a good choice.
The engine has still have to be determined but so far my choice is on the e-flite Power 360 Brushless 180Kv. It is the equivalent of a 50-60cc gas engine. You can find more info on their website at e-fliterc.com Thank you for following! |
|
|
|
|
United States, NC, Raleigh
Joined Jul 2015
36 Posts
|
Preparing parts using an image editing software
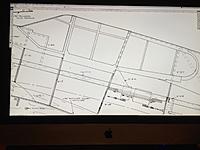
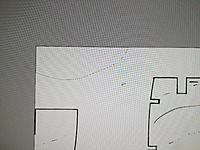
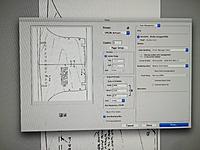
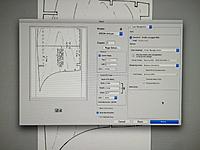
Once I received my download link, I got five (5) .pdf files into my computer. I have an iMac 5K which displays a full sheet at 25% magnification but any screen will do. The .PDF file is the full scale representation of its paper version so simply import each sheet into your favorite image editing software (I use Photoshop) and separate each part (formers and ribs) before saving them into individual files ready to print (cleaning of unwanted details and occasionally rotating to better fit a standard 8.5x11 paper sheet). Note that Photoshop will show a smaller image of the .PDF but will print at full scale so no worries here.
Some parts are too big to be printed on a single sheet of paper so I had to print different areas of the part over two or more sheets and tape them together. It seems like an overwhelming work but it is not. Very simple and easy to do… It's all about patience  (it took me about 6 hours to have all the templates ready including printing, cutting and taping) (it took me about 6 hours to have all the templates ready including printing, cutting and taping)
|
|
|
|
|
United States, NC, Raleigh
Joined Jul 2015
36 Posts
|
Printing formers and ribs
Make sure to print all areas of each piece as they will have to be taped back together...
|
|
|
|
|
United States, NC, Raleigh
Joined Jul 2015
36 Posts
|
Applying the templates to the wood
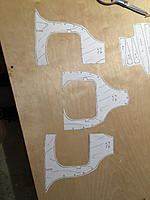
Once all the templates are ready, position them on a 1/8x12x24 piece of plywood ($3.99 at Michael's stores but much cheaper online) in the best order to save on wood. Then glue them in place. Here are two different techniques that can be applied: "All purpose spray adhesive" or "Mod Podge".
I use spray adhesive most of the time because it is quick and easy and the paper easily peels off after the cut is done. Mod Podge allows you to "print" on wood by transferring the inkjet printer's ink to the wood. It takes a little longer to achieve since you must wait for the liquid to dry first. At least 30 mn. But it is great for fine printing and intricate cuts since you won't have to deal with the paper shredding around the blade. With the spray adhesive, simply spray the back of the paper template and apply it on top of the wood. You can then start cutting. No need to wait for the glue to dry. Once the cut is done simply peel off the paper template et voila! Using Mod Podge is a very similar process but the liquid has to be applied on top of the template on the printed side using a soft brush and over each line. Then stick the template to the wood and wait at least 30 minutes for Mod Podge to dry. If you can let it seat over night, the better the results. Using a damped sponge start swiping gently over the back of the paper until it all come off in tiny pieces. Only the ink will shows on the wood. It is important to note that the drawing will be reproduced reversed which is generally not a problem for us modelers since most of our models are built symmetrically otherwise you will have to reverse the picture using your favorite image editing software prior to print it.
|
|
|
|
|
United States, GA, Atlanta
Joined Dec 2008
2,322 Posts
|
very cool to see someone cutting their own models
|
|
|
|
|
United States, NC, Raleigh
Joined Jul 2015
36 Posts
|
Cutting the formers
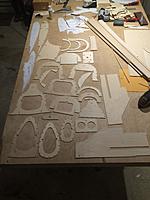
12 hours later... Most of the formers are cut! That's 12 full hours of scroll saw cutting but look at those beauties... Definitely worth the time!

|
|
|
|
|
United States, NC, Raleigh
Joined Jul 2015
36 Posts
|
Building the crutch
Now that we have all our formers cut it is time to build the crutch which is the fundamental part of the fuselage assembly. It is a simple frame that will support the formers and give the fuselage its general form.
First of all we have to print it in as many standard paper sheets as necessary, cutting the blank borders prior to assembling them until with have the full 1/1 scaled crutch laying flat and taped on the table. In the next 15 minutes or so you should have the crutch built and ready to receive the formers. Proud and happy to have the first physical part of the plane on the table!
|
|
|
|
|
United States, NC, Raleigh
Joined Jul 2015
36 Posts
|
Assembling the fuselage - part 2
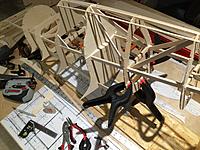
Adding the side windows F-9T. Make sure to glue them in place symmetrically by checking their position on the F-5 former.
|
|
|
|
|
United States, NC, Raleigh
Joined Jul 2015
36 Posts
|
Assembling the fuselage - part 3
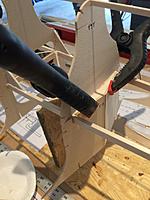
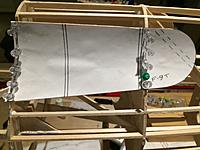
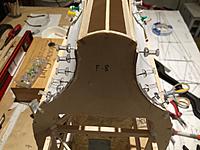
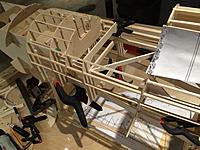
Finish to give the fuselage its final shape by adding all the balsa strips along the formers. Quick and easy!
|
|
|
|
|
United States, NC, Raleigh
Joined Jul 2015
36 Posts
|
Assembling the stabilizer
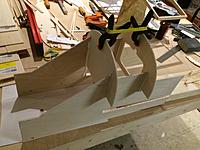
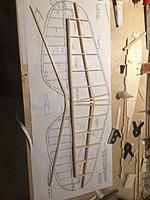
Using a similar process, the building of the stabilizer should be straightforward. Simply glue the ribs in place and adjust the elevator support by sanding it to shape. An easy job done in less than an hour.
|


