|
|
|
|
|
F Terry. Is there anything you can't do? Just incredible buddy!

|
|
|
|
|
|
|
|
|
|
|
|
|
|
Looking great Terry! I have to get covering a Staudaucher this afternoon.
|
|
|
|
|
|
Lost a little time today because it was a two hour swearing match with my canopy shell. I epoxied the front, and it slipped just a hair so that it buckled when I lined the back side up
 Luckily it came off in one pc. before the epoxy cured and I was able to start over. I trimmed it a little more on the front, which actually made it fit better anyway. I'm going to blend the line slightly with some lightweight filler like I have on my other builds. Luckily it came off in one pc. before the epoxy cured and I was able to start over. I trimmed it a little more on the front, which actually made it fit better anyway. I'm going to blend the line slightly with some lightweight filler like I have on my other builds.I also got the rest of the body filler blended on the cowl so it's ready to be split when I have time later this week. All hinges are drilled and test fit and all surfaces are sanded and ready for covering. I just need to do final sanding on the fuse and it's ready to cover as well 
|
|
|
|
|
|
I only have a dozen flights on the 42% before Winter set in solid, still need cowl molds, canopy molds slight wing mods.....I may build another 42% proto next Winter, but generally I'm not getting a lot of interest in that size for a "kit built 3D plane" when an ARF would be cheaper than the basic kit price. I plan to spend most focus on the "largish" 120cc size planes at this point.
|
|
|
|
|
|
Hey, actually found a few minutes today to work on my plane. Work has really picked up in the housing market....but we'll see if our govt. flushes that down the crapper or not
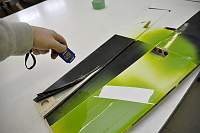
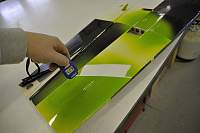
 . .Fuse is sanded and ready for covering, wings stabs and surfaces have had their final sanding done as well. Landing gear mounted and tailwheel mounted. I love the J&J tailwheels but like to reinforce the front plastic bracket with a strip of aluminum. This adds tons of strength to hold up to bumpy grass runways, harrier landing and tail dragging harrier flight.  I also made a trip to the paint store today and got a different paint match for the apple green, this one is nearly spot on. I have completely abused the sample paint and clear that I sprayed on a scrap wing panel. I put it 4' under my radiant shop heater and it wrinkled all to crap, then I used a heat gun instead of a covering iron to shrink it down. It shrank back tight and perfect. Then I set it outside in the cold for a while, then back under the radiant heat, then back with the heat gun for more abuse. Looks perfect! I'm thinking of painting all the graphics on my fuse for this plane 
|
|
|
|
|
|
I just like to paint and like the look of it on there....is the simple answer. Covering would also work just fine and would save some weight. My thought is also that the hatch is somewhat structural the way mine is built and installed so any additional strength is also a good thing.
|
|
|
||
|
|
Quote:

|
|
|
|
||
|
United States, GA, Mableton
Joined May 2006
1,797 Posts
|
Quote:
Great idea on just reinforcing the plastic with aluminum. I have always just suggested making them out of metal to people who have had problems with the plastic. I think we may have found an off the shelf supplier of metal brackets. Depends on the bulk cost, but if we can work it out we are going to make the switch. In any case we will always have the plastic ones available for existing customers. |
|
|
|
|
|
|
Cool
 This mod costs literally nothing if you have some scrap al. sheet on hand and I've tested it on up to a 40# 40%'er doing harrier landings and it holds up well. Takes less than 5 minutes too. This mod costs literally nothing if you have some scrap al. sheet on hand and I've tested it on up to a 40# 40%'er doing harrier landings and it holds up well. Takes less than 5 minutes too.I just did some more destructive testing on my painted covering and had to actually cut it out, wrinkle it into a tiny ball before it finally failed. Had it under the heat again, then held it literally 12" under it and it registered over 200* surface temp before I snapped the pic. Then I stuck it outside for 20 minutes (22* right now). Then shrunk it yet again with a heat gun (yea, I do this with all my planes on a regular basis  ).......I was shocked that it shrank back tight as a drum again (except the part where my heater melted it!) This is without adhesion promoter and I did no surface prep at all other than to wipe it with some wax / grease remover (no scuffing). I will scuff and prep the surface on my plane though! ).......I was shocked that it shrank back tight as a drum again (except the part where my heater melted it!) This is without adhesion promoter and I did no surface prep at all other than to wipe it with some wax / grease remover (no scuffing). I will scuff and prep the surface on my plane though!I also attached a pic of the clear that I am using, not sure if it is more flexible because it is a spot repair clear, but I really like this stuff. Cheaper, smaller qty. and lays down really nice. Less than $200 for all materials to paint graphics on this plane. I am ordering checkers from B&E though, I don't want to mess with those and all that masking over ultracote. So, looks like I get to do some painting 
|
«
Previous Thread
|
Next Thread
»
| Currently Active Users Viewing This Thread: 1 (0 members and 1 guests) | |
| Thread Tools | |


