logo
Thread Tools
Old 03-05-2012, 10:04 PM
JIMZACH is offline
Find More Posts by JIMZACH
Registered User
JIMZACH's Avatar
WELLINGTON,FLORIDA USA
Joined Mar 2006
567 Posts
Ya know i had the same issue with mine, i just had to send it back in for warranty to replace it. I was flying some IMAC style stuff, and pulled to an inverted 45 downline, went to power up and fly out, and it powered up and locked in. Full throttle into the ground. Demolished itself. It was a real bummer cuz i love huckin that lil thing around out fron of my house too.

Zach
JIMZACH is offline Find More Posts by JIMZACH
Reply With Quote Quick reply to this message
Sign up now
to remove ads between posts
Old 03-05-2012, 11:41 PM
Fixed Wing is offline
Find More Posts by Fixed Wing
Horse Power Saves Planes!
Fixed Wing's Avatar
Magnolia, Texas
Joined Jan 2006
2,286 Posts
In reading the various dialogue here about estimated wing weights, etc. I thought the following Monokote weight data might be helpful. These numbers are from a personal Carden 126" and are very consistent across all the 126's and 124's I've done. All color schemes used 1/8" overlap at the seams with the only Monokote over Monokote areas being for striping and lettering. Certain colors like white are slightly heavier than other colors like red.

Left Wing - 5.3 oz.
Right Wing - 5.4 oz.
Left Stab - 0.9 oz.
Right Stab - 0.9 oz.
Fuse & Rudder - 6.9 oz.
TOTAL MONOKOTE - 19.4 oz.
Fixed Wing is offline Find More Posts by Fixed Wing
Reply With Quote Quick reply to this message
Old 03-06-2012, 11:03 AM
Henry Piorun is offline
Find More Posts by Henry Piorun
Old time pattern dude
Henry Piorun's Avatar
Mission B.C. Canada
Joined Feb 2009
1,357 Posts
Excellent information, thanks Dean!
I some how thought Monokote would be lightert than that.
Henry Piorun is offline Find More Posts by Henry Piorun
Reply With Quote Quick reply to this message
Old 03-06-2012, 03:02 PM
Henry Piorun is offline
Find More Posts by Henry Piorun
Old time pattern dude
Henry Piorun's Avatar
Mission B.C. Canada
Joined Feb 2009
1,357 Posts
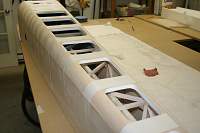
Here I'm gluing the belly pan onto the fuse. This step is pretty straight forward, once I have it fitting the way I want I paint epoxy resin along the foam edge wherever it needs gluing. Masking tape makes a great "clamp" for this job. The belly pan has a bit of flex to it so it's very easy to get everything lined up perfectly.
The last pictures shows what it looks like after a bit of elbow grease with a 120 grit sanding block. Looks pretty good!
Henry Piorun is offline Find More Posts by Henry Piorun
Reply With Quote Quick reply to this message
Old 03-06-2012, 03:17 PM
mbacosa is offline
Find More Posts by mbacosa
Registered User
mbacosa's Avatar
United States, AZ, Scottsdale
Joined May 2008
2,094 Posts
Henry,
Have you ever used Gorilla Glue (urethane) to glue the foam pieces to the fuse (turtle deck and belly pan). Just curious if you found a benefit with epoxy or if its just personal preference.
mbacosa is offline Find More Posts by mbacosa
Reply With Quote Quick reply to this message
Old 03-06-2012, 04:54 PM
Henry Piorun is offline
Find More Posts by Henry Piorun
Old time pattern dude
Henry Piorun's Avatar
Mission B.C. Canada
Joined Feb 2009
1,357 Posts
I have used Gorilla glue before on certian applications and it works just fine. I try and not use it for any "exposed" edges because it expands so much and then you have to clean it up constantly or sand it all off. If you get a good fit to start with epoxy works great, I guess it's more a personal preference that's all.
Henry Piorun is offline Find More Posts by Henry Piorun
Reply With Quote Quick reply to this message
Old 03-06-2012, 05:45 PM
harv is offline
Find More Posts by harv
it wont go any lower
harv's Avatar
Canada, BC, Surrey
Joined Feb 2006
2,920 Posts
Missed a spot
harv is offline Find More Posts by harv
Reply With Quote Quick reply to this message
Old 03-06-2012, 07:38 PM
poprlite is offline
Find More Posts by poprlite
which rudder?
poprlite's Avatar
United States, GA, McDonough
Joined Nov 2008
417 Posts
Hey Henry that looks very good!
poprlite is offline Find More Posts by poprlite
Reply With Quote Quick reply to this message
Old 03-06-2012, 08:44 PM
Henry Piorun is offline
Find More Posts by Henry Piorun
Old time pattern dude
Henry Piorun's Avatar
Mission B.C. Canada
Joined Feb 2009
1,357 Posts
Thanks! I'm pleased with how it's turning out.
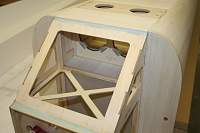
So here I'm finishing off the front of the fuse with some 1/4 inch balsa sheeting. There are a couple of ways to go with this, some people cut lightening holes here to match the plywood and cover the area with Monokote. That works great but I chose to leave it solid and continue my painted interior look. Sacrificing a few grams here, oh well...
The only deviation here from stock is I like to use a 4-44 bolt instead of a dowel for the center hold down of the cowl. This is accessed from the inside of the fuse. I insert a little hardwood dowel where the bolt goes through, just makes the area a little more durable.
Henry Piorun is offline Find More Posts by Henry Piorun
Reply With Quote Quick reply to this message
Old 03-06-2012, 09:06 PM
plane is offline
Find More Posts by plane
Registered User
plane's Avatar
Gilbert, AZ
Joined Jan 2006
1,424 Posts
Quote:
Originally Posted by mbacosa View Post
Henry,
Have you ever used Gorilla Glue (urethane) to glue the foam pieces to the fuse (turtle deck and belly pan). Just curious if you found a benefit with epoxy or if its just personal preference.
Hey Mike, I'm with Henry on this one. Not only does epoxy (West System or equivalent) look better, it sands WAY better. I even glue on my leading, trailing, and bevel caps with it for that reason.
plane is offline Find More Posts by plane
Reply With Quote Quick reply to this message
Old 03-07-2012, 12:33 PM
mbacosa is offline
Find More Posts by mbacosa
Registered User
mbacosa's Avatar
United States, AZ, Scottsdale
Joined May 2008
2,094 Posts
Quote:
Originally Posted by plane View Post
Hey Mike, I'm with Henry on this one. Not only does epoxy (West System or equivalent) look better, it sands WAY better. I even glue on my leading, trailing, and bevel caps with it for that reason.
Thanks Rich. Not close to that point of course! BUT im slowly getting things together. Hopefully we'll b talking soon about vacuum bagging some foam.
mbacosa is offline Find More Posts by mbacosa
Reply With Quote Quick reply to this message
Old 03-07-2012, 08:21 PM
plane is offline
Find More Posts by plane
Registered User
plane's Avatar
Gilbert, AZ
Joined Jan 2006
1,424 Posts
Quote:
Originally Posted by mbacosa View Post
Thanks Rich. Not close to that point of course! BUT im slowly getting things together. Hopefully we'll b talking soon about vacuum bagging some foam.
Sounds good, I'm bagging my stuff as I type this.
plane is offline Find More Posts by plane
Reply With Quote Quick reply to this message
Old 03-07-2012, 08:47 PM
Henry Piorun is offline
Find More Posts by Henry Piorun
Old time pattern dude
Henry Piorun's Avatar
Mission B.C. Canada
Joined Feb 2009
1,357 Posts
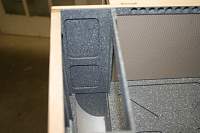
So here I'm continuing my painted interior look by masking off the area that will be glued to the front of the fuse. And then painting the exposed area that you will be able to see. The pictures are pretty self explanatory.
Henry Piorun is offline Find More Posts by Henry Piorun
Reply With Quote Quick reply to this message
Old 03-07-2012, 10:01 PM
Henry Piorun is offline
Find More Posts by Henry Piorun
Old time pattern dude
Henry Piorun's Avatar
Mission B.C. Canada
Joined Feb 2009
1,357 Posts
And a couple of exterior shots of the parts all glued on and sanded...
Henry Piorun is offline Find More Posts by Henry Piorun
Reply With Quote Quick reply to this message
Old 03-08-2012, 12:27 PM
Henry Piorun is offline
Find More Posts by Henry Piorun
Old time pattern dude
Henry Piorun's Avatar
Mission B.C. Canada
Joined Feb 2009
1,357 Posts
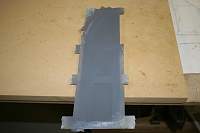
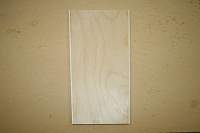
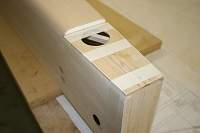
To finish off the bottom of the fuselage all that's left is the tail wheel mount. A 1/8 peice of plywood is used for this. Because the edge of the plywood needs to be sanded to match the curve of the fuse I like to glue small strips of balsa to both edges of the plywood. This makes sanding the contours much easier since you're not sanding hard plywood and trying to match it up to the soft balsa. I used 1/16 balsa, just make sure you cut a 1/16 off either side of the plywood first!
I also installed the 4/40 blind nuts and cut a lightening hole.
Henry Piorun is offline Find More Posts by Henry Piorun
Reply With Quote Quick reply to this message


Quick Reply
Message:


Currently Active Users Viewing This Thread: 2 (0 members and 2 guests)
 
Thread Tools