|
|
|
|
|
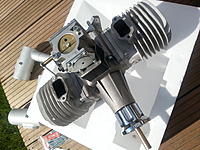
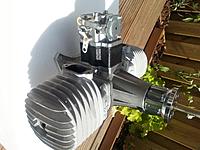
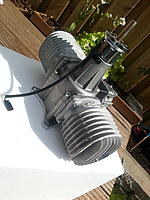
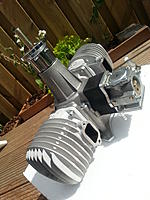
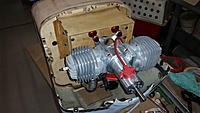
Picture series Decathlon 150 Pilot 40% : GP 176ccm engine pics
Just for the info, some pictures of the Great Power GP-176 engine.
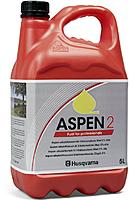
and the Aspen 2-stroke fuel I use in all my gasoline-models as bought from: www.gvgoliehandel.nl/de-de/marken/aspen www.gvgoliehandel.nl/en-us/brands/aspen www.aspen-benelux.nl/nl-nl/gebruik/modelbouw |
|
|
|
|
|
|
|
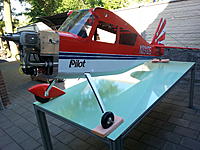
Picture series Decathlon 150 Pilot 40%: Trial assembly and sub-total weights
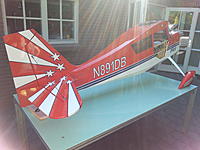
Trial assembly, just to see the real size for the first time
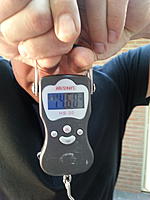
 Fuselage -as pictured on the table- 14,68 kg (32.3 lbs if I'm correct) Wings are 2,66 kg (5.86 lbs) and 2,64 kg (5.81 lbs) Items to be installed: engine cowl, three-blade carbon prop, carbon spinner, wing struts, doors. I guess empty weight will be around 23kg (50.66 lbs) In The Netherlands we have a max take off weight (regulated by law) of 25 kg (55 lbs) Keeping in mind the bigger engine, navigation lights, pilot, some minor construction modifications and such . . . .   
|
|
|
|
|
|
I had a intermittent problem with my engine not starting which plagued me for the entire season which was frustrating. So I ended up leaving it back at the hanger most of my trips to events. I finally figured it out when the same problem showed up on another airplane. Tracked it back to a programming issue on my transmitter
 So I never really flew it much till recently. Now that the issue is resolved, I've been doing some dynamic flight trimming and working out the bugs. I've included a video below. So I never really flew it much till recently. Now that the issue is resolved, I've been doing some dynamic flight trimming and working out the bugs. I've included a video below.The only real issue I have having now is the damn latches on the door and top hatch. They keep dislodging and I have to dig them out of the tail of the fuselage or replace them. I had to order a new top hatch on one flight when it departed in flight. Other than the above, it flys great and I'm going to have a ball with it next season!!! https://youtu.be/3HOxAdgb6cs |
|
|
|
|
|
Started reading post and watching vid, wondered who posted this.....WOW, Steve did, haven't seen that name for ages.
How are you, was in Boston over Thanksgiving. Was it 03-04 Joe Nall we hung around a little. Sorry for this post. Nice plane and flying Steve Roger |
|
|
||
|
|
Quote:
You're going to love it! |
|
|
|
||
|
|
Already love it Mike. Just need to fix the damn latch problems. Everything else seems solid. Watching yours fly at Westport got me motivated to drag mine out of the hangar and resolve the ignition issue to get it flying. Thanks for the motivation
 Quote:
Reply via PM so we don't hijack this thread 
|
|
|
|
|
|
United States, CA, Laguna Niguel
Joined Aug 2012
2 Posts
|
Just got my 40% Decathlon delivered yesterday. Seems pretty straight forward except for the cowl install. How can you install that cowl with the bottom bolts going into the plane from the front to the back, and the side and top bolts going in from back to front? How do you get access?
Thanks Gary |
|
|
|
|
United States, CA, Laguna Niguel
Joined Aug 2012
2 Posts
|
Mike, it seems like you have a lot of experience with the 40% Decathlon. What is the best way to install the cowl. It looks like the bottom bolts go in from front to back and the side and top bolts go in from back to front. How do you possible gain access to the bolts from the back to front?
Thanks. Hope you don't mind a few more questions as I get in to this build. Regards, Gary |
|
|
|
|
|
Gary, I saw the same issue you did, and from past frustrations on different airplanes I decided I wasn't going to do that again!
 I always liked the convenience of a split cowl for so many reasons, so I decided to go that route with the decathlon. It took more time, but it was well worth it IMO. The split cowl allowed me to use a more typical mounting method, better cowl ducting for cooling, and I don't have to remove the prop/spinner to remove the cowl for maintenance of inspection. You don't need to split the cowl, and could easily add a couple mounting blocks to the firewall and mount the cowl in a traditional manner. Either method is better than as designed. I'm sure others with respond with alternate solutions for thought. |
|
|
||
|
|
Quote:
I reversed all of the blind nuts (except the top center one) I created a allen wrench by using a 24" long carbon tube that the allen wrench fit into. I just cut off the L and inserted and epoxied it in there. I added a piece of glow fuel tubing over the allen to keep the bolt on. I drilled holes in the front of the cowl to push the allen wrench straight back to the bolts.. problem solved. Worked great for me! If you have questions, just ask... |
|
|
|
|
|
|
Gary,
Make sure that you have a windshield support behind the windshield as it will flex back with wind pressure and crack in the top corners. I made mine... but Pilot may have put given it to you in the kit as Tony T. (owner of Pilot) watches this tread and makes adjustments from our comments.. He's a great guy who really cares about us. |
|
|
|
|
|
I damaged my Decathlon last year, the nose and fwd fuselage was too damaged to repair easily so I eventually contacted Pilot R/C and in a short time they had sent all, well nearly all, the wood for free that I needed for a rebuild just as they advertise, I had to pay for freight, which is fair. The missing wood was my fault because a few emails went back and forth with pics from them to confirm I had what I needed. Luckily it was easily manufactured.
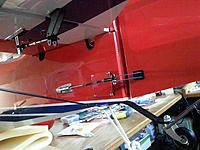
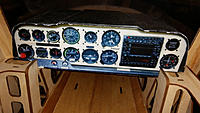
Initially I threw the cowl away but decided to experiment with a split cowl and got it out of my trash bin. The windscreen was toast but the landing gear, rear fuselage and wings were OK. One leading edge D-box needed a bit of work. The spinner and prop were busted, the engine was OK, the ground was soft and it hit at idle. I clipped a wire that flicked it into a low nose high stall. I nearly rescued it, nearly. As you can see the damage was fairly bad and needed a lot of laser cut parts, in fact everything fwd of F10 which is the slanted former behind the windows. My only concern was no instructions, but after a few trial fits, I managed to build my 3D jigsaw and found it was a later version as well. As you'll see I altered some things. Two things I didn't like on the model before were the cowl attachment, even after using Mike's idea and I really wanted access to behind the firewall. I'll post more pics once the old and new are joined.
|
|
|
|
|
|
Thanks Mike, it was a lot of your input to this thread that got me into this model in the first place. It flies really well and looks great in the air and the DA120 with Proflow canisters works just fine for what I do.
Something I didn't mention was the landing light. It is a 12V LED downlight. I carefully dremeled away everything that wasn't needed. Ended up with just the lens and electronics. I used black bostick hotglue to pot the exposed elecs and installed it. It is very bright. Re: latches, I have a bunch of these, that I'll BVM Aeropoxy in. Love that stuff. That is an advantage of self assembly and they will only need minor modifications to fit. . |
|
|
|
|
|
The new section and remaining fuselage do fit together. I'm using the former F10 in each as my join, just had to release the lower stringers on the original and it fitted together better than I expected. The model will be just a couple of millimeters longer. Just need to clear some space so I can put the wings on and check everything is straight before I glue the fuselage together and the wing tubes.
|
«
Previous Thread
|
Next Thread
»
| Currently Active Users Viewing This Thread: 2 (0 members and 2 guests) | |
| Thread Tools | |
 Similar Threads
|
|||||
| Category | Thread | Thread Starter | Forum | Replies | Last Post |
| Hempel 50% Cub or Pilot Decathlon | pepatrick | Airframes and Kits | 92 | 11-07-2010 09:07 AM | |
| Bill Hempel 38% Decathlon assembly thread | Asher Carmichael | Airframes and Kits | 11 | 04-04-2010 08:16 PM | |
| TBM / Pilot-Rc Decathlon | gonzalo38 | Airframes and Kits | 17 | 10-31-2009 07:49 AM | |
| Zafiro 3D:short building thread | yonatan | Build Threads | 15 | 05-23-2009 08:53 PM | |

