|
|
|
|
|
Build Log
AMR Low Wing 30cc Build - First Gasser
Okay so last year I thought about moving into a plane with a gas motor, but what should I get? What motor should I use? I consulted several people and posted messages on this site and a couple of others. Pretty much everyone said to go with an easy plane to fly and a reliable motor.
So will it be an ARF or a build? Since I recently became unemployed (after 42 years they thought I was no longer needed along with 20+ other people, and was downsized, but that is a whole story in itself) I found myself with a lot of time on my hands, so I will build. I am an experienced builder having built aircraft from kits as well as scratch built and I thought it would be fun to do. One issue to overcome was my allergy to CA glue and balsa dust, but more on that later. To me an easy build would be a stick, they are a good flying plane and almost everyone has had one as some point in their flying years. So I started looking for a stick to build. I had talked to the AMR guys a couple of years ago at the Toledo Show and I was impressed with their products, but they have many different sizes. After considering a budget (remember I’m unemployed and not independently wealthy) I thought the 30 size would work best. Since everyone has the high wing version, I began studying the low wing version as it looked pretty cool. As far as a motor, I studied DLE, Zenoah, O.S., DA and several others. I choose the Zenoah ZP38 as it was available, reliable, and in the price range. This motor is heaver and not as powerful as others, but the reliability sold me, I could find no one with any bad words to say about the brand. I wasn’t looking for a hot rod, just something to learn with that would be a good fit for the airplane. I ended up placing an order for the AMR low wing 30 kit even though I could find no one who had built that particular plane. I just love the looks of the low wing stick. This build will be a little different than others as I will be working well in advance of what you will see here. Also, there have been other builds here for the high wing version and there isn’t much difference between the two. But hopefully it will be interesting to see how the low wing version is put together. More to come……………… |
|
|
|
|
|
|
|
It took about ten days for the kit to arrive from Canada. The box was large and heavy and upon opening the box I could see why. There was a lot of wood in that box along with lots of hardware, instructions and much more. Below are a few pictures of what arrived. The box had a whole in it and I thought part of the kit would be damaged, but when opened, everything was in great shape.
I went through the box and checked the contents against the material list that was in the instruction manual. I found a couple of items that did not check out with the list, so I contacted the folks at AMR and everything was settled. Turns out the materials list varies a bit from what is included in the kit depending on the wood available at the time the kit is boxed. Anyway, no worries and I proceeded with the build. |
|
|
|
|
Joined May 2012
41 Posts
|
Good Luck Kman712
Hey Kman712,
Great choice for a kit. You also made a good choice for a motor. The plane will probably build a little tail heavy so you're going to need the extra nose weight anyway. A Buddy of mine has the high wing 50cc size with a 3W78 twin and AWESOME ! does not do justice to how well that plane flies. It will do slow rolls, the length of our field with no rudder correction required. I didn't believe him when he told me that, but when I watched him the next time, he held his transmitter in his left hand. I am going to build one this winter and it's going to be my first kit build, even though I've been flying for over ten years. Michel at AMR was kind enough to email me the building instructions for the high wing 50cc Stick which I've studied and I cannot foresee any problems with building it. Like you, I will not be using CA. I will be using a combination of Titebond Wood Glue and Gorilla Glue with epoxy where necessary. My Buddy told me he has a motor for me no matter which one I build. He said if I build the 30cc size, he'll give me a 3W48 twin he has sitting on his shelf and if I build the 50cc size, he'll give me a 3W70 twin for it. Is that AWESOME or what? Good luck with your build, I know you're going to enjoy it. Even though it's probably going to by pretty quickly.  Take care, David |
|
|
|
|
|
David,
Thanks for your comments and words of encouragement. The build is pretty straight forward and the guys at AMR have been great at answering questions with a quick response. Wow, you are lucky to have a buddy willing to lend you a motor as that represents a good bit of the cost. Also you won't have to worry about breaking in the motor or getting it tuned and ready for flight. I'm looking forward to flying this plane, I've heard great things about the high wing version and am sure the same will apply to the low wing version. I hope you enjoy the build I am posting. Kman |
|
|
|
|
|
Hi Chris,
Yes, the low wing stick has been around for sometime. I was at an event at Champaign Illinois in late August and saw two low wing sticks. Talking to the pilots they were "sweet and low" kits and were similar in size to the one I am building. They flew great and looked nice. I believe I took some pictures and may post them here when I get a chance. Kman |
|
|
|
|
|
Getting Started
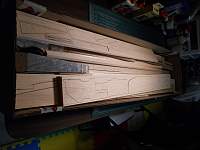
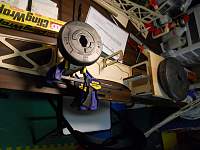
My work area is small, basically a six foot table in a small room in the basement that is shared with my wife who uses the area for crafts. It became apparent that was not going to work when I put the kit box on the table and had no room left to build. I will have to find a better solution but for now the box goes on the floor and I will work on the table. Since I have an allergy to CA glue, most of the build will be done using wood glue so I had a bottle of Elmer’s as well as some Tight Bond that will do. I am able to use the Super-Gold CA from Bob Smith Industries without much of a problem. This glue does not “bloom” like normal CA and I don’t have the reaction I normally have to CA. However I do use it sparingly. I also use their kicker. The remaining glue needed according to the manual is structural epoxy glue. I ordered some T88 from System Three and I was all set. The Fuse The fuse is the first part to be built when following the instruction manual. The first step was to go through the box and separate the fuse pieces, then punch and cut out all the parts needed to assemble the fuse. The whole kit is laser cut and many of the parts just fall out which is nice while others had to be cut out with a knife. I find that the quality of the wood was pretty good over all, but some of the plywood parts separated at the layers. One thing for sure, once this kit is finished I will have a lot of scraps for my scrap box. The kit is constructed with 1/8th and ¼ inch plywood and balsa. Many of the parts are built-up by layering thinner pieces together. Once finished this results in a very strong part. Since the fuse is longer than the plywood supplied you begin by splicing two pieces together to make a fuse side. This went very smoothly and the parts fit was right on. The manual continues to remind you to check the parts fit before gluing and to make corrections where necessary, however I am finding that corrections aren’t needed as the parts go together very nicely. Glue the ply doublers on the sides and you can see the fuse starting to take shape. The photos below show the parts of the fuse all ready to be glued together, the joining of the fuse sides, and gluing on the doublers. Please note the use of the training weights that have been setting in the garage gathering dust, might as well put them to good use by holding parts together. |
|
|
|
|
|
Next Steps
Next you laminate several sub assemblies that will be attached to the fuse sides. In the pictures below you will see the firewall, landing gear assembly and the sub assemblies for the front and rear wing attachment. The sticks glued to the sides will support a ply shelf where you can attach radio or ignition components. There is nothing in the instruction manual about placement of servos, radio equipment, fuel tanks and the like, but there is plenty of room in the fuse for all your components. Since each installation is different you have a blank page to do what you like, but some ideas in the instruction manual would have been helpful. Along with reading the instructions, please study the images in the manual, they can tell you a lot as there are no plans that come with the kit. I assume that this will use the same wing and fuse as the high wing kit with a few modifications, and I did note an error in the manual where they forgot to reverse the blind nuts for mounting the wing on the low wing version, so study and trial fit everything. |
|
|
|
|
|
I'm beginning to like the bigger planes. I have been flying 120 size planes for a couple of years now and they just seem to fly better than the 40 to 60 size planes. Also, since I am getting a little older, they are easier to see, lol.
Kman |
|
|
|
|
|
I glued the other fuse half to the assembly, be careful that everything lines up to keep everything square. This is not difficult as there are slots in the sides that help keep everything straight. I added more rails to support another ply floor for mounting equipment in the plane.
I then added the fuse bottom with a couple of more formers. Please note the tube in the picture below, this is for the extensions that connect to the elevator servos. You can tell this kit was well thought out as the tube passes through the formers for total support. A big thanks to the folks at AMR for including all the tubes in the kit that are needed to route wiring, it makes things neater and easier for radio installation. There are a couple more pieces to install on the fuse then it is time to glue on the top. Everything went together smoothly and precisely, they even provide a jig in the kit to help with the rear end fuse alignment. Very nice. |
|
|
|
|
|
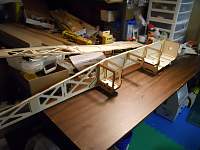
Well, the fuse is finished and ready to go. It is very solid, I think I could use it as a bat to hit baseballs. Looks like there is plenty of room inside for the radio, fuel tank, servos and ignition system.
Check out the pictures below. |
«
Previous Thread
|
Next Thread
»
| Currently Active Users Viewing This Thread: 1 (0 members and 1 guests) | |
| Thread Tools | |


