|
|
|
|
|
3D Hobby Shop 87" 50cc Extra SHP
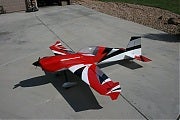
They're here!!!
Since the airplanes are officially in stock and shipping, I figured it must be time to throw some build photos up. I conpiled these over a week or two as we received the final production sample. Here's a link to the airplane http://www.3dhobbyshop.com/detail.aspx?ID=2280 And here are the specs: Length: 87" Wing Area: 1475 sq. inches Weight 15.5-16.5 lbs typical depending on equipment. Construction: Laser-cut Balsa/Ply structure. Carbon wing spar tube/Carbon wing spar receiver tube. Carbon stab spar tube/Carbon stab spar receiver tube. Molded one-piece carbon landing gear. Canopy pre-attached to top hatch. Phenolic/ball-link hardware included Wing/Stab bags included Covering: Ultracote/Oracover Radio Equipment: QTY 5 HD servos (Hitec HS-5955TG or JR8611 recommended) Aluminum Servo Arms - QTY 4 2" arms, QTY 1 3.5" double-sided 7-9 CH receiver Receiver battery pack 6V 2000mah minimum - 2S A123 pack or 2S Lipo+regulator Recommended Spinner: 3.5" |
|
|
|
|
|
|
|
Re: 3D Hobby Shop 87" 50cc Extra SHP
Although this feels a little pretentios, I figured I'd also post the developer's notes from the manual to give a feel for the design goals and our (Ben and I) level of satisfaction with the airplane.
Scott  In-Stock and Shipping! Developer Scott Stoops introduces the 87" Extra SHP: The new 87” Extra SHP is the culmination of several years of development towards creating what 3D Hobby Shop considers to be the ultimate 50cc aerobatic RC aircraft available today. Our initial design goal was to create a model that flew precision as well as 3D better than any existing airframe on the market, while still maintaining the high level of prefabrication and quality engineering that 3D Hobby Shop is known for with our smaller models. I couldn’t be happier with the results! When you first see the model, I guarantee you’ll be amazed at how big and light it is! With gas setups, we’re seeing production weights in the 15.5 pounds (mufflers) to 16.5 pounds (canister setup) range, which is pretty amazing for a model with nearly 1500 sqaures of wing that is 90” long. Basically the same size as many 75cc models, but lighter than the average 50cc model, how’s that for performance! As many of you know, I fly at nearly 6000 feet in the thin Colorado air and I’m seeing excellent punchout from a stock DA/DL 50. The only way to get that is to go light, which the enormous 87” SHP is. Sea level performance in the thick air is even better. Aerodynamically, the 87” SHP is a radical departure in performance from the typical 50cc model. We optimized not only the areas and moments of the airplane, but also the location of each component to minimize/eliminate coupling making the airplane as pure an aerobatic performer as I’ve ever flown. Its long tail ensures great precision tracking, while the deep bevels and generous control areas allow for outstanding pitch authority during aggressive 3D flight. Taking that one step further, we also incorporated our special thin “Stoops” 3D airfoil section from our smaller models into the 87” SHP which virtually eliminates rock in harrier flight and allows clean pitch transitions through the stall. You won’t find a model this size that 3D’s or locks-in better than the SHP! In short - if I had to choose a single model to fly for the rest of my life – this is the one. -Scott Stoops |
|
|
|
|
|
Re: 3D Hobby Shop 87" 50cc Extra SHP
|
|
|
|
|
|
Re: 3D Hobby Shop 87" 50cc Extra SHP
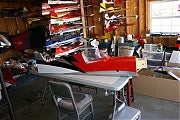
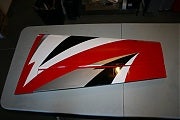
OK, getting started. After unpacking the model from its individually wrapped bags and triple boxes, I retightened the covering in a couple of spots. In the dry Colorado climate, the covering tends to need retightening after a couple of days or so. This one was no different. Don't be surprised if you live in drier climates to have to reshrink about a week after unpacking. Just the way it is...
Scott |
|
|
|
|
|
Re: 3D Hobby Shop 87" 50cc Extra SHP
|
|
|
|
|
|
Re: 3D Hobby Shop 87" 50cc Extra SHP
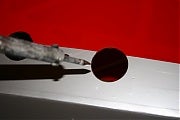
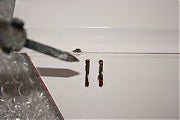
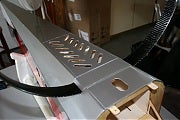
I use a pencil tip soldering iron to remove the covering over the appropriate holes in the fuse and wings, but a hobby blade works as well.
Scott |
|
|
|
|
|
Re: 3D Hobby Shop 87" 50cc Extra SHP
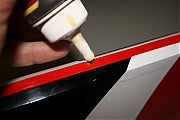
Unlike some of the ARF manufacturers, we've decided to leave the hinge gluing to the end user. This allows each of us to use our preferred technique as well. I like PU glues like SUMO. The process is pretty straight forward and includes the following steps:
1. Check each hinge hole for a good hinge fit 2. Lubricate the hinges with petroleum or oil 3. Wet the hinge holes with water 4. Insert a small amount of glue 5. Insert the hinges on one half 6. Complete the other side and tape so they won't move In my dry climate, working time is about an hour, but you'll want to come back and clean up the glue about every 15 minutes for the first hour. Denatured alchohol works well to clean the mess. Scott |
|
|
|
|
|
Re: 3D Hobby Shop 87" 50cc Extra SHP
While we've got the water and glue out, now is a good time to prep and glue the phenolic control horns. Lots of techniques for this, but I find PU glue like Sumo to work for this step as well.
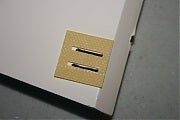
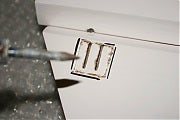
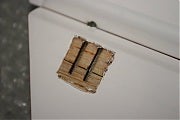
Each phenolic horn consists of two horns and a single flat load plate. The rudder has dual arms and a total of two load plates. The first step is to remove the covering over the two slots in each flight control. I used my iron for that. Next, with the load plate, mark the covering to be removed with a Sharpie and remove the covering with the iron again. Sharpie marks clean up well with denatured alchohol. Scott |
|
|
|
|
|
Re: 3D Hobby Shop 87" 50cc Extra SHP
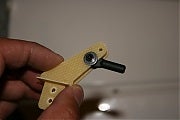
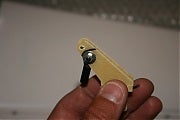
Before gluing the control horns in, I recommend attaching the appropriate ball links ot the assembly to ensure the horns stay perfectly straight during the cure. The correct order is bolt - washer - phenolic - ball link - phenolic - washer - nut.
The phenolics that we use have two holes, the lower of which is correct for the 87" SHP. The upper hole will be used for the larger 103" SHP. To get full control throw, you'll need to trim the upper hole away. A Dremel or sanding disc works well with the hardware installed, but before gluing to the flight control. If you're using expanding PU glues, be sure to coat the area with a thin mist of water to ensure the glue kicks. Use denatured alchohol to clean the excess adhesive. It will probably foam about like seen in the last photo, but is easy to clean up. Scott |
|
|
|
|
|
Re: 3D Hobby Shop 87" 50cc Extra SHP
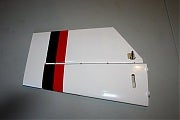
Completed flight controls ready for the radio gear. If you're going to seal the hinge gaps, now is a good time. I prefer clear Solite film for this step because it doesn't "crinkle" as much as some other materials when moved, but many different techniques exist for this step including tape and covering materials.
Scott |
|
|
|
|
|
Re: 3D Hobby Shop 87" 50cc Extra SHP
Let's get some landing gear under this thing.
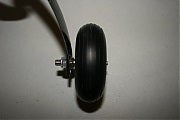
The stock (yes, stock!) molded airfoil shaped carbon landing gear is attached to the bottom of the fuselage with bolts, washers, and self-locking nuts. The attach point is through an aluminum angle bracket that really effectively transfers the load to the surrounding structure. Access is through the front of the can tunnel, or if you're going to install a can, through the rear can access area aft of the landing gear plate. Landing gear installation starts with attaching the axles to the carbon gear. Be sure to use all three wheel collars, two between the gear and the wheel, and one to hold the wheel on the axle. The second inner wheel collar is used to space the wheel correctly for the pant installation. I used a Dremel cutoff wheel to remove excess axle length for the best fit in the pant. |
|
|
|
|
|
Re: 3D Hobby Shop 87" 50cc Extra SHP
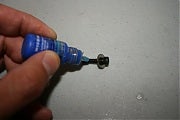
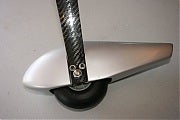
Wheel pant attachment is next. We use a slotted wheel pant that slots the landing gear leg into the pant itself to help keep everything straight. You will need to dremel the slot in the pant slightly wider to allow it to be dropped over the axle and wheel collar spacer. This allows the pant to be removed simply by removing the two 3mm bolt/washers and sliding the pant off the top of the axle.
Be sure to use thread locker... |
|
|
|
|
|
Re: 3D Hobby Shop 87" 50cc Extra SHP
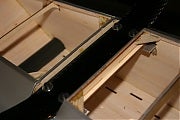
Mounting the gear to the fuse - I used vice grips to hold the nuts, but it would probably be better to drag out the socket set
 Again, access can be through the front of the can mount hole, or if you're using the can cooling access plate through there. Again, access can be through the front of the can mount hole, or if you're using the can cooling access plate through there.The last shot is with the landing gear cover installed. It also shows the can outlet and cooling covers in place. I used a couple of dabs of hot glue to hold the landing gear plate cover in place. Scott |
|
|
|
|
|
Re: 3D Hobby Shop 87" 50cc Extra SHP
Tailwheel installation -
The tailwheel is attached to preinstalled blind nuts, and the tiller is attached to the rudder with a 3mm stud and ball link screwed into the bottom of the rudder. You will need to drill a hole for the tiller guide, and harden the area with thin CA. I also glue the tiller guide in with PU glue. Scott |
«
Previous Thread
|
Next Thread
»
| Currently Active Users Viewing This Thread: 1 (0 members and 1 guests) | |
| Thread Tools | |
 Similar Threads
|
|||||
| Category | Thread | Thread Starter | Forum | Replies | Last Post |
| 3D Hobby Shop 87" Extra 300 SHP | Yani | Airframes and Kits | 164 | 06-19-2017 11:41 AM | |
| 3D Hobby Shop 85" Katana - Assembly Thread | sukhoi26mx | Airframes and Kits | 356 | 05-31-2010 07:50 AM | |
| 3DHS Killer 87" Extra SHP | Radioactive | Build Threads - Electrics | 66 | 08-25-2009 02:08 AM | |
| DFW Area August 2&3, 2008 3D Hobby Shop and the 114th RC Aero Squadron Flyin | gwh | Event Announcements and Discussion | 2 | 05-27-2008 09:46 PM | |
| 3D Hobby Shop 47" Extra 300 SHP | sun.flyer | General Discussion - Electrics | 12 | 04-08-2007 10:02 AM | |


