|
|
|
|
USA, OH, Aurora
Joined Jan 2006
30,070 Posts
|
30% Pilot RC Extra 260 - BUILD
Hey guys.
I'm building a Pilot RC 30% Extra 260 for a buddy of mine. He has no Giant Scale experience, so I am building the plane for him. First impressions: The kit came in a wood box, and was very protected. It arrived from China in 4 days, completely un harmed. (I did not get shots of the packageing, my buddy Kevin had pulled the plane out of the box before I had a chance to shoot it) The quality of the kit is nice, and the covering is amazing. The kit feels REALLY light. The hinging is done, and the inside and outside hinges are "Pinned" in place with metal pins! Nice touch. Also, the cowl is internally mounted so there are no exposed bolts. And finally the hardware and accessories included with the kit is very complete and all seems to be very usable. Included with the kit was a nice set of Carbon Fiber accessories. Wing and stab tubes, spinner and landing gear are all carbon fiber. The Build: I like to get my planes up on their feet. So the landing gear and tail wheel are the first items to go on. The main gear just simply bolt on. The tail wheel on the other hand requires that you measure and drill the holes for the blind nuts. Not a problem. Just center the tail wheel assembly on the area, mark and drill. The side of the fuse has a small access area so getting the blind nuts in place is cake. |
|
|
|
|
|
|
USA, OH, Aurora
Joined Jan 2006
30,070 Posts
|
Re: 30% Pilot RC Extra 260 - BUILD
Next thing I did was to get the wheels on.
No rocket science here, Pop in the supplied axels, bolt them up from the back side. Then put the first of the supplied wheel collars. Make sure to leave some room for the wheel pants. (I believe I spaced the inside collar out by about 1 cm.) Then slide the wheel on, and pop on the other wheel collar. Another nice feature, the included collars have two set screws to really make sure it doesn't move. Once the wheels were on, I slipped the wheel pants over the wheels, lined them up with the ground to make them level, and then marked them from the pre-drilled holes in the landing gear. Drilled the marks, and inserted blind nuts inside the pants. Everything matched up perfectly, and the plane was now wearing pants. |
|
|
|
|
USA, OH, Aurora
Joined Jan 2006
30,070 Posts
|
Re: 30% Pilot RC Extra 260 - BUILD
Next, I tackled the rudder.
I started by gluing in the provided phenolic control horns. They are of a nice quality. Make sure to scuff the sides before gluing into place. Once that was done, I inserted the long piano wire type hinge. The rudder is removable, another nice feature. A tip here is to sharpen the end of the wire so when you push the wire into the rudder hinges, it finds it's way to the center of each. Once the rudder is hinged and in place, place the little phenolic washer on, and then the provided wheel collar to hold it all in place. At this point, i was able to attach the tail wheel steering arm with the provided hardware. You simply drill out the marked hole, and insert the metal steering arm retainer in place. Thats it, a very simple and sturdy tail wheel system. Another tip: make sure to use some blue locktite on all the collars, this will save you problems later! |
|
|
|
|
USA, OH, Aurora
Joined Jan 2006
30,070 Posts
|
Re: 30% Pilot RC Extra 260 - BUILD
The next area I moved on to was attaching the rudder "pull pull" cables.
These wires are already put together for you, and the rear ends are ready to bolt up to the rudder control horns. Very nice touch. Up front there is an included phenolic rudder servo arm, but I did not have a round servo horn to attach it to, so I chose to use an SWB arm I had available. I screwed the rudder servo down to the built in rudder tray, simple as could be. After trying the wires in a straight front to back fashion, and then the crossed method, I determined that crossed wires provided much better clearance in the back of the plane. I pulled the wires up to meet my servo and attached the included ends. Over all a very easy pull- pull install. |
|
|
|
|
USA, OH, Aurora
Joined Jan 2006
30,070 Posts
|
Re: 30% Pilot RC Extra 260 - BUILD
Next I moved on to the stabs.
The stabs have an anti rotational pin, and two lower screw holes that mount the stab to the fuse. basically the stab will not move on you in flight. It's a very secure system. The stab's servo mounts inside the fuse and the servo horn sticks up through the bottom of the stab. The phenolic control horns are pre-installed here, so this whole process is easy and quick. This method of internal servos is nice, because if your one of the guys who has to remove the stabs to fit the plane into your car, you will not have to detach the servo linkage each time. Also notice in the third picture, you can see the factory pinned hinges.. VERY NICE! I did have to trim away a little of the material in the servo hole to get the servos to slide in properly, but it was really no big deal. The kit includes some nice phenolic servo arms, but again, I did not have access to the round servo horns that these would attach to, so some trusty SWB 1.5" arms were used. After the servos are in place simply attach the included "rocket city" type linkage and the stabs are ready to be attached to the fuse. Run your extensions through the holes in the fuse (You do have to cut the covering away, but it is very simple to figure out where to cut it) and up to the area you will have your receiver mounted. Put the stab tube in place, slide on the stabs, and bolt them in place. At this point the back of the plane is done! |
|
|
|
|
USA, OH, Aurora
Joined Jan 2006
30,070 Posts
|
Re: 30% Pilot RC Extra 260 - BUILD
Next we move on to the main wings.
Glue in the provided phenolic control horns. The holes are already cut for you, just scuff the arms, apply glue and insert into the holes. DONE. The servo holes are ready to go, just use the provided guide string attach your servo lead to it, and pull the lead through the wing. Use servo screws to attach the servo and the servo is mounted! Make sure your servos are placed in the right direction. You will want the servo output shaft to be towards the front of the wing. If you take the time to look at the provided hardware, you will see it's length and this will be very clear. Once again, use the included "rocket city" type hardware, attach it to the servo horn and the control horn with the provided screws. Your main wings are now complete. Again, the kit does provide some nice phenolic servo arms, but once again I did not have access to the round servo horns these would attach to, so I used some Hangar 9 1.5" servo arms. These were a perfect match. |
|
|
|
|
USA, OH, Aurora
Joined Jan 2006
30,070 Posts
|
Re: 30% Pilot RC Extra 260 - BUILD
Next I will move to the motor box.
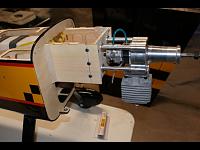
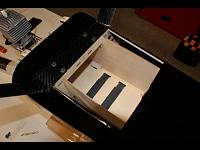
The kit comes with a front plate that has markings for a DA-50/DL-50 and simply bolts together. I added epoxie to the joints before bolting the box together, and I will add some angle stock to the motor box to really hold it together. This is as far as I got last night, so until after the holiday weekend, I'm afraid this is where the build will pause. So far during the build, everything has gone together as it should, all the parts are of a very high quality, and everything is VERY LIGHT. I have no doubt I can get this plane to around 15 pounds or less for my friend. He is going to be very happy. Next will be the motor selection and install. WE'll see what we come up with. HAPPY THANKSGIVING! 
|
|
|
|
|
USA, OH, Aurora
Joined Jan 2006
30,070 Posts
|
Re: 30% Pilot RC Extra 260 - BUILD
Ok.. th motor we are going to use came in this week.
We ended up going with an MT-57 on a canister. (The cannister is offered through www.mtenginesusa.com as the motor and cannister combo) I had to cut the motor box by 1 1/8", but it was not a problem. Really quite simple. I just used a square on the current holes and drew a line through the middle of them, measure over 1 1/8" from the center line on the current holes, and drew a new line. Then measured the distance from the top of the original hole's placement and duplicated it. The process took about an hour but the end result was very nice. This also gave me a chance to really glue the motor box together with some Gorilla glue and add an 1/8" plywood motor box doubler on the face of the motor box. Th motor box is very solid now. Pictures coming tonight. this plane should be finished up in the next week. Tonight i hope to mount the canister.. The tunnel is there, I just need to make a few mounts. Stay tuned. |
|
|
|
|
USA, OH, Aurora
Joined Jan 2006
30,070 Posts
|
Re: 30% Pilot RC Extra 260 - BUILD
Ok.. tonight I got quite a lot done. I made a pipe mount and got it into the pre-made pipe tunnel.
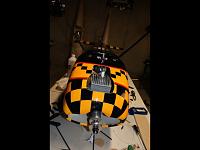
i also tried a new way to keep the the pipe in place, I used an old R/C car trick, and wrapped the can's stinger with a R/C car rubber exhaust coupler, and then backed it with a stiff piece of rubber and then zip tied the can in place around the exhaust couplers. The can is supported in the back by th pipe mount, and the additional couplers on the stinger add shock absorption, and holds the pipe in place. To get the pipe in you will have to cut the covering off the bottom of the plane near the landing gear plate, and remove a stringer. Once you do this you have plenty of room to work. The pictures show the progress... at the end of the night, the can is in and secure... i recovered the bottom cut some cooling holes, and the plane looks CLEAN... the cowl hardly needed to be cut up... although I may make a few more vents to assist in engine cooling. 
|
|
|
|
|
|
Re: 30% Pilot RC Extra 260 - BUILD
How did I miss this one ? Nice plane. Wonder how the black will do in the sun.
I'm kinda down on the fact my Winter project got shelved for a while but I get to at least see a lot of other folks projects.  I'm still trying to justify a 33-35% 260. Still hopeful. I also hope everyone that carries the ones I'm interested in still runs their "deals" after Jan. 5 which is when I'll know where everything stands. Birthday (the big five-0) a week later so maybe I'll get a big birthday present. |
|
|
|||
|
China
Joined Jun 2006
417 Posts
|
Re: 30% Pilot RC Extra 260 - BUILD
the prototype fly video are here . 30% Pilot RC Extra 260 with MT-57 engine
|
||
|
|
|||
|
China
Joined Jun 2006
417 Posts
|
Re: 30% Pilot RC Extra 260 - BUILD
edit
|
||
|
|
|
|
|
Re: 30% Pilot RC Extra 260 - BUILD
Looks nice Sleepy

|
«
Previous Thread
|
Next Thread
»
| Currently Active Users Viewing This Thread: 1 (0 members and 1 guests) | |
| Thread Tools | |
 Similar Threads
|
|||||
| Category | Thread | Thread Starter | Forum | Replies | Last Post |
| Composite-ARF Extra 260 3m Build | eagle1 | Airframes and Kits | 211 | 01-22-2012 12:48 AM | |
| Aeroworks 75cc Extra 260 Questions/Availability... Anyone users here? | Paul Cataldo | Airframes and Kits | 1 | 02-02-2008 10:07 PM | |
| Extra 260 build with LJJ CNC Parts. | BDSBob | Build Threads | 15 | 12-26-2007 10:40 PM | |
| Fliton Mini Extra 260 build | 3DFreak576 | Build Threads - Electrics | 23 | 09-18-2007 06:43 AM | |
| Airwild Extra 260 Build Thread | Pttrnflier | Workshop Skills | 0 | 08-28-2006 01:07 PM | |


