Archive for November, 2017
-
Views: 362
I started this project since my flying field wont support a turbine aircraft. Nothing against the club, but has everything to do with a community agreement with the town. turbines tend to catch fire, we fly around agricultural farms, you get the point :) -
Views: 283
the first 2 weeks of owning the plane I was getting to know it. Love its size. -
Views: 276
rearview was just as good! -
Views: 287
Large at 6 feet! -
Views: 280
with an $80 pilot at the helm lol. Just a big child dream to have a flyable GI joe hahahaha. -
Views: 298
Me for scale! -
Views: 273

New Paint scheme courtesy of Callie graphics. I needed something different from the stock tail. -
Views: 273
ordered and on its way!! I am super excited. -
Views: 268
-
Views: 275

My practice plane lol! -
Views: 267

JP 105MM IS HERE!!! -
Views: 263
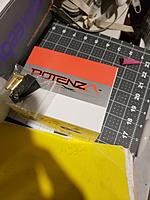
AURA IS HERE!!!! -
Views: 266
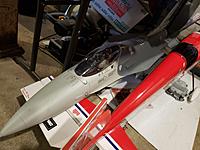
Ready and waiting for installs!!! -
Views: 283
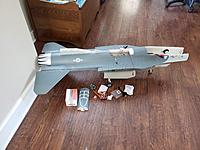
-
Views: 273

-
Views: 257

-
Views: 263

-
Views: 256

-
Views: 268

-
Views: 263
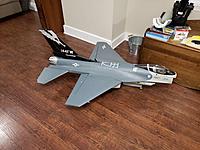
Callie graphics came through once again!!! Looks awesome!!! -
Views: 262
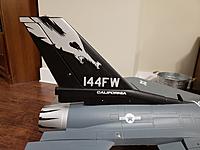
Much better look in my opinion. Now I can tell mine from the rest of the other HSD F 16s out there. -
Views: 264

-
Views: 256

144th fighter wing graphics are on and good to go!!! -
Views: 265

-
Views: 270

-
Views: 270

So pretty!! -
Views: 263

Programming the Aura 8. Going to set up Flaperons as well.
Comments (0)
Add Comment
-
Views: 263
I have never figured out who made this as far as a manufacturer was concerned. But i got it at a steal of a deal!! -
Views: 283
I was changing over from nitro to gas on this Tigercat. I chose RCGF 26cc over the Saito Fs 120s's already installed. Beila 17 inch props chosen over the master Airscrew 13 inch 3 blade that came with the plane. -
Views: 278
Its big.... -
Views: 264
test fit the scaling of the Beila props after I received them in the mail. -
Views: 280
The day the engines and props came in!! -
Views: 283
I couldn't help myself but to assemble them together!! -
Views: 272
All the parts laid out!!!! -
Views: 287
All parts are in!! Time to do the work! -
Views: 263

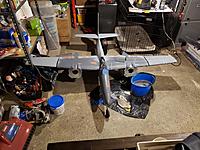
The day I got the plane home from Ohio! it was my first large scale twin engine! -
Views: 251

Jan 1, 2019... let the work begin. orbital sanding with 120 grit.. -
Views: 257
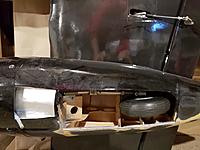
opening of the wheel well to begin to make gear doors... This part will take me the longest I think. I will be asking for help and suggestions along the way :) -
Views: 255
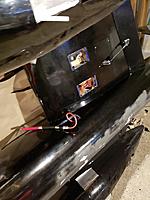
pneumatic access points checked and tested. Gear came down without a hitch. -
Views: 255

removed damaged area in order to begin repairs there.. While in transit from Ohio to Maryland, a little bump in the road caused this break. finally cut out all the damage. Time for sanding the edges smooth and re-building the section. -
Views: 267

makes it easy to see where I need to fill in the depressed areas!! -
Views: 267

top view with upper access panel opened. batteries and receiver.. -
Views: 264

nacelle mounting wall. -
Views: 254

remove-able motor mount..cool!! -
Views: 247

Back on the gear again!! That makes it easier to work on in my opinion. You can see where I started sanding the paint imperfections. time for some spot putty and a re-primer soon I hope. -
Views: 260

Sitting on the Robart/ CJ landing gear once again. -
Views: 265

Well built avionics compartment. Don Palmer 83 inch plans certainly had the right idea. Its fit is reallly tight! -
Views: 246

Putty work begins before new primer coats. -
Views: 253

-
Views: 248

Panel lines just beginning. Doing rivets as well. -
Views: 240

-
Views: 249
-
Views: 260

-
Views: 238
-
Views: 239

-
Views: 233

-
Views: 242

Began panel lines and panel relief. Next up 4000 rivers simulated..lol
-
Views: 222

Another older pic: an engine dummy shot, detailed it out. -
Views: 342
The day I received it from Tower hobbies. I had ordered a 12 X 7 master airscrew 3 blade along with it. It made the flight characteristics smoother and less jerky in the air. -
Views: 349
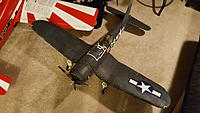
I felt the original paintjob left alot to be desired. So I painted the plane like Ira Kepfords Corsair. Callie Graphics had the graphics I needed. -
Views: 357
Went with panel definition that showed some depth of the weathering these planes would face in their theater of operation. That is an ultrasport 60 i had refurbed to flight condition with all new components and servos, etc. -
Views: 354
Decided to add a Brewster Bomb rack to the build. I bought a Flyzone Zero Bomb to fit on the rack. -
Views: 351
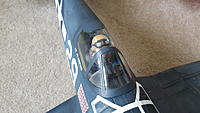
I repainted the pilot in a more accurate color scheme. I added a projection gunsight scratchbuilt. Also added the bulletproof-esqe glass too. Amongst the swtiches on the console. -
Views: 356
Added a tailhook. it was pretty easy to install scratchbuilt. -
Views: 359
I added detail to the 12 X 7 3 blade, however, it was too small of a diameter to imply proper scale of the Corsair. Painted the radial. -
Views: 353
The Dynam 13 X 7 electric prop dressed with Callie Graphics! Smooth flyer and scale speed gives this Corsair it's scale edge. Engine is weathered with Mig Jiminez Oil wash product. -
Views: 341
Picture of the Bomb and bomb rack. its held in place with Earth magnets. -
Views: 352
Underside view with Panel detail. Looks real when it flies! -
Views: 337
Changed the prop to a Dynam 13X7 3 blade. Used Callie Graphics to the prop. -
Views: 348
You can see the scratchbuilt gunsight reticle I constructed. -
Views: 348
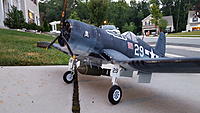
Full view of the Corsair. -
Views: 341
Scratchbuilt Brewster bomb rack assembly: ABS tube, Balsa, Brass tube, Sheet Styrene, 2 earth magnets, 1 Adam 12 bomb. -
Views: 367
After I added the Dynam prop. It was a bit lighter than the master airscrew prop, So I could run the motor slower and get just as much lift . This was the original paint scheme Flyzone utilized for production... needless to say I didn't like it very much -
Views: 349
More detail setting on my sidewalk at home. -
Views: 349
the lighter color is a base of Alclad Aircraft Aluminum over flat black primer. Airbrushed in... Where the control surface was fabric, I used white instead of Alclad. -
Views: 356
3/4 view -
Views: 358
There is a message to TOJO on the other side of this bomb..heehee -
Views: 349
I need to add oil spotting and this bottom will be completed. -
Views: 359
Good lighting to see some of the detailing.. I have a tru turn "A" style nut replacing the stock hub cover. -
Views: 264

The day after Christmas when I got the plane from tower. Merry Christmas gift to myself.... -
Views: 246

-
Views: 253
-
Views: 236

-
Views: 250

-
Views: 255
-
Views: 238

-
Views: 237

-
Views: 250

-
Views: 244

-
Views: 242

-
Views: 252

-
Views: 246

-
Views: 243

-
Views: 235

-
Views: 244
-
Views: 249

-
Views: 253

With the Ramoser Vario prop. $55.00 but worth every penny. http://www.ramoser.de/home_e/varioprop_e/varioprop_e.html -
Views: 247

Another view of the Ramoser Vario prop. http://www.ramoser.de/home_e/varioprop_e/varioprop_e.html -
Views: 251
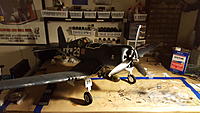
-
Views: 230

-
Views: 222

-
Views: 212

-
Views: 225

-
Views: 222

-
Views: 174

-
Views: 340
Just me and my 330SC. -
Views: 341
The day I got the Extra, It needed nothing!!! It was clearly well taken care of by it's previous owner. I felt I wasnt happy with all small planes, needed to go larger lol. -
Views: 340
The day I flew the 330 with my son! It floated into it's landing. Its the reason I take him with me, quality time! -
Views: 337
MT propeller logo with red tips. One of my favorite views! Have to keep it looking professional lol -
Views: 348
I am flying! Club member got the photo, I didn't even know it! One of the best flying planes I have, plus its my favorite 3D plane! Flys like its on rails. -
Views: 514
the PAU and the 330 just basking in the sun... Such a great day to fly! -
Views: 270
loads of field equipment haha -
Views: 276
I had been searching for quite some time to find either a graphics package and/or an elemental design for my Extra. I finally found elements I liked that worked with the color scheme of the plane. -
Views: 265
Shout out to Flip Flop 3D group on Facebook. Some of my greatest friends in this hobby are on this group. -
Views: 269
Looks ready to fly!! -
Views: 270
Certainly this was the right graphic fit for this scheme and plane :) -
Views: 262
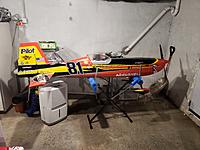
Completed the graphics for the Extra... I must say Callie Graphics does an outstanding job!! Her prices are right on for what I was looking for!!! Contact Calliegraphics for your custom work needs!! -
Views: 255

Working in carbon plate details.
-
Views: 338
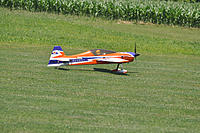
Just taking off!! -
Views: 334

-
Views: 336
-
Views: 341
-
Views: 330
-
Views: 334
This is the day I bought the SBACH, it needed some love after I got it. -
Views: 265

Modeled the prop after this Sbach! -
Views: 235

-
Views: 227

-
Views: 239

View of the internals. -
Views: 220

How to properly transport your planes lol. Painters tape wrapped 3 times in the range of the support bar. Bubble wrap. run a bungee over the front portion of the rudder with bubble wrap. Tape the rudder and you're done. -
Views: 225

-
Views: 222

-
Views: 221

Engine work to ensure updates work! Ran like a brand new engine!
-
Views: 379
like a 3D jigsaw puzzle (pun intended). This was my first real Build. Everything else I had was either ARF or PnP or used. -
Views: 368

The day I got the plane, i couldn't wait to put it together and get a feel for its size! -
Views: 296
Dry fitting everything together here. -
Views: 372
Can you see the Sky-slicer MK5 influence? -
Views: 365
This plane lands like a Ballerina and a butterfly combined! This was when I was tuning the DA35. Needed to Keep the cowl off for that. -
Views: 369
This was the third flight for this PAU, before I picked up graphics. -
Views: 387
I wanted to keep this as clean as possible. Wire Loom in Green everywhere. Went with MKS servos all around 7.4V set up. -
Views: 393
A little better view of the internals. Kept it lightweight too! 12.2lbs. -
Views: 239
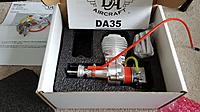
-
Views: 231

-
Views: 362
First time mounting to an engine box. Took it slow and got it right! -
Views: 287
Cowl Fitting after Motor mounting came out good. Went with a Miracle Fuel dot and dual switch so I wouldn't have to fuss with it. Green fuel line to keep the theme going. -
Views: 375
Just before I painted the propellor tips Neon Green. I was watching PLANES with my son and loved Ripslingers propeller! Graphics were from B&E. -
Views: 360
a low glide for fun!!! -
Views: 306
Myself and the PAU. -
Views: 284

-
Views: 288

-
Views: 282

-
Views: 307
I submitted this photo to B&E to use in their Gallery. Really liked how it came out.
-
Views: 392
What it looks like today! -
Views: 357
-
Views: 346
-
Views: 362
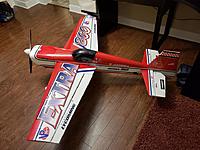
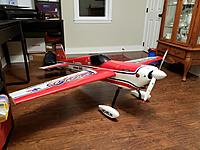
The Day I got the Extra, it needed alot of goodies!! -
Views: 355
-
Views: 340
What the Extra looked like before I bought it. -
Views: 347
What the plane came as stock -
Views: 342
a year after I had the plane! Alot of changes have been made since then! -
Views: 295
-
Views: 290
-
Views: 327
-
Views: 285
-
Views: 292
-
Views: 285
-
Views: 278
-
Views: 292
-
Views: 278
-
Views: 279
-
Views: 291
-
Views: 274
-
Views: 281
-
Views: 264

-
Views: 290
-
Views: 269


 .
. 