logo
Posted by nzflyer21 | 07-18-2019 @ 12:04 AM | 27,517 Views
Hello there again,

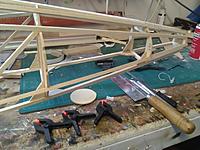
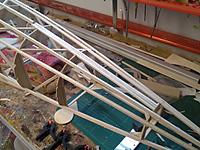
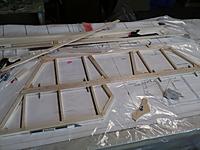
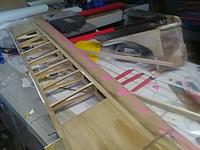
I managed to spend a short period out in the garage this afternoon and placed a few of the stringers in place . They. seemed to fit nicely and come to the right place at the tail. Tomorrow I will start getting the tailplane dry-fitted ant worked out.
I see that the full-size version had the rudder and elevator control horns internal the fuselage, which I think I could replicate ok.
I spent some time surfing the net looking for the correct colours for the French roundels and came across the information about the origin of the French roundels and that it was the practice of a good number of emerging WW1 airforces to use the circle to place their emblem into. The French it appears looked back to the past to make use of the colours of the tricolored cockade red, white and blue. Of the 1789 period of the French revolution. Well, I hope that this is reasonably correct. I found it interesting to read.
The next bit of research will be to find out the correct colours of the 5 colour camouflage scheme used on the Morane Saulnier A1
Posted by woodendesk | 07-12-2019 @ 08:58 PM | 29,876 Views
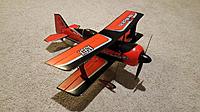
UMX P3 REVOLUTION

(orange-aircraft.com) - Maker of the real revolution

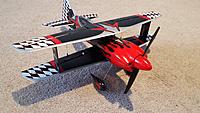
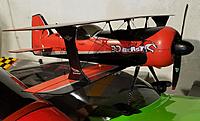
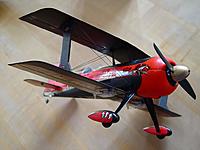
Another UMX I had to have!! When the I first flew my P3, it became my favorite plane. It flew on rails and was well balanced. I felt it needed more though {no surprise there from me lol}. Therefore, I decided to improve upon the already great design.

CURRENT UPGRADES___________________________________
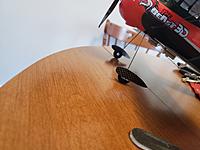
* All carbon parts were cut from a .5mm X 200mm X 250mm sheet 3K tabby pattern. (found on ebay)
-Carbon fiber wheel struts
-Carbon fiber wing struts w/carbon rod backing
-Carbon fiber tail horn control arm
-Upgraded carbon fiber battery tray- accommodates bigger batteries to run 3S.
-Painted propeller like Prometheus P2 and added MT propeller logos (just because lol)
-Silver outline to red cowl flames

PLANNED PERFORMANCE UPGRADES_______________________________________
-Aluminum prop shaft *coming soon
-BB Hyp G5 50Cmax (3S) 240mAh w/UMX connector & JST-XH balance tap (BabbelBatts)


PLANNED COSMETIC CHANGES_________________
-Silver pen around edge of the red flames on cowling and fuselage. *coming soon
-Polish canopy
-Servo covers underwing
Posted by nzflyer21 | 07-11-2019 @ 09:18 PM | 27,574 Views
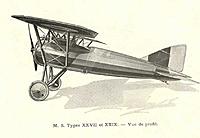
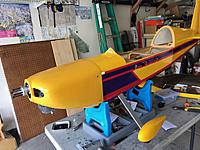
Hi, sorry I just realized I actually haven't put a picture up of what I am building.
It is a Morane Saulnier WW1 aircraft 1/3 rd scale. The plans are from BUSA
I am yet to decide on which aircraft to model or base my paintwork on as there are several really nice schemes out there to choose from.
I hope it ok to post these pictures as I retrieved them from the internet
Posted by nzflyer21 | 07-11-2019 @ 09:02 PM | 27,397 Views
Hello there again
Well I have managed to get out to the garage for a couple of hours today I took a small fan heater as a comrade to in an attempt to keep me warm. Didn't work, it was still cold.
So I will put up a few pictures of my efforts. I wanted to show you the small saw bench I purchased from AliExpress this year. It has really improved my cuts and keep the cross cut square in both ways. Across and downwards.

I also purchased a very small engineer s square which is proving very handy in my effort to maintain a good finish to my work. The little saw bench can easy handle up to 1\2 inch balsa wood with ease and if you go quietly it will rip the 1\2 inch as well. It can manage thin ply ok but does not like 1\4 inch at all.
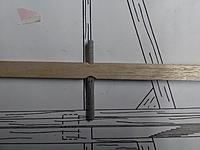
I started the tail plane and elevator in this session and set out where my Robart hinges are to go . I drilled the holes and made small notches to get a closer fit.
I think this has worked out good doing this part early in the build.
Posted by nzflyer21 | 07-10-2019 @ 12:03 AM | 27,731 Views
Hello again
Well again I find myself doing other things instead of working on the Morane.
Bitterly cold over the last 3 weeks with the temperature remaining cool.
We are waiting on our new log fire to be installed so doing it about hard.
Today I decided to recover an old hobby king trainer I have had for years.
It had a horrid pink film on it so time for that to go
The bones of it are still good. But very faded and the control horns I discovered during the striping down were in fact very brittle and broke as I was removing them which was disconcerting. I last flew it about 6 months ago I think so I count myself lucky not to have had a crash.
So this afternoon I pulled most of the old film off and recovered with some red film I have about. The wing is in good condition and I will place a servo in each side instead of the one central servo.
Oh well at least I feel that I have done something constructive ,not scale but something to quickly do.
Posted by nzflyer21 | 06-28-2019 @ 01:22 AM | 28,390 Views
Hello there
Well not much building this week, cold , frosty and busy at work.
My son has liberated our second vehicle for several weeks so having to walk to work in the 0530hrs frosts. What is worse is our other vehicle is too small to get a plane in.
The Morane Saulnier plans are not or don't appear to have all the details, so a bit of detective work is needed. It pretty much admitts to that the the manual from BUSA, That's ok I have time on my side.

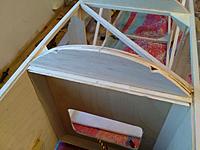
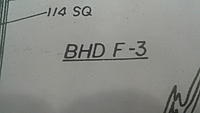
Although there is a term that I am of sure about if you can help me with that "BHD" it is in relation to the formers .
I will attach photos.
Another thing that has been somewhat confusing,but I followed the instructions was the placement of a former at the back of the cockpit area which required me the leave a gap between one former and another?
I can't see why it is need, but I am sure all will be revealed in the fullness of time.
Posted by nzflyer21 | 06-25-2019 @ 12:21 AM | 28,673 Views
Hi again, well not much more completed this weekend, a bit of a disaster really, my son arrived with his lovely french girl for the weekend which was very nice. But my son had a project in mind to complete and as the weather was not that flash or warm ,he decided to build his cabinet in the garage.
It turned out to be a very dusty affair, pretty much covering everything in a coat of dust!
So I have spent the last few days cleaning and getting everything back to square one againl
About correctly mounting servos
.
I looked up about how to use the servo eyelets properly, I remembered reading a while ago that the eyelets go to the bottom of the servo. I have done this no, it does seem to make a difference, they feel more secure now
Is this correct?
What are your thoughts on this ? Any comments would be welcome.

I added extra support to my servo rails by placing and gluing some small plywood supports over the top of the rails. A bit of added security.

.
Posted by Vtach688 | 06-24-2019 @ 09:36 PM | 28,514 Views
So I was out of RC for around 8 or so years, and got back into in last year. I started out slow with a EF Timber then progressed to my latest airplane.
When I left RC, my highest achievement was a Aeroworks Yak 54 50cc. Having a collection of electric airplane, I felt I was missing something. Yes, it was a gasser, lol. So I recently acquired a Dave Patrick Edge 540T, 30cc-ish, 78" wingspan plane. I got it a good price and it was a minimum buy in.

It's not new and has had a repair, but still good bones. I had a DLE 55, so that 's what I installed. This is plane looks bigger than a 30-35cc airplane and not much heavier than the 35cc. In fact, she came in at 15.lb.

My plan is to fly it, if i like the it, then i'll do a restore and recover job. its like finding that classic car, i guess.

I would like to see if anyone have an info on this bird. Like the actual specs, CG, and so on. It's not fully needed but the information would be nice.

I'll also update this as i go along and post the video on my YouTube channel ( I'll put a link below). thanks for checking out the blog,

V.


Father's Day at MARKS (4 min 22 sec)

Posted by nzflyer21 | 06-21-2019 @ 04:55 AM | 28,474 Views
Hello there, I haven't got much completed over the last few days. The weather has turned really cold, we have had several big frosty mornings in row and by the time I get home from work there is only about an hour's light left and the temperature drops really quickly , making it to cold to be out in the workshop.

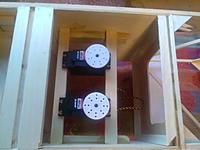
I positioned my large Hi-Tec servos where I felt they should go.which ended up being further back then I wanted. The plans don't give any clues as to where they should go,but still should be just ahead of the CG.

I am planning on a pull pull system for the rudder and elevator at this stage.
Also planning on doing a bit of scale detail in the cockpit, so have been thinking about overall accessibility to make sure I can get to the servo positions if needed once the plane is completed.
Posted by woodendesk | 06-19-2019 @ 10:41 AM | 30,571 Views
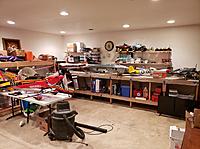
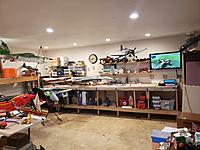
Well I've moved in officially!! Here is the first shot of the 4 car garage and shop I have going for me now. Comment any suggestions you may have to making it more friendly, fun, enjoyable, etc. I have a full fridge and freezer in there too for libations! Also a full bathroom in the garage!!
Posted by nzflyer21 | 06-18-2019 @ 02:08 AM | 28,476 Views
Hi there
I thought I would add a few pictures of the fuselage progress for the 1\3 rd scale Morane Saulnier.
I have spent abit of time working out the engine position and servo position s for the throttle and choke on the Moraine Saulnier the fuselage progress to date seems to be going along nicely. When I started to look at this model ,there seemed to be limited construction pictures online. Maybe I was looking in the wrong places.
As I mentioned earlier this is my first adventure into gas engines so lots to find out about them..
Anyway just wanted to say hello again.
Posted by nzflyer21 | 06-16-2019 @ 08:41 PM | 28,290 Views
Hi there, just wanting to introduce my self today, I am pleased to have found this web site, I have found lots of interesting topics and ideas.
I love reading all the tips and great ideas on offer and have made use of some of them. I have always flown with glow engine and now I have started my first gas engine product, A Balsa USA Morane Saulnier 1/3rd scale.

I have built the 1/4 scale Fokker DVII from scratch, it is yet to fly. Very busy at work at present so it will have to wait.

I will pop a picture on today for you to see, I have tried to give it some weathering effect to give that a go.
Posted by RAF | 06-14-2019 @ 07:30 AM | 27,638 Views
Posted by woodendesk | 06-10-2019 @ 08:06 AM | 30,886 Views
3DHS YAK 55M 91inch
*More to come....Here is what I see just on the surface the Yak has. I will update as I go along going over the plane. Consider this also documentation of the Yak, servicing, modifications. As most of you know I love to be thorough.
SERVOS________________________
-Rudder: (Hitec) HS-7955 TG (Titanium Gear) (X1) 4.8-6.0V programmable
-Elevators:
-Ailerons:
-Throttle:
SWB servo arms

ENGINE_________________________
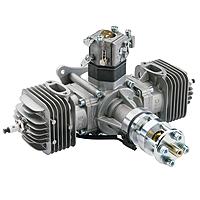
-DLE 60cc Twin
-Falcon 24 X 9 (Gas Carbonfiber Propeller)
-Fortitude Fuel tank (20oz./V.2)
-EASY PULL fuel dot (silver)


ELECTRONICS___________________
-Fromeco Wolverine power switch
-Tech Aero Ultra IBEC (ignition battery elimination circuit) 5v-6.6v
-Spektrum receiver

BATTERIES______________________
*TBD- I haven't decided what route I want to go here.
Posted by TexasFlyBoy | 05-19-2019 @ 07:10 PM | 30,403 Views
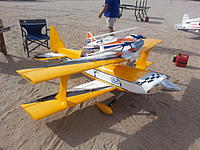
Slow pass at Loomis Flying Field, Mooreland, OK. August 2017
Posted by woodendesk | 05-13-2019 @ 11:32 AM | 33,248 Views
UMX BEAST:
Modifications______________________
- Metal prop shaft
- Carbon fiber Battery tray to accommodate larger batteries (custom made)
- Mt propeller logos (Callie Graphics)
*all carbon parts made from 200 X 250mm X .5mm Carbon 3K Tabby twill pattern (ebay)
- Carbon wheel pants (custom made)
-Carbon Landing gear struts (custom made)

Future add-ons_____________________
-3000kv motor (P3 revolution)
-Clear custom servo covers
-BB Hyp G5 50Cmax (3S) 240mAh w/UMX connector & JST-XH balance tap battery (Babbebatts).
Posted by Midwest_tuna | 05-12-2019 @ 05:57 PM | 29,564 Views
I just completed the build of a PAU Sukhoi. Part of that build was the installation of MKS 777A+ servos on all the control surfaces. Upon completion of the installation I noticed a slight flutter in the elevator servos particularly when I switched from high rates to low rates or if I moved the trx sticks rapidly. After consultation with the techie at MKS he advised that the problem was caused by poor quality servo extensions even though the extensions used were heavy gauge. The issue is not the gauge of the wire, rather the alloy of the steel contained therein. This becomes increasingly important as the extensions get longer such as elevator servos in the tail of the plane. Today’s high frame rate high speed servos require a very clean signal, especially when Spektrum Power Safe receivers are in use. Additionally, Spektrum recommends that signal boosters not be used. MKS recommend the use of a superior quality servo extensions such as the ones offered by Power Box systems. I ordered them from Horizon (available also from Chief Aircraft), installed them on the elevator servos and the servo flutter problem went away. I am now in the process of replacing the wing servo extensions with Power Box (German made) extensions.
Posted by Greg Briley | 05-10-2019 @ 01:48 PM | 27,839 Views
I found a new use today for that real cool sticky tape I was selling. For twenty year I never had a problem with mice. A nasty neighbor moved two doors down from me and now I have mice. You would have to see to believe. I stapled down a 12 by 16 piece of that stuff . and sure enough caught a mouse the first night. It sticks to there feet first and then the fur has no chance. After selling all that I had I was able to find it at Home Depot in a different size. Its called Bondera. I first used it for Batteries and gas tanks along with remote receivers. Thanks just had to share that