|
|
|
|
|
Re: Miro F3A
Hi Harrys
here is a drawing with the basic dimensions on it. I think all the info on the model is in the posts. If not just ask. Regards Rod |
|
|
|
|
|
|
|
Re: Miro F3A
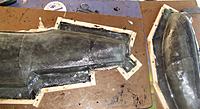
I have applied the glass in strips this makes it easier and uses all the material. I have made a fairly thin mold as it is not a production mold. It is 6 layers of 200gm glass with an extra couple of layers on the flanges. I will leave it for a couple of days to cure before starting on the other side.
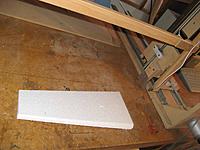
In between coats I fired up the CNC foam cutter and produced a rudder. The LE has a cutout for a strip of 3/16" balsa to glue the hinges to. I will sheet the rudder with the lightest balsa I have. |
|
|
|
|
|
Re: Miro F3A
The splitter plates came off with no problems. After a good cleanup a few coats of wax were applied then new dams were built on top of the earlier ones. The flanges on the half mold I have just done seem to be about the right thickness ie about 5mm. The registration buttons seem to have worked out OK. I suppose I could have put a bit more thought into the air intake mold but I think it will work out. You can see that this is the table I airbrush my foamies on, good practise for this model.
|
|
|
|
|
|
Re: Miro F3A
Here a are the basic plugs for the spinner and spat molds. In the foreground is a G202 spat which is the same length. The Miro spat will be narrower and not quite as high. The 202 spat would have done the job but I wanted just the right design for the Miro. Mike B says you need an ali spinner for the 4 strokes (for the electric starter) and a 3 1/4" truturn FAI will fit but I will do a carbon one anyway. I find molding the spats hard work (ie getting the carbon to conform to the tight curves at the front and rear of the mold) so this time I will do lap joint molds and vac bag the parts before joining, more on this later. Also I have a few ideas on spinner molding ie I want to use one piece of carbon for each layer, and I will balance the final product.
|
|
|
|
|
|
Re: Miro F3A
Here is another mold photo much like the other ones, however the mold is pretty much finished now and only requires the air intake on the cowl done. Including the pattern I have used about 10 mtrs of 200gm glass and 6 or 7 ltrs of resin and hardener. I need to let the whole thing crispen up as a rigid mold releases much more easily than a soft green one. Mike came through with some wing tubes today, man we are so lucky. Can get on to the flying surfaces now. There is not alot of info out there on foam wing building specificaly relating to pattern/Imac. Plenty of overviews but not those killer detail bits. Havent had any feedback on airfoils so I most probably go with 12% with the high point 35% (NACA 63A012) on the wing and SD 8020 or NACA 0010 for the stab.
|
|
|
|
|
|
Re: Miro F3A
This has been the impetus to build a post curing oven. The foam comes curtesy of Weta Workshop (cover sheet). The heater is a 150 W wardrobe heater. The molds are sitting in there now.
Spinner plug is also shaping up. |
|
|
|
|
|
Re: Miro F3A
The level of talent on this site shocks me! Seeing guys like Paffy and Rod (just to name a couple recent builds!) do everything but taking a blow torch to fiber glass to make their own carbon fiber is simply astounding. Rod are you planning to harvest some wild berries or something to make your own paint??? GREAT job guy! I love watching craftsmen make something beatiful with nothing but brain power and their hands. Keep up the good work!
|
|
|
|
|
Joined Jan 2006
1,835 Posts
|
Re: Miro F3A
BEAUTIFUL!
I can't wait to see the finished product, Rod!! |
|
|
|
|
|
Re: Miro F3A
Mold pics are here. The fuse molds just about fell aff the plug and look pretty good. The hatch molds were only slightly more difficultand picked up a some of the plug finish. This came off the molds with a bit of thinners and left the mold in perfect condition. I will give the mold a bit of a sand wirh 600+ paper to take off the high spots then at least 6 coats of wax.
I thought you guys might like a pic of me to see who's doin this so here you are looking at me dusting off the mold after giving the edges a sand with the power file so I dont skewer myself with the sharp bits when working on the mold. As you can see I dont like sanding fibreglass. I'm pretty pleased with these molds as I got the thickness about right and the registration buttons are working well. Spat plug is also coming along. |
|
|
|
|
|
Re: Miro F3A
my guess is the little tabs round the outside of the mound to help align the two halves...
This is an excellent build thread - I can really start to appreciate the work that goes into making composite models now! Good to see you take no chances with all the protective gear you are wearing... Thanks for taking us through step by step - can't wait to see the final product |
|
|
|
|
|
Re: Miro F3A
Hi Biff have a look at post no 43 for how I did it. Here is a pic of the final result. The idea is to have a molded in system to exactly register the mold halves so they align properly. In this case the buttons are square not round. There are all sorts of systems to keep the mold halves aligned but this seems the simplest and cheapest. You can see the male and female buttons on the flanges in the middle of the pic. I have to say my new Canon A 710 camera is giving me a very good time and this thread wouldn't be possible without it.
|
«
Previous Thread
|
Next Thread
»
| Currently Active Users Viewing This Thread: 1 (0 members and 1 guests) | |
| Thread Tools | |
 Similar Threads
|
|||||
| Category | Thread | Thread Starter | Forum | Replies | Last Post |
| f3a foamies. Which one?? | fun_fly_3d | Foamies | 15 | 05-04-2011 08:29 PM | |
| Building F3A plane for AFPD | harrys | Pattern Competition | 7 | 04-23-2008 12:02 PM | |
| I'm looking for 14MZ file for F3A or other Pattern Plane | gumush | Pattern Competition | 4 | 09-03-2007 08:44 AM | |
| Genesis F3A | mirekf3a | Nitro Power | 4 | 12-18-2006 11:16 PM | |
| cyclone f3a problems | marcezini | General Discussion | 1 | 07-31-2006 07:48 PM | |


