|
|
|
|
|
Discussion
E Fusion Build Thread
Hello everyone. im going to be doing my best to detailed build thread for the E Fusion. It will probably be a couple / few days between postings as im building, taking pics and notes at the same time so it deffinately will slow my pace. With that being said, thanks for reading and being patient as i build and post pics with what im doing ( most intermediate to advanced builders will already know ) and special note if they apply.
With that being said, lets get started. Thanks, David |
|
|
|
|
|
|
|
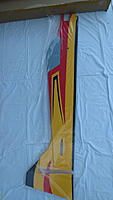
ok, lets start with the fuse. Get the fuse, rudder and the hinges located in the accessory bag. You'll need 15 to 30 minute epoxy for the hinges. (*you will want to oil the pins and the center are of the hinge so after the epoxy sets up it will be easier to remove.) Glue one side of the hinges first. Allow glue to setup then glue the other side on. It doesnt matter what side you glue first, just make sure that when you have seated everything in place and the glue is drying, that the hingeline is straight and the top of the counterbalance on the rudder lines up with the LE of the vertical stabilizer
|
|
|
|
|
|
tailwheel assembly
time to assemble the tailwheel. find your tailwheel assembly bag and open it and seperate the parts. (* MAKE SURE TO LocTite ALL SCREWS AND BOLTS THROUGH EVERY STEP.)
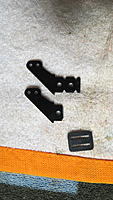
get the tailwheel bracket, tailwheel axle assembly, aluminum control horn ( in the same bag as all the other parts) and lock collar. assemble as shown. make sure when you are tightening all the screws that you align everything and get it straight. next get 2 lock collars and the tailwheel. put a lock collar on first. followed by the tailwheel and another lock collar. put the collars as close to each side of the wheel as possible and still have the tailwheel spin freely. lastly before we install onto the fuse, attach the included spin to the aluminum horn using the opened up end to go through the horn then closing it up with some needlenose pliers. ( 4 screws are included to mount this. 3 for the CF bracket and 1 for mounting the spring to the rudder. when you mount the tailwheel assembly to the fuse, 1st locate and mark the holes for the tailwheel bracket insuring that the vertical part of the tailwheel axle is lined up with the hinge line. drill some starter holes first, then screw down your tailwheel assembly. unscrew the 3 screws and put thin CA in the holes to harden them then remount tailwheel. time to put the control horns in. get 2 CF control horns, control horn plate and a ball link with screw and nut. you will notice the control horns are long and need to be cut off so they dont stick out the other side of the covering. sand the control horns on both sides so the epoxy will adhere to them. put the ball link in between the 2 control horns along with the nut and bolt so it keeps the bolt hole lined up and the spacing between the horns. locate the 2 slot in the rudder and roughly cut the covering so you can insert the control horn and plate so you can trace the outline of the plate. now remove the control horn and cut the covering loose where you just traced around the plate. to keep this area and ALL other control horn areas clean and neat during gluing, use some painters tape to put right outside where you removed the covering so no epoxy gets on the covering. put epoxy in the holes and on the control horns then insert into the slots in the rudder. wipe off the excess epoxy on the outside that squeezes out. once you have it cleaned up and are satisfied with it, remove the tape and set to the side for the epoxy to cure |
|
|
|
|
|
You can also you Petroleum Jelly for the hinges instead of oil. I actually prefer it as it stays in one place and doesnt drip.
|
|
|
|
|
|
Main Landing Gear
get your landing gear, wheels and bag of bolts,washers and nylocks.
put the washer first on the axle bolt followed by the wheel. put the nylock on the backside of the wheel and tighten to the point where there is no slop back and forth (or minimal slop) and the wheel still spin freely. ok, here you will need to get the main gear bag with the long bolts in it because you will need the regular nuts to attach the wheels to the landing gear. ( dont forget your LocTite!) mount the main landing gear to the fuse with the included nuts and bolts ( long bolts). tighten down the bolts without crushing the fuselage. |
|
|
|
|
|
good point. thanks for pointing that out. anything that is greasy will work. petroleum jelly has been my go to all my life. trying something different for this build.
|
|
|
|
|
Joined Sep 2009
184 Posts
|
It might just be the angle you snapped the photo but recheck your landing gear. I didn't notice until I taxied out for the maiden today that the right wheel is forward of the left! I'm adding a shot that hopefully shows what I mean. When it taxied out, it was crabbed at an angle going straight,
|
|
|
|
|
|
Hinging And Glueing The Horizontal Stabilizer And Elevator
locate you horizontal stab and 2 elevator halves. ( they are in the same bag when you unbox your Fusion. you will also need 6 hinges. again, prep your hinges so the epoxy wont stick to them. you may want to trim a little of the hinge pocket so that you get a tighter hinge gap and that the LE of the elevator counter balances line up correctly with the LE of the horizontal stabilizer.
PLEASE be aware of THIS step. you can do this 3 ways. #1) you can glue the hinges in both elevator halves 1st or, #2) glue the hinges into HALF of the horizontal stab . then slide the stab through the fuse and glue the other half (if you glue all hinges at once, the stab WILL NOT go through the fuse..) or, #3) (i went with this option) glue the hinges into half of the stab and in the opposite side elevator half. if you opt fo this way, make sure you are glueing different halves and NOT THE SAME SIDE. DO NOT CLEAN GLUE FROM THE HINGES AT THIS POINT. Now i opted also to glue the horizontal stab at this point BEFORE glueing the elevator halves to the stab for simplicity in my mind. you will need to get your CF wing tube and go ahead and slide it throught the fuse and measure both sides and get it centered and mark it on one side of the fuse. ( i used tape so i could slide it to the same spot each time i put the wing tube in.) you will need this centered so you can square the horizontal stab to the fuse. slide the horizontal stab through the fuse and measure both sides and get it centered also. either mark both sides or use T pins and pin the back of the stab so it cant move from center while you are squaring the LE of the stab. put the wing tube in the fuse at this point and measure from the end of the wing tube to eithe the LE or TE of the horizontal stab. once it is square, mark or T pin it in place at this point. get this part right as this will effect all aspects of flight if not square or parallel (next step)with the fuse and wing. measure twice, glue once.. now check that the stab is parallel to the wing tube. you may have to shim one side or the other to get it perfect. i used zip ties on the bottom of one side as that was enough for the little amount of shimming that was needed. when you get it right, remeasure everything for square, recheck for parallel to wing tube then CA the stab to the fuse. you may have to use microballons to fill in any minor gaps between the fuse and the stab. now glue the elevator halves to the stab. use tape to hold the elevator halves in place while the glue cures. after the glue cures, clean the epoxy from the hinges and make sure that they move freely. if there is any binding or squeaking, find out where its coming from and clean that hinge even more. then check your amount of throw. (working on control horns currently. pics coming soon) |
|
|
||
|
|
Quote:
|
|
|
|
|
|
Joined Sep 2009
184 Posts
|
I'm actually glad to hear its just mine and not a manufacturing defect!
I just didn't check it since w/2 holes and sitting flat there shouldn't be enough wiggle room to move that way - or so I thought. It obviously didn't stop me from flying. I do notice the top of the gear is angled so maybe I have two lefts? Will check later. |
|
|
|
|
|
Install of Elevator Control Horns
ok, so these control horns are installed just like the rudder control horn. trim your control horns, scuff with sandpaper and assemble your control horns. mark the coverimg with a pen ( or something) and remove the covering where your control horns are going to be glued at. put tape around the outer perimeter so you dont get epoxy all over the place. clean up excess epoxy, remove tape and set aside for epoxy to cure.
|
|
|
||
|
|
Quote:
It has been my experience that the mounting holes have enough slack to adjust the gear ever so slightly forward or aft on either side. I suggest loosening the screws slightly and see if you can make the necessary adjustments first. |
|
|
|
|
|
|
Saberwulf,
I don't recommend aligning the stab to the wing tube only as the wing tube will have some play in the fuse being such a small contact area. The instructions I wrote recommend installing the wings temporarily while aligning and gluing the stab in place. this has always been the customary practice on profiles. |
|
|
||
|
|
I took that in consideration when squaring everything up. I removed the slop from the wing tube with some tape wrapped around the tube , squared the stab, then checked with the wing. All is good. Thanks for mentioning that as I overlooked it and meant to address that.
Quote:
|
|
«
Previous Thread
|
Next Thread
»
| Currently Active Users Viewing This Thread: 2 (0 members and 2 guests) | |
| Thread Tools | |


