logo
Thread Tools
Old 04-10-2020, 11:18 PM
Benji is offline
Find More Posts by Benji
3D Low & Slow
Benji's Avatar
United States, CA, Rancho Cucamonga
Joined Jan 2006
620 Posts
Quote:
Originally Posted by DESERTRIDER49 View Post
Hi Benji
I realize this may be a little far off, do you have a source for decals ?
You inspired me to resume construction on my Adrian Page 1/4 scale R2.
Hi!
I don’t have a source for Decals yet.
There are a few options in this forum that I have seen before. When I get closer I’m going to start doing the research.
I didn’t know the kit from Adrian but it’s seems very nice too.
Let me know if you need any help in the building process.
Benji is offline Find More Posts by Benji
Reply With Quote Quick reply to this message
Sign up now
to remove ads between posts
Old 04-11-2020, 08:18 AM
crosswind is offline
Find More Posts by crosswind
Never hover on an empty tank
crosswind's Avatar
United States, CA, Galt
Joined Nov 2009
611 Posts
Hello Benji!
Awesome build on the Gee Bee. Looking forward to seeing some pics when you finish that bad boy!

Man, could I talk you in to posting some pics of that Carden? And the Extra still looks good too!
Hope all is well.
crosswind is offline Find More Posts by crosswind
Reply With Quote Quick reply to this message
Old 04-11-2020, 11:18 AM
Benji is offline
Find More Posts by Benji
3D Low & Slow
Benji's Avatar
United States, CA, Rancho Cucamonga
Joined Jan 2006
620 Posts
Quote:
Originally Posted by crosswind View Post
Hello Benji!
Awesome build on the Gee Bee. Looking forward to seeing some pics when you finish that bad boy!

Man, could I talk you in to posting some pics of that Carden? And the Extra still looks good too!
Hope all is well.
Hello Terry,

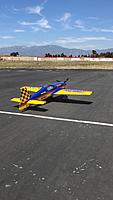
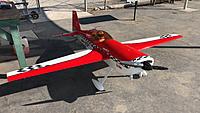
Yeah no problem. I still have both extras, the 260 is a beast but super docile when it comes to sport flying. The Carden tracks on rails, I change the color scheme and is a blast to fly. I have been flying them here in Los Angeles Area.

Please see pictures of both airplanes below, it was nice meeting you.
Benji is offline Find More Posts by Benji
Reply With Quote Quick reply to this message
Old 04-11-2020, 02:46 PM
crosswind is offline
Find More Posts by crosswind
Never hover on an empty tank
crosswind's Avatar
United States, CA, Galt
Joined Nov 2009
611 Posts
Wow! What a difference on the Carden. Beautiful Job. It was a pleasure meeting you too.
Happy flying!
crosswind is offline Find More Posts by crosswind
Reply With Quote Quick reply to this message
Old 04-11-2020, 09:32 PM
camss69 is offline
Find More Posts by camss69
DDD
camss69's Avatar
Joined Dec 2006
1,773 Posts
Congrats on the Carden! It looks great, I was good friends with the original builder and flew that plane quite a few times. Great job on the scheme and glad to hear you enjoy it!
camss69 is offline Find More Posts by camss69
Reply With Quote Quick reply to this message
Old 04-13-2020, 01:41 AM
Benji is offline
Find More Posts by Benji
3D Low & Slow
Benji's Avatar
United States, CA, Rancho Cucamonga
Joined Jan 2006
620 Posts
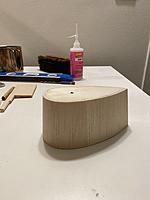
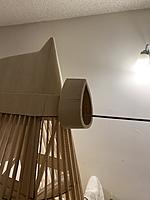
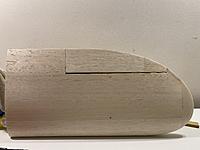
Tail wheel pant

Hello all!
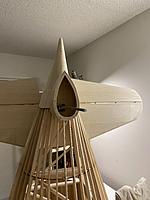
Back to the Gee Bee, this weekend I worked in installing the rear wheel rod and the balsa sheeting around it.
I fabricated the rear wheel pant, and for this I used cad to draw the shape of the wheel and get measurements since the drawings don’t have enough details. They call to use the Byron wheel pant, but it’s not available anymore. I build this one with two plywoods, one smaller than the other and I connected them with 1/8 inch balsa sheet.
After it was frame I cut one of the plywoods to make the opening for the wheel.
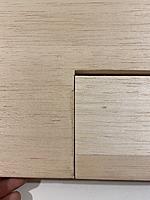
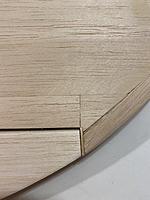
At the end of the day I worked on the left wing to minimize the gap between the aileron and the wing since this is a race plane.
We ordered the main landing gear from Sierra Giant and we should get it this week!
We will keep you with more updates this week.
Benji is offline Find More Posts by Benji
Reply With Quote Quick reply to this message
Old 04-15-2020, 01:38 AM
Benji is offline
Find More Posts by Benji
3D Low & Slow
Benji's Avatar
United States, CA, Rancho Cucamonga
Joined Jan 2006
620 Posts
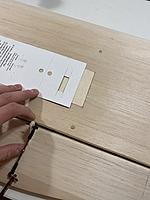
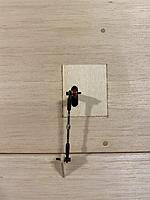
Aileron servo assembly

Hello everyone!
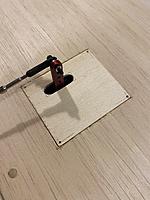
Tonight I spend sometime installing the servo into the left wing, this servo is mounted inside the wing and the cover has to be fabricated.
The drawings call for 1\8 inch balsa but I opted for ply sheet instead. I test fitted the servo first with the arm on and then with a piece of cardboard I layout the opening. Then I drew it on the ply and cut it. The ply is mounted with low profile wood screws.
For both wings I trimmed the ailerons to get the smallest gap possible and square with the wing.
Wait for tomorrow updates
Benji is offline Find More Posts by Benji
Reply With Quote Quick reply to this message
Old 04-15-2020, 05:36 AM
Motomazzo is online now
Find More Posts by Motomazzo
Registered User
United States, TX
Joined Nov 2019
2,354 Posts
Very nice work! You are very much a builder and craftsman. Good to see.

Is there enough gap for covering thickness at the aileron ends? It adds up fast when you start overlapping! Which I’m sure you know. Just an observation.

JAM
Motomazzo is online now Find More Posts by Motomazzo
Reply With Quote Quick reply to this message
Old 04-16-2020, 12:41 AM
Benji is offline
Find More Posts by Benji
3D Low & Slow
Benji's Avatar
United States, CA, Rancho Cucamonga
Joined Jan 2006
620 Posts
Quote:
Originally Posted by Motomazzo View Post
Very nice work! You are very much a builder and craftsman. Good to see.

Is there enough gap for covering thickness at the aileron ends? It adds up fast when you start overlapping! Which I’m sure you know. Just an observation.

JAM
Thank you for that. Yes you are right, there is not enough room for the cover at the end of the ailerons. However, I am waiting to get the covering material. This time I will try using a fabric material which I have not use before and would like to test try it once here. I might have to sand a little more to get it clear.
Benji is offline Find More Posts by Benji
Reply With Quote Quick reply to this message
Old 04-16-2020, 12:44 AM
Benji is offline
Find More Posts by Benji
3D Low & Slow
Benji's Avatar
United States, CA, Rancho Cucamonga
Joined Jan 2006
620 Posts
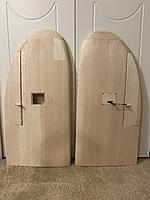
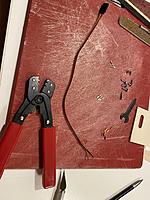
Today was a little calmer day, I spent some time building the right wing servo door and the two servo extensions. I like creating my own extensions to the exact length. I installed both servos in place and the two doors. This are ready for set up once the rest of the gear is working in the fuse.
Benji is offline Find More Posts by Benji
Reply With Quote Quick reply to this message
Old 04-18-2020, 11:19 AM
Benji is offline
Find More Posts by Benji
3D Low & Slow
Benji's Avatar
United States, CA, Rancho Cucamonga
Joined Jan 2006
620 Posts
Landing gear

Finally the landing gear has arrived. I got it from Sierra Giant yesterday.
I want to say that quality is top notch, size is closed to the drawings.
Is very light. Later today I’m going to work on installing it.
Benji is offline Find More Posts by Benji
Reply With Quote Quick reply to this message
Old 04-18-2020, 06:33 PM
crosswind is offline
Find More Posts by crosswind
Never hover on an empty tank
crosswind's Avatar
United States, CA, Galt
Joined Nov 2009
611 Posts
Nice Benji. Those gears look great. I received a set of Sierra gears for a P-47 project I have going a few weeks ago and hear what you're saying about the quality of Sierra gears.

I imagine your wheels are also Sierra? Those are gonna look killer on the GeeBee!
crosswind is offline Find More Posts by crosswind
Reply With Quote Quick reply to this message
Old 04-22-2020, 01:11 AM
Benji is offline
Find More Posts by Benji
3D Low & Slow
Benji's Avatar
United States, CA, Rancho Cucamonga
Joined Jan 2006
620 Posts
Wheels

Quote:
Originally Posted by crosswind View Post
Nice Benji. Those gears look great. I received a set of Sierra gears for a P-47 project I have going a few weeks ago and hear what you're saying about the quality of Sierra gears.

I imagine your wheels are also Sierra? Those are gonna look killer on the GeeBee!
Well, the wheels come with the kit but they are Robart 5 inches.
They have a Goodyear logo on the side.
Benji is offline Find More Posts by Benji
Reply With Quote Quick reply to this message
Old 04-22-2020, 01:19 AM
Benji is offline
Find More Posts by Benji
3D Low & Slow
Benji's Avatar
United States, CA, Rancho Cucamonga
Joined Jan 2006
620 Posts
Landing Gear installation

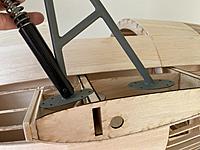
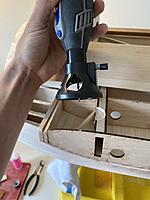
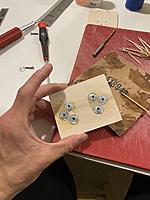
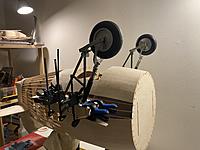
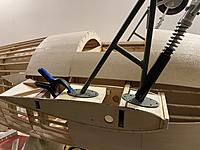
Today I finish the installation of the landing gear. The drawings call for a landing gear by Byron but I opted for the Sierra. I had to design the base for this new gear. The spar wing box had to be trim down to let the landing gear leg sit. I made the supports with balsa stringers and 1/4 inch ply. I was not able to use one of the bolds because is right on the wing spare box. For the other ones I used m4 screws and tee nuts. I put epoxy around the nuts so they don’t drive loose. When glueing the ply into the supports, the landing gear has to be bolted so everything aligns well.
So far it feels very rigid and the suspension works great.
Next step: sheet the undersign of the wing with 1/8 ply.

Best, Benjamin
Benji is offline Find More Posts by Benji
Reply With Quote Quick reply to this message
Old 04-27-2020, 01:12 AM
Benji is offline
Find More Posts by Benji
3D Low & Slow
Benji's Avatar
United States, CA, Rancho Cucamonga
Joined Jan 2006
620 Posts
Fuselage wing

Hello everyone!
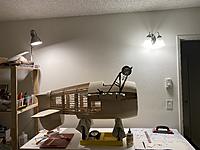
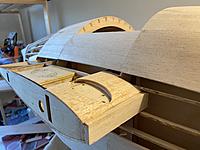
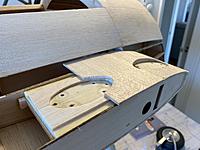
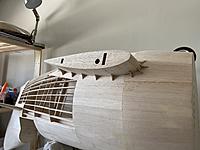
I did some work on the Gee Bee this weekend. On Friday I finish the installation of the landing gear in the fuselage wing sections. After, I covered with balsa sheets the small wing sections in the fuselage. I had to build up around the landing gear supports to hide the small gap.
Then to do the fillet in the wings I opted to install ribs that follow the geometry, and on top I used 1/16 inch balsa sheet. I’m planning on using fairing compound to fill the forward most part of the wing.
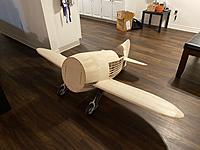
This is the first time that the Gee Bee sits in his landing gear, starting to look in shape.
Benji is offline Find More Posts by Benji
Reply With Quote Quick reply to this message


Quick Reply
Message:


Currently Active Users Viewing This Thread: 1 (0 members and 1 guests)
 
Thread Tools