|
|
|
|
|
Discussion
Leaky retracts on a Byron Staggerwing
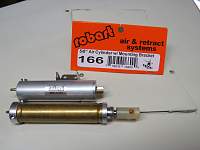
Anyone know how to repair or replace the air cylinders on a Byron Staggerwing? It's body is a brass tube that is crimped onto the end fittings... I can't take it apart to change out the o-rings. I've tried putting ATF in the cylinders, which helped, but didn't fix the leak.
Is there any company that makes replacement cylinders? It is a 1.5" stroke cylinder and the end fittings are .75" across. I'm really excited to try it out - changed out the Moki 30cc nitro motor for a DLE 30 gasser and have updated a few other things. It looks awesome & can't wait to try it. The air system went from 61 psi down to 30 psi in 7 minutes without cycling the gear or anything. This would end badly! Thanks Terry |
|
|
|
|
|
|
|
Hi,
Try giving a call to one of these folks ; UP-1 , http://www.up-1.com/cylinders.html , ROBART, http://www.robart.com/ , SIERRA GIANTS , http://www.sierragiant.com/ . they might be able to rebuild or have replacement parts you need . Hope this Helps, Later, Mark K. Atlanta , GA. USA |
|
|
|
|
|
Thanks for the links - the Ultra Precision cylinders look very similar to what came with the Byrons Staggerwing. I've sent over the dimensions of what is there to see if they can match something up. Robart hasn't returned my email from a month ago except for the automated reply. Sierra makes me drool too much... I'll hit them up if UP doesn't have something good.
|
|
|
|
|
|
Odd, but no one from any of the three companies returned an email. Oh well - I got some Robart cylinders and managed to fit them in. Works well on the bench, but no flights yet.
|
|
|
|
|
|
Cylinder fix
I managed to fix mine. Cut carefully with a Dremel JUST below the cripmped groove. Just enough till you see the aluminum. You can then disassemble it. Cut off the remaining ring in and above the groove. If you manage to score the aluminum it doesn't matter there is an o-ring below it. There is an o-ring where the shaft goes through the top just behind a brass insert., that is the culprit. To get the pressed insert out I used a drill bit just bigger than the hole. The bit will catch it and dislodge it. Then remove the insert and the old o-ring. I used 2 o-rings smaller ID than the original. Replace all the other o-rings. Be sure they are the exact same size as the original or slightly larger. Debur the brass tube and clean and oil everything.
TAKE A MEASUREMENT OF WHERE THE STAMP GOOVE HOLDING THE BRASS CYLINDER WILL GO. Transfer that measurement to the cylinder. Reassemble everything. Careful not to gouge or cut the o-rings or scratch the shaft. The brass insert holding in the o-ring can be tapped back in with brass or aluminum tubing. Tap it down as far as you can get it or it will leak. Drop 1 drop of Locktite or 5min epoxy around the outermost edge of the insert. Just a tiny bit! Now the fun part. Get two blocks and secure them to a table with a gap to hold the cylinder off the table. Drop some Locktite into the groove. You could also pull the cylinder back a bit and use silocone. This will seal any leaks if they get past the inner O-ring. Take a small flat tip and a hammer and start tapping the brass cylinder into the groove on the line you drew earlier. Keep it square to the part or you could cut through the brass. It may take a few strikes. I went over it a few times to make everything was even. Install lines and check for leaks using soapy water. The white plastic attach piont will change since it shortened the stroke a 1/4". It seems like a lot but I did it in an hour and that was figuring out what I needed to do. Should only take 30 min. |
|
|
|
|
Joined Oct 2018
5 Posts
|
Very nice tutorial.
|
|
|
||
|
Menomonee Falls, Wisconsin
Joined Jul 2006
119 Posts
|
Quote:
I've done basically the same thing on several Byron retract units for P51's. Although, I sacrificed the brass tube by just cutting it apart in the middle with a dremel and then "peeling" it off the aluminum end pieces. Then I replaced the brass tube with a piece you can get at the hobby store or sometimes the hardware store has it. I forget what size it is right now but they have it on that brass tube display. That way you can get it back to the same length stroke, if needed. Measure the brass tube length before you cut it apart then cut a new on the same length. Great step by step instructions you provided there! |
|
«
Previous Thread
|
Next Thread
»
| Currently Active Users Viewing This Thread: 1 (0 members and 1 guests) | |
| Thread Tools | |


