|
|
|
|
Joined Aug 2016
7 Posts
|
Thank you S737500 for you help and patience but you will be pleased to know i finally got it running.
My 2nd engine turned up a few days ago, and i had exactly the same issues with it not running under its own steam,which made me think it's me doing something wrong. The engine did cost me a bit more money, but it was well worth it just for the customer services support at justengines.co.uk. After i walked them through my starting sequence it was simple in the end, i was using the electric start to prime the engine each time and obviously kept flooding it. It didn't matter how many times i kept flicking it over by hand it just wouldn't pull the fuel through- maybe because its a new engine and everything's stiff possibly, so i used the electric start to get the fuel to the end of the pipe where it joins the nipple, then flicked it over a few times by hand to suck it through, opened the choke, turned on the ignition, with the electric start, it started in a few seconds, and what a lovely sounding engine it is and so much cleaner then nitro engines. 2 engines later, many lost evenings, 8 starter motor rubbers and 1 electric start its finally running in my test rig. Will run another tank or 2 through it and then fit it to the plane to carry on the run in sequence and get it flying before the end of summer. |
|
|
|
|
|
|
Joined Feb 2017
11 Posts
|
I purchased the NGH 30cc from hobbyking and like the threads author I encountered loose bolts and screws as well as dry rockers, all other critical areas had been oiled, though.
Unfortunately, I'm not pleased with the out of box design as it has some substantial flaws. These flaws will reduce satisfaction of performance. As designed, it will cause issues when trying to set the carburetor and you'll find that the idle can't be set to the mid range, causing bog issue and if corrected the idle has to be set high or else the engine will die due to lack of fuel. Here's the problem... Walbro carbs fuel pumps function off pressure pulses from the engines crankcase with positive and negative pressure resulting in movement of the fuel pump diaphragm in the carb. This engine has a direct line from the crankcase to the carb mounting bracket which delivers oil retained in the crankcase back into the fuel pump. When I removed the pump cover to inspect the diaphragm there was a major amount of oil in there and this problem has been associated with degrading pump performance. That's why other manufacturers vent oil either into the air or back into the intake manifold itself. If you research the 38cc you'll notice the intake manifold has 2 nipples mounted in it to eliminate this very problem. Why the 30cc didn't follow this design is beyond me. Also, I forgot to mention earlier, when I was inspecting the new engine I noticed that the o-ring that seals the intake manifold to the carburetor mounting plate, when assembled from the factory they forced the mount on the manifold and tore the o-ring which can cause a vacuum leak which makes setting the carb very difficult and can cause a lean fuel mixture that overheats the engine and ruin the engine. When I disabled the carburetor and found the oil, I also found that one of the 2 gaskets used between the carb and mounting plate had blown out and was leaking pressure directly into the manifold. I assume that this was caused by 1) narrow distance between the pulse hole that's in it to the intake itself 2) high crankcase pressure being delivered to the pulse nipple. Not to mention the lack of uneven surfaces that the casting and not machining to create a true flat surface so that the gasket has even torque pressure all around it. So, if you plan to buy this engine, be prepared to modify it to get any type of good results and performance. P.S. The o-ring is a 14.3mm x 11.1mm x 1.6mm I couldn't find one in stock at any of the local hardware stores here in the States, be prepared to order it online unless you get lucky. |
|
|
|
|
Joined Feb 2017
11 Posts
|
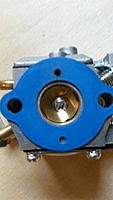
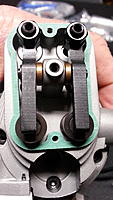
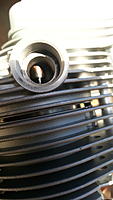
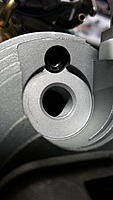
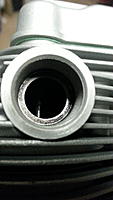
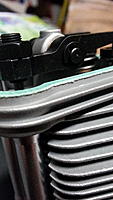
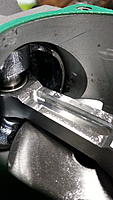
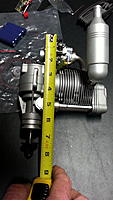
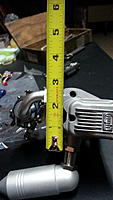
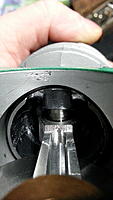
Here are a few photos of the engine.
*Timing from factory was set at 35 degrees BTDC. *The connecting rod has needle bearings on both ends, BTW. *The engine had been pre-ran and factory tested. This engine has potential but not out of the box. You get what you pay for, hopefully it'll have longevity... after I get the carb issues corrected. |
|
|
|
|
United States, TX, Friendswood
Joined Oct 2007
184 Posts
|
Gary,
I bought the same engine from Hobby King as well. Ran it on a test stand, it started very easily, throttled very well and I was very glad. I did not have any trouble setting the needles. I did notice that power was not very impressive, and the shake was excessive. I bought the engine for my Phoenix Stuka, which I plan to assemble soon. I am very interested in your findings. Please post step by step instruction for installing the oil vent, etc. I am confident I can do it myself. Thank you. |
|
|
||
|
Joined Feb 2017
11 Posts
|
Quote:
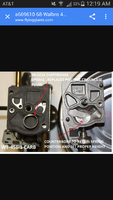
I had pretty good running at first on the bench but it degraded as I ran more and more tanks of pump gas and fuel through it. The collecting of crankcase oil reintroduced back into the carburetor changes erratically and depending on engine orientation also increases the fluctuations of gas/oil mixture pumped into the carb via the tank and the crankcase that sits in the carbs diaphragm pump. This alone causes problems of its own outside the other problems. If a person doesn't mind high idle, say around 2500, and the inconsistencies of fuel/oil mixtures while flying causing some serious erratic throttle control and midrange over fueling. .. It could be passed off as suitable. But for those looking for the upmost performance, that this engine is capable of, it must be modified. I have done some modifications already but am currently waiting for parts for the carburetor. I'm also changing the pulse pressure from the crankcase to the manifold. By adding a spring to the diaphragm pump to accommodate the pulse pressure fluctuations that 4 strokes have, this should stabilize the pump action so that a consistent throttle transition from low idle to WOT will be smooth. I will be sure to report back with my findings and my super critical opinion of the performance. Hopefully we can get these things running superbly. Thanks for your reply and input of your experience. Here is a picture of what I will be doing to the carburetor pump and cover.... |
|
|
|
|
|
Joined Feb 2017
11 Posts
|
Walbro also produces a remote fuel pulse pump that enables a modification that is a little easier (no milling needed to the carburetors pump cover like I mentioned above) although there would be a needed small easy modification to the internal carburetor pump.
If you read the document from walbro they indicate the difference between 2 stroke and 4 stroke carb needs. This engine runs much smoother if it's plumbed right. I've read many times that people described it as a "real shaker" and this is because the excessive rich fuel setting needed to keep the engine running throughout the rpm range and still idle. I've gotten mine to produce an idle @1650 and a WOT @ 7800 and that using a retarded ignition timing, so I know I'll achieve higher rpm once I advance the timing. All the while vibrating at near 2 stroke levels (I've not taken vibrometer readings yet for comparison but I plan to). I did try a dubro anti-vibration engine mount to see if it would help control the excessive vibration as compared to the supplied aluminum mount and the dubro mount actually increased vibration all the way through 20-80 hz range. An engine shaking excessively will destroy an air frame and electronics. As well, once plumbed properly, this engine will consume less fuel because the carburetor won't have to be set rich to keep it running. The spark plug inspection provided signs of very rich fuel settings and the temperature of the engine (I checked with a laser temp gun) showing awfully cold which won't preform well for overall maximum performance. This engine has high quality potential but the fuel pump issues have to be corrected to get it. P.S. I've done a ton of research on commercial weed trimmers and blowers using 4 cycle engines and all of them are using a carburetor that is designed with the pump spring like I showed as a modification plan above, but this carburetors come from the factory with a purge pump bulb which adds size and limits firewall spacing to carb. This is the remote pump walbro makes. FPC-pump-8-20-12.pdf I also provided a screen shot photo of the info below. |
|
|
|
|
United States, TX, Friendswood
Joined Oct 2007
184 Posts
|
Hi Gary,
Your explanation makes a lot of sense to me as I can relate to how my 2-stroke's shake if idle is set rich. The NGH GF30 is a very beefy engine. I suppose that NGH might not have the depth of knowledge that say OS or Saito does but they do not appear to cut corners. I also have an OS GF40. The OS is lighter and a much more refined product. I have not run my OS but plan to do so when I get the new Quique Yak 35cc. I am quite impressed by my new Saito FG-14C that I bought a month ago. It's a piece of jewel and it flies my little .46 Extra really well. Lately, I have got bitten by the 4-stroke gas bug. I claim ignorance of how engines work let alone a Walbro carb. I do want to get the NGH to go as well as it could. I appreciate what you are doing and would like to learn from your work. |
|
|
||
|
Finland
Joined Jan 2006
11 Posts
|
Quote:
|
|
|
|
|
|
Joined Feb 2017
11 Posts
|
Lastuaja,
You'll have to cut the flaps off the internal diaphragm pump. If you don't the external pump will fight against the internal pump. Lots of folks have complained that the external pump didn't function and not much changed in the behavior of the engine. .. well, it's because they forgot to cut those little flaps off. I'll see if I can get a picture for you of what needs cut. |
|
|
|
|
Joined Feb 2017
11 Posts
|
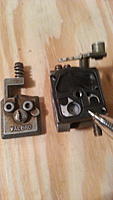
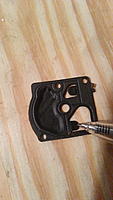
First modification, to the carburetors diaphragm pump.....
Sorry about the old junk carb I'm using, didn't want to disassemble the one on my engine, but they're all pretty much the same. Also, I'm going in depth for those that may not be familiar with carburetors. Please don't assume I'm implying your particular abilities. 1 st photo... This is the side of the carburetor the diaphragm pump sits and where this modification will be done. 2nd photo... This is the diaphragm that you'll be modifying. 3rd photo. .. This is one of the flaps that needs removed. I took the diaphragm off the carburetor and sliced them off with a hobby knife. 4th photo... This is the other flap that must be removed ( when using an external walbro pump) Note: This diaphragm is now disabled and will no longer pump fuel, and it will no longer be restricting the flow of fuel being produced be the external pymp. You'll never need to replace this diaphragm because it's nothing more than a gasket now. |
|
|
|
|
Joined Feb 2017
11 Posts
|
This is the carburetors pulse port. This was where pressure originally operated the diaphragm pump. This is no longer needed.
The simplest way to close off this port is to turn your gasket around to the opposite side. The gasket should now cover up this hole blocking it off. This renders the fitting that use to supply pressure from the crankcase ineffective. It's now blocked off because there's no passage way through it because the gasket is blocking it. |
|
|
|
|
Joined Feb 2017
11 Posts
|
Depending on how you create your intake manifold pressure port that will be routed to the external pump, I recommend using a hose that's pretty stiff. Reason is because soft hose can change pressure through a ballooning effect.
If you decide to add a fitting to the manifold, I'd also recommend placing it closer to the valve rather than the carburetor. Reason, pressure that's slamming into the valve doesn't degrade as it flows backwards to the carburetor. This is a minor change but still allows for optimum pressure. |
|
|
||
|
United States, TX, Friendswood
Joined Oct 2007
184 Posts
|
Quote:
|
|
|
|
|
|
Joined Feb 2017
11 Posts
|
I'm in the process of designing a completely new fuel delivery system that will work on almost any carb, including stock glow carburetors.
I've tested the system and it worked amazing. But this was a bench setup and I've not gotten all the components shipped to me yet for what will actually go into the planes but I've done the math.  This new design I came up with eliminatea so much hassle when dealing with gas engines that is often a turn off to many modelers. It will almost completely eliminate maintenance of the carburetor and allow for precise even flow at all times. I hope to have this system up and running and tested by mid summer. Hopefully we will never need a walbro carburetor again. The testing I've done so far has made this engine run better than any engine I've seen yet. Superb idle, instantaneous throttle response and rapid return to idle. Simple fuel line routing, no longer need 3' of vent line to combat siphoning affect when rolling inverted, and you'll be able to mount the fuel tank anywhere on the plane... even the tail. Hahahaa. I think I'll be able to get all the components needed for around $10. Mostly off the shelf items I hope. I believe it'll be revolutionary and rid us of so dang much hassle. I'm excited about it !!!! |
|
|
|
|
Joined Feb 2017
11 Posts
|
|
«
Previous Thread
|
Next Thread
»
| Currently Active Users Viewing This Thread: 1 (0 members and 1 guests) | |
| Thread Tools | |


