|
|
|
|
|
Rudder and Elevators
Sorry, I lied I did more today. I had a church meeting and after the meeting, I could not help myself had to work on the tail.
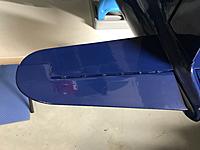
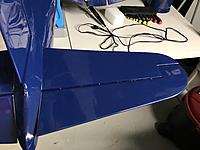
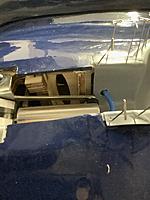
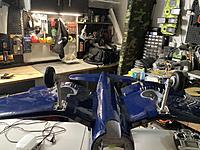
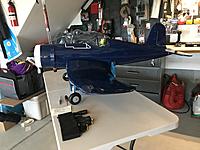
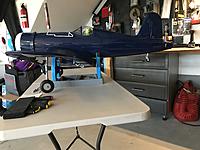
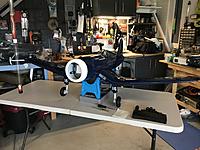
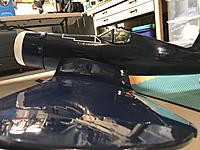
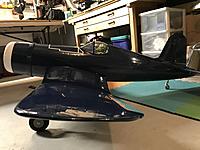
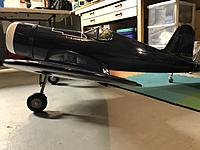
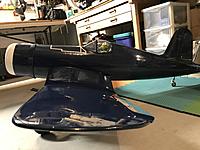
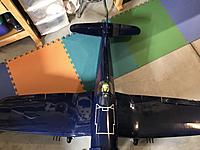
 So I pretty much did the same operation for the hinges on both elevators with the Robart Steel Hinges with the same Jig. I did not photo document this as much as the ailerons because I did it the same way. I still cut into the elevator for each hinge as I did with the ailerons. It worked well. Horizontal stab. I fitted it measured it side to side to make sure each side left and right of the stab was even then I measured from the same point on both sides of the nose of the plane until they were equal, as well, proper height was measured. Then I marked the horizontal stab with a permanent marker. Removed it from the fuselage, and removed the covering in the center from the stab. Applied 30 minute epoxy to the opened for the stab and the cut away surface of the stab itself and refitted and measured. Elevators. Then I glued the hinges in place after lubricating the joints with vaseline. Fitted them and ensured they were completely pressed evenly in place. Rudder. Then I fitted the rudder with the rudder/tail wheel control rod. Then I used 30 minute epoxy on those also and here is the outcome in the photos below. |
|
|
|
|
|
|
|
Nice work Flathatter, going together fast! I hear ya on the cost of the radials but man that sound.....
Yes, I have a DLE 35RA in the Strega. I installed a Bowman ring and it came new with a Walbro carb. I'm running a Falcon 18x10 on Red Line at 32-1 and it flat hauls the mail! Engine only has 6 tanks of run time on it so I can't wait to see what it'll do once broke in. I have not clocked the speed as I only have 5 flights on it so far. Flies on rails and the DLE just flat runs! I see you are considering a 35RA for the corsair. If not the radial the DLE 35RA would be my choice. Really impressed with mine. |
|
|
|
|
|
DLE35
Crosswind, I love DLE engines I have a DLE30 in an MXSR and it has been a runner for about 8-10 years. Put in a tuning pipe and she screams. I have the RC guys Cessna with 35RA. I donít have much time on that engine yet. Then I have Bill Hempleís L4 Grasshopper with 55RA. they are great engines. Hope you have a good day, Brother!
|
|
|
|
|
|
Crosswind,
Did you have plenty of room on your firewall for the 35RA? Reason I ask, is because the bolt pattern is a bit wider on the 35. It slightly runs over the left edge of the firewall on the top. I love the 35. Good engine. I put Bowman rings in all my DLE’s. From you photo it looks like you are into the larger planes. Do you do 3D sort of flying. I can do a lot of 3D stuff in real flight, but I don’t have the nerve to try it with one of my planes. I probably don’t have a great plane to try it with any way. Tried to hover my MXSR and she was hard to manage and I did not want to crash it. So I fly most sport aerobatics. |
|
|
|
|
|
Hey Flathatter! I had just enough room on the firewall of the Strega for the 35RA...I would call it a tight fit, lol. The bolt pattern on the bottom of the engine/top of the fire wall lined up pretty good, the pattern on the top of the engine/bottom of the fire wall had to be moved out towards the edges of the fire wall. I filled the original holes with 1/4" dowels and re-drilled the holes in the correct locations for the 35. I had to also remove some tri-stock from the face of the firewall to accommodate the stand offs. All that being said, my stand offs do not overhang the firewall.
This 35RA is my first DLE. I usually run DAs but chose the DLE because of the rear exhaust and the way it would fit so nice in the cowl of the Mustang. Very happy with my choice! what a great little engine! Only other change I made besides the Bowman ring was the spark plug to a CM-6. |
|
|
|
|
|
Yea they don’t run well with the DLE plugs.. the pattern on my firewall sounds exactly like you described... thank you very much.
Wil |
|
|
|
|
|
The Landing Gear
So next is the landing gear. Iím starting to feel like Iím making progress on this build. So I first fitted the gear. To make sure the bolt holes line up and guess what? Two of the blind nuts were stripped out go figure! So I screwed the bolt in and tapped them with a light hammer and they came right out! Joy!! Guess what the y were rusty and very tattered. They had taken a hack saw to them to cut off one side to make it flush with the wheel well. That makes since, but rusty and stripped. Well very fixable. So I replaced them easily. I always keep RTL fastener kits in my collection. They are very inexpensive and having all that hardware laying around is awesome not to mention way cheaper than those little packs at the hobby store that cost $4-5 for a couple of screws. Like a 70% savings. He sells really good tools also. He has been in business for years. He is a member of my club, and a darn good pilot too. So sorry about the little advertisement, but itís good hardware on the cheap. https://www.rtlfasteners.com/RC/NP.html
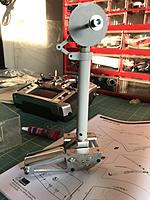
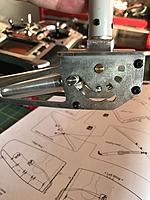
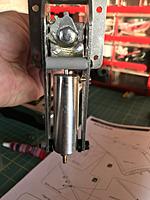
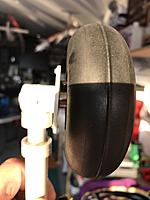
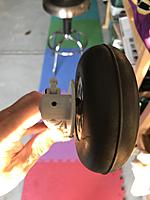
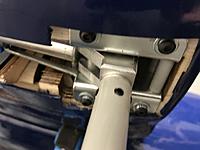
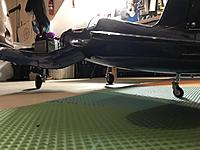
So refitted both Landin Gear and they fit fine with good clearance. So I then fitted the tubing that came with the kit. Seems like really good stuff some people say itís crap, but I found out the tubing and the fittings are made by a company called Festo. In my research they look to be a Germany company. The fittings are like those shark bite plumbing fittings where you push the tube into the fitting and it seals into the fitting. Pressing on the blue ring around it releases it. Iíll let you know how they work. So after getting the tubing cut to the right length the tubing closest to the mechanical portion of the landing gear or the mount has a spring that fits over, to protect the tube. Because that end moves a lot the other end is stationary.and does not require a protective spring. Once I got those fitting I cut out the wheel wells. They are very delicate and it is so easy to rip them accidentally or cut to far the wrong direction. I did in one small little spot (the blade slipped no big deal) and I sealed it with some thick CA. worked great! Trimmed way the oracoat around the perimeter of the wheel well. It called for epoxy in the instructions. I decided to use canopy glue. I had a bottle, and since I screw my canopies in place. I donít use this glue much but it works well for plastic to wood applications. I initialIy use push pins to hold the plastic down but it did not hold well. So I removed the pins and secured it in place with green masking tape from homedepot. It sticks tight and pulls the plastic to form in place but releases easily when pulling it off and does not pull the oracoat off. I then put the tires on per the instructions. There is a set screw in the bottom of the oleo that locked the gear axle in place so I used Loctite on the set screw and the axle. Then pulled the air tubes through, refitted the landing gear, added Loctite to the bolts and torqued them in place. Reop-checking there is no binding and freely moves. Did not check operation with pneumatic movement yet just by hand. Iím sort of impressed with at least the gear. So until tomorrow. |
|
|
|
|
|
Hey guys Henry final got the rest of the unboxing videos out to me. I posted them back at the beginning if you want to see them. Thanks again for all of you guys input. Have a very blessed day.
Wil |
|
|
|
|
|
Welcome Sam
Welcome to the build Sam. I also want to thank the other wonderful people and their inputs. Iím am unable to work on it the weekend I am on a 4 day spiritual walk with 48 other men. Called the walk to Emmaus. I will be back at the build on Monday. Thanks for your patience.
WIL |
|
|
|||
|
|
Aileron and Flap Function
|
||
|
|
|||
|
|
Elevator and Rudders Servo Installation and Landing Gear
|
||
|
|
|
|
|
Tail and Gear
So in the videos above I show the operation of the Ailerons and Flaps in the first video. All throws are Set and function flawlessly.
Second video shows the installation of the elevator servos and rudder servo and linkage. I soldered the brass end threads on to each of the three rods after I established proper length and cut each to fit. Then soldered the brass ends on. I used the Dubro black 2-56 ball ends on both ends. Set the throws 15 mm low rate and 20 medium rate as called for in the book then high rates I added 18 mm deflection up and down. Rudder I did 20mm low, 30 mm medium and 35 high first two recommend and third I added on each. Then I mounted the air control valve in its cradle and zip tied it down installed a high torque power HD servo to control the valve and used the supplied linkage. It was pretty robust linkage unlike the tail linkage I replaced. Then I cut all of the landing gear tubing to fit, the middle nipple on the valve is the supply line, and the far left nipple (furthest from the servo control arm) is out to the extension side of the gear. They are connected via quick disconnect T-fittings that I describe earlier in the thread. I like them! So the nipple closest to the servo is the retract side also has a quick disconnect T-fitting that goes out to the retract side of the gear. Set the servo to move 8 mm which gives us proper movement for function. Operation check is good. Over night pressure check, Iíll have to let you know. See the op check video above. The are fast and very abrupt. I may switch to a Robart control valve so I can control the speed. We shall see? See photos below |
|
|
|
|
|
Rest of the Photos
Here are the rest of the photos so far. See you guys later.
|
«
Previous Thread
|
Next Thread
»
| Currently Active Users Viewing This Thread: 1 (0 members and 1 guests) | |
| Thread Tools | |


