|
|
|
|
|
Build Log
3DFoamy.com Pro Edge build and fly
One of the great advances of the hobby has been the introduction and refinement of foamies, which are inexpensive to build and are fantastic training tools for pilots wanting to fly 3D. Additionally, foamies can be flown where large aircraft can't, they are quiet, and are generally a real blast to fly. Stay after-hours at just about any RC event and you'll see a sky filled with foamies.
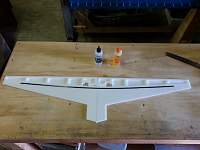
Within the foamy ranks are a great variety of attributes, depending on design: Indoor, outdoor, stiff, crash-resistant, easy to fly, precise, flat-winged, airfoiled, etc. My combination of not having an indoor flying site nearby, wanting an aircraft that can handle wind, and one that closely emulates flying my giant scale aerobats, is a tall order. I personally don't like foamies that make every maneuver as easy as possible for me, as I want to build skills that transfer directly to my large aircraft. I also want a foamy that can handle high-speed maneuvers as well as slow, 3D flight, just like a large aircraft. As an added bonus, a foamy that can be flown at high speed comfortably can also handle wind well. My preference in what a foamy should be has led me to the 3DFoamy.com line of aircraft. Their construction method and design gives them flying qualities that are truly best described as flying a small version of my large scale aerobats. Since 2006 I have owned several of their aerobatic aircraft, including the Super Cap, three different Pro Giles, and a Pro Katana. I have also built and flown their F-14 and T-38 park jets. After retiring my most recent Pro Giles, I decided it was time to try a different airframe. The Giles is an excellent design, which is why I've had three of them (would have just been two but my first one was in my trailer when it got stolen), but trying new things is fun. So I picked up a Pro Edge kit and will be getting it ready for this summer. The kit comes with laser-cut foam and wood parts, as well as pushrod hardware, control horns, and carbon fiber wing and stab tubes. You supply your radio gear, motor, ESC, battery, and paint. Construction begins with the wing. Remove the main wing piece from the board of parts and remove the lightening holes. There is a slot for the carbon fiber spar that gets removed as well, but don't glue in the spar just yet. The best method is to glue on the bottom leading edge pieces first, as shown in the photos below. I use 3M 77 spray adhesive for this step. Be careful though, as you only get one chance to lay them down properly. Do one at a time and there is no need to glue the pieces where they meet. That joint will get plenty of glue when the wing is installed later. I also like to draw a centerline reference before laminating the leading edge skins, as seen below. |
|
|
|
|
|
|
|
After the bottom wing skins have been laminated on, flip the wing over and install the carbon fiber spar. I prefer 15 minute epoxy for this step, as it gives me time to make sure the wing is straight. More on that in a bit. You'll notice a bend in the spar channel and that is by design. It ensures that the spar is making good contact with the channel, creating a strong glue joint.
After setting the spar in position with epoxy, laminate the top wing skins on using 3M 77. Make sure that the top skins align at the leading edge of the wing and the wing tips. The gap created in the middle of the wing accomodates the horizontal fuselage pieces later in the build. Once the top skins have been laid down, weigh the wing down with some books. This will keep it nice and straight while the epoxy sets on the spar. |
|
|
|
|
|
While the epoxy is setting in the wing, you can pull out the rest of the parts and work on sanding the edges, if desired. I prefer to round the edges of the fuselage and the leading and trailing edges of the flying surfaces. Beveling the control surfaces will be necessary, and double-beveling is most appropriate for these types of 3D machines. You can do the sanding later if you want but I find it easiest to do it before the parts are glued together. Plus it's the worst part of building in my opinion and it's nice to get it out of the way early. There is no hinge hardware provided with the kit, so it is up to you to determine what method of hinging you want to use. If you prefer tape, then bevel to the top of the control surface. I like using micro hinge points, so I bevel my control surfaces to the center just like a giant scale.
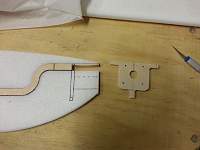
It's also time to start work on your motor installation setup. The kit is designed with a motor stick, and if you are using an outrunner motor you'll need to adapt the setup to accomodate your motor. A laser-cut firewall is available, but in my case I'll be making my own out of plywood. In either case, the motor mount stick will need to be cut to size, and a hole will need to be cut in the fuselage to accomodate your motor. The motor stick is laminated together from two laser-cut wood parts. In the second picture below, you can see where I have set up my Hacker A20-20L on the fuselage to check the fit and determine where the motor mount stick needs to be trimmed. Note that I have not epoxied the stick into place yet, as it will be easier to cut when it's not in position. Don't just skip installing the stick, as it provides an excellent load transfer from the firewall to the rest of the fuselage. |
|
|
|
|
|
After a little measuring, I cut out a firewall from 1/8" ply. Light-ply would probably work for this application but I felt more comfortable getting the real deal for mounting the motor. I got good results by drilling the shaft and mounting screw holes first, then making the outline for the mount based on those holes. A little work with the scroll saw, and the firewall and motor stick were good to go. After trimming out the front of the fuselage to accomodate the motor, do a test fit to make sure everything looks good. After that, epoxy the motor stick into place. The firewall will be epoxied in later when the fuselage sides are in place.
This is a good time to glue in the horizontal stab. There is a precut wood piece that serves as the hinge for the carbon stab tube, so be sure to glue that in place before attaching the stab to the fuselage. The kit comes with a couple 90-degree angles, so you can easily check the positioning of the stab before gluing it in place. Finally, a picture showing why progress on a #$%# foamy has been so slow. Since last year I've gained about 15 pounds in my life, but it's a really cute 15 pounds named Alice. Being a new dad has been a huge change, and one that doesn't allow much free time anymore, but Alice was happy to help out in the garage for a little bit yesterday. In this picture you can see her really paying attention while I give her pointers on the use of a mini clamp. Hopefully I can get more progress done on the foamy soon - I need my foamy fix! |
|
|
|
|
|
To complete the basic airframe, the wings and fuse sides get installed next. Slide the wing into position and check to make sure it sits perpendicular to the fuselage, and is parallel to the horizontal stab. Lightly sand the slot in the fuselage if needed to make it right. When you're happy with the alignment, glue the wing in place.
Test fit the fuselage sides, and mark and cut them to accept the firewall and for motor clearance. You may also need to trim the root of the upper wing skins to allow the fuse sides to sit tight against the wing. Mine required a slight bevel for a proper fit. When gluing in the first fuse side, I like to leave the second one in place as well. The interlocking nature of the sides into the fuse will help keep the fuselage straight, which gives better alignment while gluing in the first side. Be sure to glue the sides onto the wing and stab as well as the fuse, and once the sides are in place, run a glue fillet line on all top and bottom joint areas for extra strength. Once in place, the fuse sides make the whole airframe very rigid, and there is no carbon bracing needed on the Pro series kits aside from the wing spar and elevator joiner/spar. |
«
Previous Thread
|
Next Thread
»
| Currently Active Users Viewing This Thread: 1 (0 members and 1 guests) | |
| Thread Tools | |


