|
|
|
|
|
More Fuse Work
Continued to work on the fuse. Glued the belly pan and started sanding a bit to make perfectly flush. Came out great. I did this glue job in two stages. Glued where the gusset meets the fuse first. I then glued around where the belly pan meets the motor box. I used a putty knife while pulling a gap and spread glue on the motor box. This all made for a very clean job with no glue where we don't want it.
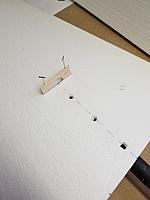
Fit the cap to the end of the front belly section using 1/8" balsa using Gorilla Glue. Then I cut the hatch section off the back of the rear belly pan section. Grampa turned dowels down to a perfect 3"16, pre-drilled the holes. I glued a 1/32" cap to the hatch and prepared the 1/8" lightply cap for the end of the fuse. The hatch will be held by two dowls and an 8-32 socket head cap screw. Time to get a tailwheel. I made the sheeting for the Fin/Rudder. I also cut off the top 3 3/8" of the rudder for the counter balance. I understand I don't need it but it looks sexy and very EXTRA! I fit a 1/8" ply root to support this cap like Mark B does. I glued this to the counter balance with poly and waiting for it to dry. |
|
|
|
|
|
|
United States, CA, Cupertino
Joined Apr 2017
37 Posts
|
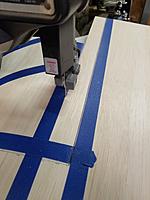
What dremel bit was that you used to cut out the circle?
|
|
|
|
|
|
That is the 1/16" ball cutter bit. Just dive it through the balsa. Then I took a piece of 1" dowel and stuck some 3M Pro sand paper (the best I've found for control and clean work). I used 3M77 adhesive to stick it. When you want to change it just use a heat gun and it peels right off for a new piece.
Hobby Geek, do you have a podcast going? I have been listening and loving it!!!! Really well done. I pop it on at work (computer analyst) and it gets me through the day. Really cool and thanks for doing this! |
|
|
|
|
|
Fin/Rudder Construction
Installed a root rib in the Rudder to give some strength for the counterbalance. I love the looks of it. If it looks good, it must fly good!
 Also installed a balsa triangle to the front corner of the counterbalance. Also installed a balsa triangle to the front corner of the counterbalance.Did the layout for the rudder and fin and removed the excess stock before the sheeting process. I am really impressed at how well poly glue works on foam and balsa! It foams into the foam at least 1/4". It is a bit hectic to get it spread and then lay it in the shucks but we haven't even come close yet to it foaming early on us. We are building up to get the courage for the wings. I did learn that I like spreading it with atleast 8"x3" light ply spreader. This makes it go really fast! Literally 10 seconds to spread one side of the rudder sheeting and into the shuck it goes. Leaves plenty of time to adjust and apply weight just right. After cure I did another layout and made the cuts on the band saw right up to the line. This made a very nice, smooth cut. |
|
|
|
|
|
90 deg. Drop
|
|
|
|
|
|
Thanks Ballistic! Does anybody have any experience using the non-flex headers that DA offers. They look very nice and clean without having to deal with the Teflon wrapping. I have flex headers on my DA 120 but was curious if they are needed.
|
|
|
|
|
|
Absolutely they are needed. In the early days of canisters, they didn't have flex headers and you would end up breaking the header at the mounting flange or in the case of Pefa aluminum headers they would break right at the bend to the canister. The motor, airframe, and the exhaust system fibrate or resonate at different frequencies.
Tom |
|
|
|
|
|
Fin/ Rudder Work
Had a great weekend of building!
After setting the laser and measuring, measuring, measuring I finally got the stab phenolic set! phew  Got some more work done on the fin. Sured up the edges and installed the leading edge so I can work on mounting. I also made the 3/4" hinge stock and cut to shape. After installing the hard point for the stab incidence and the brace across the stab phenolic I started working on the fin plate. After this I glued the hinge stock to the rear of the fin for fitting and getting my bearings for installing it. Can't wait to get the fin and turtle deck on. This will be looking like an airplane soon! |
|
|
|
|
|
Stab prep
Started this morning making the sheeting and getting ready for the stabs. Used CA to put a cap on the end of the phenolics, then set and glued. I used MarkB's method by drilling some holes to introduce the glue to the socket while spinning the tube. This was very easy and a great tip!
I headed on this afternoon to stab layout. Ended the day by routing out the servo pads, incidence bracket hard point and stab tube bolt hard point. Grampa put the dowels on the lathe and counter-bore for the t-nut and socket head screw. Should come out flush in the end! This was a tricky little piece to make. |
|
|
|
|
|
Fin
Sanded up the stab skins using a palm sander. Worked really well! Will be doing the last prep and end cap creation and it's on to the poly glue. Found if you heat the poly glue a little bit it spreads a lot easier. Will be nice to have the entire tail group all done.
Worked on the fin a bit, drilled the hinge points on both the fin and rudder. Installed the fin. I have more pictures, will post them in a couple days. Grampa made a really nice tail wheel bracket for the new trailer we are going to get soon. Simple 5x10 with barn doors and side access door. Small and simple. So far the build has been going really smooth with no need for re-work. There I go jinxing myself!!! 
|
|
|
|
|
|
Thanks John! Finally get a chance to thank you for the great build threads you've posted. You have helped me visualize all this to get me through this build. Thanks to you guys I get to enjoy it without pulling my hair out. I joke with my grandfather " we going to do this John's, Mark's, Tom's, Fixed Wing's, Steve's, Terry's ect... way??" lol!
The old man was pretty clever with that bracket. He even painted it, hehe. I have decided that I will build this aircraft with both the wooden and glass cowling. Sounds crazy but the wooden cowling can be cut and sanded to the existing, finished fuse. I want the experience of fitting the glass under my belt. Will be using Windecker's method for mounting the glass. Been studying his 43% build quite a bit. Josh |
|
|
||
|
United States, CA, Cupertino
Joined Apr 2017
37 Posts
|
Quote:
 I've been on a bit of a hiatus the last few months due to work and family commitments. But I'm trying to drum up interviews right now to get the show going again. Thanks for listening! |
|
«
Previous Thread
|
Next Thread
»
| Currently Active Users Viewing This Thread: 1 (0 members and 1 guests) | |
| Thread Tools | |


