|
|
|
|
United States, MI, Troy
Joined Aug 2009
142 Posts
|
Friday Ralph and I sanded the plane getting it ready for covering. We started sanding with 150 grit and finished with 320. After sanding we vacuumed and wiped down all the parts. Nothing new to show in the photos except a lot of dust, so I don't have photos to post. Our next step is to glass the hatch. Also working on the color scheme. Tom's son has some ideas for the wing bottom.
Ron |
|
|
|
|
||
|
|
Quote:
Great work Ron! Can you post pictures of what you are doing to the hatch- I'm in the process of doing this with my Jtec and my first time doing this so looking for any tips. Are you doing the paint yourself or having someone else do it? And what type of paint? Thanks, Dunny |
|
|
|
||
|
United States, FL, Orange Park
Joined Feb 2018
113 Posts
|
Quote:
Brian |
|
|
|
|
|
|
Just a quick note as I'm just sitting up for a few moments while I go through recovery, and thanks for all the well wishes.
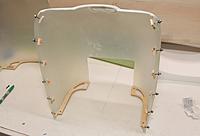
Ron will fill in more details as he starts to glass in the canopy/hatch. For the laminating resin we have used Eze-Kote from Deluxe Materials, water based, fast drying, great results. For paint we have our colors custom matched by a great local automotive paint suppler, Wiltse's Auto Paint in Waterford MI. They feature the Lesonal line of auto paint products. That's all for now...got to lay down. P.S. these are pictures from previous builds. Tom |
|
|
|
|
United States, MI, Troy
Joined Aug 2009
142 Posts
|
Feeling under the weather today. Didn't get anything done on the plane. Tom answered your question about what we used to finish the hatch. I will show photos and the write up as soon as I get started. We also had power go out today. First time in many years.
Ron |
|
|
|
|
United States, MI, Troy
Joined Aug 2009
142 Posts
|
Ralph and I worked on the rudder and hatch. We shaped the bottom of the rudder to match the contour of the fuselage.
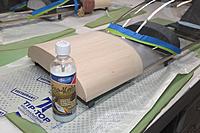
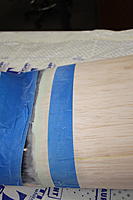
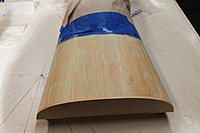
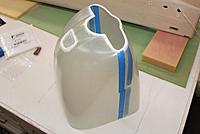
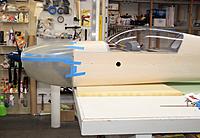
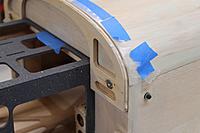
Next we taped off the canopy and hatch to protect it from the filler and sanding. The filler we used was “Upol Dolphin Glaze UP0714”. It is a two part finishing glaze for filling scratches and small dents and pinholes. The product is similar in consistency to toothpaste and flows easily into the seam between the canopy and the front hatch. It is thick enough that it doesn’t flow out of vertical surfaces. It also sands easily. After sanding (150, 220, and 320 grit) and cleaning the surface we brushed on a coat of “EZ-Kote” to seal the balsa hatch. I had to call it a day. Ron |
|
|
|
|
United States, MI, Troy
Joined Aug 2009
142 Posts
|
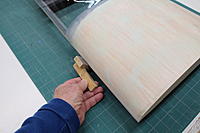
I spent some time this weekend working on the front hatch. After the hatch was sealed with EZ-Kote and sanded smooth with 220, 320, and 400 grit sandpaper, I cut a light weight 3/4 oz fiberglass strip 1” wide to cover the seam between the canopy and balsa. Then laid the fiberglass over front hatch and painted on the EZ-Kote. After about 45 min to 1 hour of drying time, I sanded the hatch with 400 grit sandpaper. At least 20 min drying is recommended on the bottle. Repeated this process 5 more times to fill in the weave of the fiberglass. I let the EZ-Kote dry overnight then sanded the hatch with 220 and 320 grit sandpaper. To remove the excess fiberglass along the side of the hatch, use a small sanding block and rub it along the bottom edge. Just use enough pressure to cut the fiberglass imprenated with resin. Don't round over the edges. I find this method a lot easier than trying to cut the fiberglass with an exacto knife. This method makes a clean cut without pulling the glass away from the balsa or the plastic canopy. This tip is also on the EZ-Kote bottle. Next I used the “Upol Dolfin Glase” to skim coat the hatch. We do this step to make sure the fiberglass weave and imperfections are filled in. After the glaze dried, I sanded the surface smooth starting with a light sanding with 150 grit to remove any high spots, 220, 320, and 400 grit. Next step is to move the protective tape on the canopy back approximately 1/4” to feather out the build up line from the Ez-Kote and filler. The more care taken at this stage saves a lot of time during the painting stage. The primer will reveal all the imperfections in the surface which will have to be addressed.
Dunny, I hope this answers your questions. It's not hard. It just takes time and patience. Ron |
|
|
|
|
|
Well I was finally able to join Ron and Ralph today for just a short time, it's good to get out.
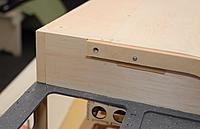
We started out the day by mounting the DA200 with the 3 degree offset SWB mount, we also added the 1 degree washers at the top to give the recommended downthrust. This is all in prep to mounting the cowl. Next we used a Dremel to grind out the front of each cowl halve and then temporally taped them together. It was then back to the fuse to first mark where the upper dowel pin would be located. We have a fixture that we use to do this, and when marked, we inlay a 1/4" thick square of light ply to act as a mount for the 1/4" dowels on both sides. We then checked the upper single 1/4" ply cowl and the lower two cowl ring for good fuse contour fitment. To aid we use a scrape piece of cowl fiberglass so that the cowl rings will be the correct shape and size for a flush cowl to fuse transition. With the cowl rings now ready, what we do is to use a 1/16" spacer double taped to the fuse and then using servo screws, temporally mount the cowl rings to the fuse. That's all we did today, tomorrow with our cowl drill fixture we will drill and glue the upper dowel pins into the fuse. Plus use that guide again to locate the lower cowl fastener location as well. Tom |
|
|
|
|
|
Thanks Dale, heading off to Ron's for a few hours...
Tom |
|
|
|
|
|
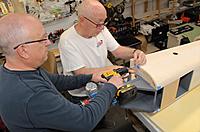
All of us where together today to continue the mounting of the cowl. In the first picture Ron and Ralph are using our dowel locator jig on the cowl ring. A 1/4" dowel along with a lower hard point for the 6-32 blind nut were Zpoxy in place.
Next we located the upper cowl ring with the help of little squares of the cowl material and hard wood rails taped to the top of the hatch. These rails and scrap fiberglass made it easy to properly locate the upper cowl ring. With all of the rings mounted, we dry fitted the cowl in place with Ralph playing the part of pilot....Just a little sanding on the right side of the cowl base was needed to get a perfect fit. At this point we also drew registration marks on both the cowl and fuse so we would know exactly where the cowl would go. The cowl was removed, then wax paper was inserted between the cowl rings and the fuse. We then ran a bead of Hysol around each cowl ring and the cowl was placed back on lining up the registration marks and taped in pace. To insure the cowl fitted tight to the cowl rings, we used servo screws to hold the fiberglass cowl snug to the rings. These screws will be removed once the Hysol cures, (tomorrow) and the holes will be filled with UPOL glaze. Tom |
|
|
|
|
|
With the three of us together, our goal today was to finish up the cowl mounting.
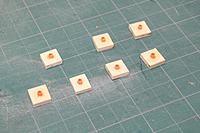
To ensure that all of the upper cowl bolts are all on a straight line, we first propped up the rear of the fuse so that the datum line was a zero degrees. Next we used our laser to shoot a line down the upper cowl to mark the vertical and horizontal location of each mounting bolt. With the cowl still on the fuse, BTW, the Hysol glue joint of the ring to each cowl half was excellent, we used a 9/64" drill at each of the upper to lower bolt holes through the fiberglass. The cowl halves were then removed and work began on the upper cowl bolt hole re-enforcement and the hard points for the lower cowl. For the upper cowl we have always used this procedure to ensure that the bolt holes don't deteriorate over time. With a 6-32 bolt sticking up through each hole, a 6-32 washer is tach glued in place with a few drops of CA. The bolts are removed and we use a one inch strip of .75oz. glass cloth over the bottom length of the cowl and laminate it down with Zpoxy Finishing Resin. Once that cures, we will open up each hole again with the 9-64 drill. For the cowl bottom, we made twelve 1/4x3/4x3/4" light ply hard points, drilled a 3/16" hole in the center for are tried and trued Ohio Super Star nylon treaded inserts. These hard points were then glued to the inside fuse bottom cowl with Hysol and secured for the curing process with 6-32 bolts and washers. Everything was left to cure overnight. Tom |
|
|
|
|
|
Tom your installation of the Kam Aero cowl is very enlightening.
Thanks for discussing in detail how you align the cowl ring for the mating of the cowl well throughout procedure. Those Ohio nylon thread inserts you haven't had them strip and I thinking they would help prevent the 6-32 bolts from loosing up from engine vibrations. Great build guys thanks for all your insight . |
«
Previous Thread
|
Next Thread
»
| Currently Active Users Viewing This Thread: 1 (0 members and 1 guests) | |
| Thread Tools | |


