|
|
|
|
|
Discussion
*Redwing RC 50cc Slick 540 Electric Build*
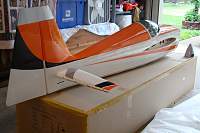
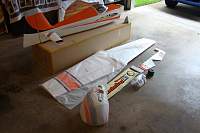
Picked up my plane at our IMAA event last weekend from Redwing RC. I have some minor issues and Redwing RC is working with me on it but overall a very nice plane. Seems to be super light which will be great for my first giant scale electric. Here is what my setup will be.
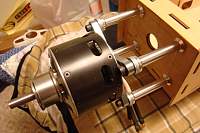
Eflite-Power 360 motor Phoenix Edge HVF 160 w/Fan ESC EC5 connectors / 8 gauge wire EC5 Series connector / 8 gauge wire 2 Glacer 5000 45C 6S packs in series XOAR (gas/wood) 24X10 prop 4" Tru-Turn Ultimate Spinner |
|
|
|
|
|
|
|
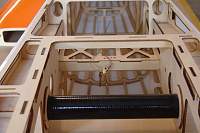
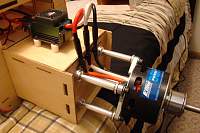
I used a XOAR 23X8 prop just as a test to see if the prop bolt (4 bolts) pattern was the same as a DLE 55 and it is. I have ordered the DA50 2 1/2" Stand-offs as they are tapped 1/4-20 on one end and that will fit the bolts that came with the Power 360. I also changed out all the pin type hinges that came with the Slick 540 to the Robart 312 3/16" Steel Hinge Points. The Robarts are the same size but have a larger pin in the knuckle. The stock ones would have probably been fine but since I had the Robarts I used them. I had a problem with both stabs not fitting up to the fuse so I removed some of the ply on the root rib on the leading and trailing edge and them added washers to take up the gap between the tabs on the stabs and the fuse. Sold one of my planes so I'm waiting for them to pick it up so I can buy the CC 160HV /Fan ESC. I also have a DLE 35RA I'll be selling to fund the rest of my new electric build.
|
|
|
|
|
|
Received my DA50 2 1/2" stand-offs today. had to add 3/16" to get the proper gap between the cowl and the spinner back plate. These stand-offs are really heavy duty.
|
|
|
|
|
|
Cool...I'm building a Redwing 76" MXS-R, it will be electric also
|
|
|
|
|
|
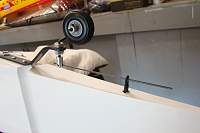
Worked on my Slick 540 this morning and got a few things completed. The cowl was not positioned correctly so I had to add another 1/16" (already had 3/16" added to the stand-offs) to all 4 stand-off's. I happened to have some 1/4" aluminum spacers on had so it worked out fine. I also had to add 1/16" washers to both upper cowl bolts to tilt the cowl down a little to line up with the spinner back plate. The 5/8" bolts that hold the wheel pants on are to long and they were hitting the wheel hub and the wheel will not turn. Had to replace them with 1/2" bolts. Also had to use my dremel tool to cut away both sides of the wheel pants on the bottom as they were rubbing against the wheels. Got the tail wheel bracket put on and seems to work fine.
|
|
|
|
|
|
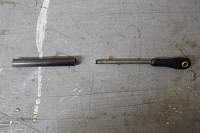
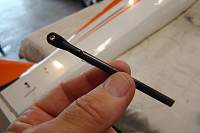
Started installing the tail wheel assembly only to find out that the small aluminum piece that gets epoxied into the rudder was not long enough and had to be replaced. I took a 2-56 ball link and screwed a piece of all thread rod into it and then epoxied it into a piece of carbon fiber tube. I had to drill through the bottom of the rudder and into the next rib to make sure it was strong enough.
|
|
|
|
|
|
All connectors are soldered on and the CC 160HV ESC is installed. The round hole in the front of the cowl creates a direct air flow over the ESC.
|
|
|
|
|
|
Plane is looking good so far
|
|
|
|
|
|
|
|
|
||
|
|
Quote:
|
|
|
|
|
|
|
My new Glacier 5000mAh 6S 45C packs are here but the USPS would not leave them without a signature so I picked them up today. I also need to dig out an old lap top pc so I can download the new firmware for my CC 160 ESC and get everything programmed.
I found today at Radio Shack a cord to use to upload the latest firmware and program my ESC. Only $3.97. |
|
|
|
|
|
Interesting....wonder if that cord actually works with the esc. Let me know, I have the actual CC cord
|
|
|
|
|
|
I hooked up two different cords this morning and it will light up but it does not recognize it. I'm going to try and program it with the TX and see how it goes.
|
|
|
|
|
|
I stand corrected. I manually programmed the ESC with my TX and after that I plugged it back into the pc with the Castle Link and it fire right up. Maybe I had a bad connection with both cords the first time but I don't think so as I unplugged it and plugged it back in several times. Any way, got it setup.
|
|
|
|
|
|
Can not get one cell to come up all the way. 3.93 is as high as it will go. Got the ESC programmed and the arming switch working. Got the Slick up on it's legs and started to install the aileron servos and ran into a snag. I believe the pre-installed servo mount is in the wrong place. Going to have to get the dremel tool out. Just looks like one thing after another with this plane. Still waiting on my XOAR 24X10 prop and the remaining servos that were on back order.
|
«
Previous Thread
|
Next Thread
»
| Currently Active Users Viewing This Thread: 1 (0 members and 1 guests) | |
| Thread Tools | |


