Horizon Hobby Hangar 9 Timber 110 30-50cc ARF Review
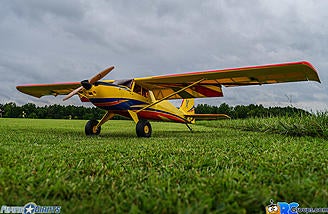
Looking for the next BIG thing? Well you found it! The renowned Timber family gets a BIG brother with the 110" (over 9 feet!) wingspan gas or electric giant-scale version. Check out just how nimble this big STOL bird is!

This giant-scale Timber is BIG...ON FUN!
| Product: | Hangar 9 Timber 110 30-50cc ARF |
| Wingspan: | 110" |
| Length: | 68" |
| Wing Area: | 1466 sq in |
| Wing Loading: | 29.4 oz sq/ft |
| Weight: | 17-19 lbs |
| Engine (gas): | 30-50cc |
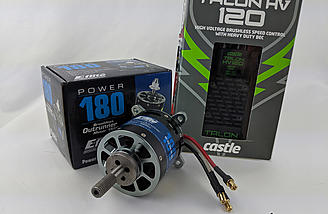
| Motor (elec): | Power 160-180 or equivalent |
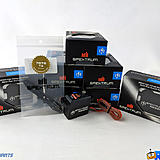
| ESC (elec): | 120A |
| Battery (elec): | 10-12s 5-7000mAh |
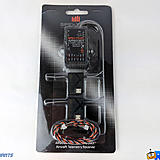
| Servos req: | 7 high-torque |
| Price: | $699.99 |
| Available from: | horizonhobby.com |
| PDF Manual: | Click Here |
Timber? What's a Timber? Likely something you WON'T hear at the local flying field! Horizon has had a big hit with the Timber, which has helped guide it through 4 versions over the years since its release in 2016. A high-wing STOL (Short Takeoff and Landing) airplane with big surfaces and big power has made it an every-day plane for pilots of all types.
Last year at Fall Nall, Horizon Hobby gave us a preview of what is now the Timber 110. With a balsa and plywood frame along with gas and electric options, it's giving giant-scale pilots a whole new reason to "Timber".
The now released Timber 110 from Hangar 9 was just delivered to my doorstep, so let's get choppin'!
See others' opinions, equipment and mods on the Timber 110 in THIS THREAD.
Key Features
- High quality balsa and plywood construction provides a strong and lightweight airframe
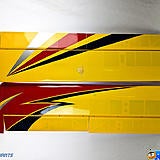
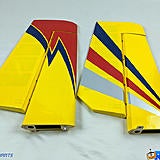
- Vibrant and eye-catching UltraCote covering for a high-quality finish and good looks
- Functional flaps expand the flight envelope and make for STOL take offs and landings
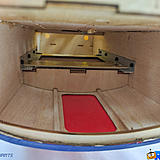
- Multiple hatches allows plenty of opening space for assembly and battery changes
- Large 7" tundra-style tires included
- Optional-use leading edge devices allows for even shorter take offs and landings (included)
- Pre-hinged control surfaces (except rudder) help you save on build time
- Two-piece plug-in wings with carbon fiber wing tube allows for easy transportation and storage
- Removable horizontal stabilizer for easy field assembly
- Accepts Hangar 9 CubCrafters XCub 60cc articulated landing gear (sold separately)
- Tool-free field assembly
- Painted fiberglass cowl requires no finishing by the customer
- Painted aluminum landing gear matches the covering perfectly
- Designed to accept gas/petrol engines and electric motors
- Float ready, with hard points for optional float set
- Complete hardware kit with engine and motor mounting hardware
Flight Review Video
| Timber 110 RCGroups Review (14 min 22 sec) |
In the Box
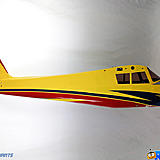
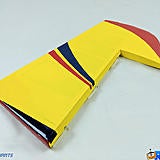
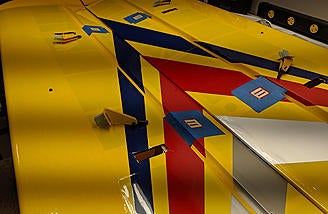
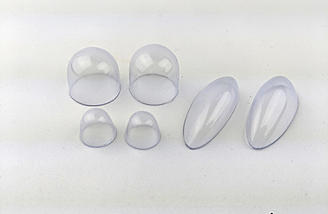
The Timber 110 box is over 5' long, and inside you'll see that all of the parts are very nicely secured. Inside the plastic wrap bags, you'll find a very well constructed airplane with an excellent covering job. With barely any wrinkles visible, the bright yellow scheme will show up great in sunny and cloudy skies. Despite the size of the fuselage, it weighs only 3.4 lbs out of the box and has plenty of room for all of your components. The wing halves are huge and require very little assembly as all of the hinges are pre-glued....hallelujah! In fact, the elevators are pre-glued too! The only epoxy you'll need for this entire plane are for the control horns, rudder hinges and motor box. Speaking of the wings, you may notice that the wingtips are molded plastic and in the box of hardware are 3 sets of clear plastic shapes, which I can only presume are for if you wanted to add some navigation or landing lights. I also noticed a servo wire tube in each wing going from the aileron servo hole out to the wing tip. I'm eager to see what everyone will do with these features!


Assembly
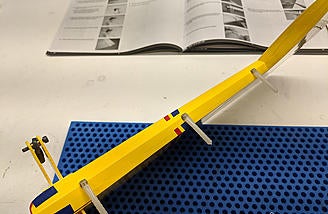
Wings
As is typical with giant-scale ARFs, you'll start off with getting all of your control horns glued in. I went assembly line style and cut all of the covering slots and servo mounting areas first, so I could glue as many control horns in as possible with one batch of mixed epoxy.
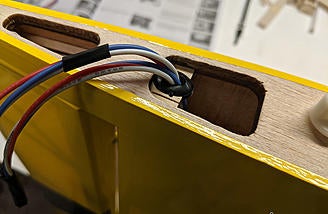
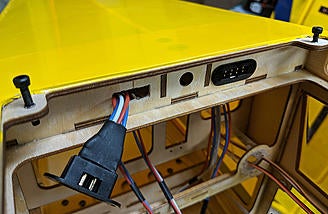
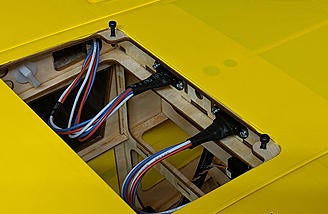
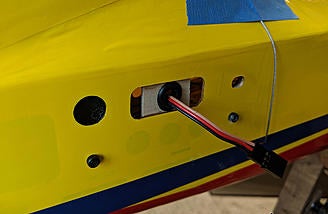
Something you may have seen on my previous builds are the servo harnesses from Taildragger RC. I love these things as they make assembly at the field a snap. There's no guessing or color-coding needed for your multiple servo connections coming from the wing. The plywood right below the top access hatch looks like the perfect location for the housing to be mounted.
As I started installing the wing servos, I noticed something interesting...a clear tube running from the aileron hatch to the wingtip. I also found 3 different shaped clear plastic 'bubbles' in the hardware package. It looks as if they've given us the first steps to adding navigation lights to this monster Timber!
Unfortunately, the longest of the wire-puller strings in each of my wings were accidentally glued to the ribbing or hinges inside the wing...so there they will remain. Thankfully the wing structure is straight and open, so gravity was all that was needed to get my extensions down to the wing root.
If you're using the Hangar 9 1.5" aluminum servo arms specified on the completion parts list, take note that they are tapped for 4-40 and will need to be drilled out or re-tapped for M3 to use the bolts that come with the kit, or use your own 4-40 bolts that are of sufficient length (the ones provided with the servo arms are too short). You'll also likely find that the ball-links for the wing surface connections need approx. 20 turns onto the turnbuckle, vs the 12 in the manual, to be the right length.
Fuselage
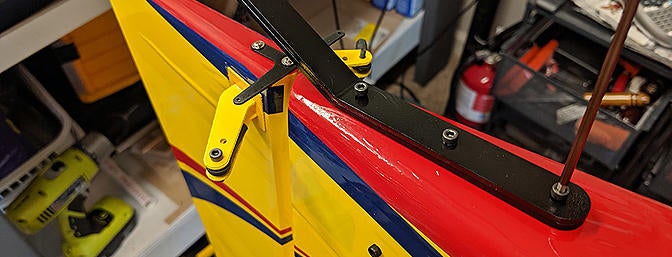
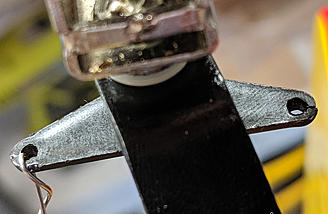
Once the rudder hinges and control horns are glued in, you're off to the races on the fuselage assembly. I decided to toss a little black spray paint on the tailwheel assembly, which I think blends into the airplane a bit better. Note that in the tailwheel bag there are two sizes of screws. The 2 smaller ones are intended for the metal T-arm that mounts on the rudder; the 3 larger ones are apparently not needed as they were replaced with hex-head bolts that are in the fuselage.
Once the tailwheel assembly is mounted, you can connect the springs. I suggest twisting the spring wire on the plastic tiller arm before stretching & securing the spring onto the metal T. Be careful here as the plastic on the tiller arm is a bit soft and that hole doesn't have a lot of plastic around it, so the wire can easily cut right through as your twisting the spring wire around. You can also try drilling a smaller hole a bit inwards so there's more plastic around the hole.
There was a little confusion in the manual regarding the rudder servo arm. Despite the parts completion list having a 3" servo arm, the assembly instructions show the 1.5" arm that comes with the servo. Usually, the servo arm length is equal to the length of the control arm. Given that, I used the 3" arm. There was also no mention of if the pull-pull wires needed to be crossed or not. I chose to cross them, as that's typically what's done.
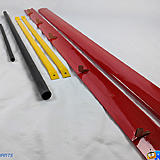
The instructions say to use a 36" extension for the elevators, however note that you will want 48" if you have a need to take the horizontal stabs off for transport or storage. I believe this is why the completion parts list includes both 36" & 48" extensions.
If you choose to go with an electric motor setup, there are a few items of note that I encountered...
The pre-installed blind nuts on the motor box firewall fit the Power 180 perfectly. If you're using another motor, you may want to remove them. These are easy enough to pop off by tapping a small flat-head screwdriver between the firewall and plywood 'washers'. Doing this will make it a little easier to work in there when mounting the motor.
When using the template to mark the mounting holes on the firewall, note that the outer holes are right in the corners of the motor box, which make it a little tighter to get the bolt and tools into. I'd suggest using the circle-shaped set of holes more towards the center. Note that you can use the extra holes in the firewall to slide your allen-driver through to reach the back bolt heads a little easier...assuming the motor isn't mounted over them, or you left the motor off until the box is mounted.

Make sure to check if your motor & ESC bullet connectors' size match before you spend time mounting the motor. (Ask me how I know!) If you need to replace them with the correct size, ensure you DO NOT clip the bullets from the motor, simply un-solder them. There's a special coating on the winding wires, except for the end, which will pretty much prevent any solder adhering to it.
For the Power 1.80, the front of the motor box had to be slid nearly all the way forward to reach the 7 1/8" distance designated on the instructions. I used some rubber bands to create enough friction to hold its position and slid the cowl on for verification before gluing. I'm glad I did, because it revealed that the motor can was rubbing on the inside of the cowl. I ended up sliding it back about half way in the slot, which is closer to 6 15/16"-7", to get a nice 1/16" or so spinner gap. Don't forget that if you end up a little too far back, you can always shim behind the motor mount with washers.
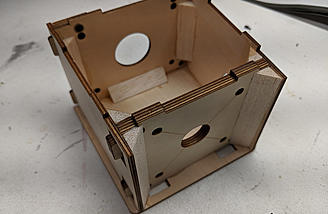
Also note that there is a selection of triangle stock included with the kit. Although the instructions don't mention it, you should use these to reinforce the motor box firewall on both sides. After getting my firewall distance set and glued in place, I cut the triangle stock to size and glued them in place on both sides of the firewall. I also added a piece on each inner corner of the back of the box. If your motor mount holes are close to the triangle stock (not needed for the Power 1.80), you may need to carve out semi-circles so the washers will sit flat. There's also a top piece for the motor box provided, but the instructions don't mention or show it. I decided to leave mine off.

The instructions use two sets of four 4mm x 20mm bolts to mount the engine and motor box, however the bag of hardware came with four 20mm and four 30mm. The 20mm are just long enough to mount the motor box to the firewall, leaving the longer ones for mounting the motor to the motor box. Since my motor mount lined up with the pre-installed blind-nuts, I didn't really need to use the nylon lock-nuts, but did anyway for peace of mind. My bag didn't have enough lock-nuts in it for the 4 motor bolts and 4 motor box bolts, but I had plenty in my hardware box to fill in what was needed.

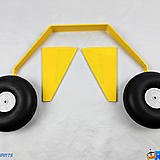
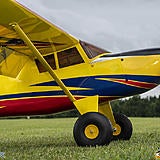
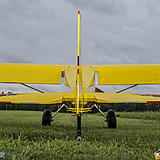
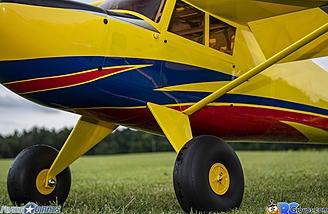
I masked off the wheels and tossed a little yellow spray paint on the wheel wells so that it would match the plane a bit better. It ended up being a little too orange-yellow, but still looks better than the dull grey plastic color. The landing gear are installed easy, once you figure out the arrangement. The picture above shows how the plywood with blind-nuts has to be slid into the pipe tunnel. The metal landing gear should be mounted with the straight-edge facing forward. Once you slide the wheels on the axle and secure with the cotter pin, I recommend bending one of the pin ends to ensure it won't pop off.

UPDATE: Near the end of my review process, after less than a dozen or so flights, I landed to find the inner hub of my left wheel had broken off. I'm not sure what caused the hub to break, but I'd advise keeping an eye on your wheel hubs during your pre-flight inspections.
The 3" spinner needed to have the backplate reamed out for the 3/8" shaft of the Power 1.80 motor. I took my time and used a rag through the lightening holes to help hold onto it. Eventually my prop reamer made it's way through, and I was able to mount the prop and spinner.

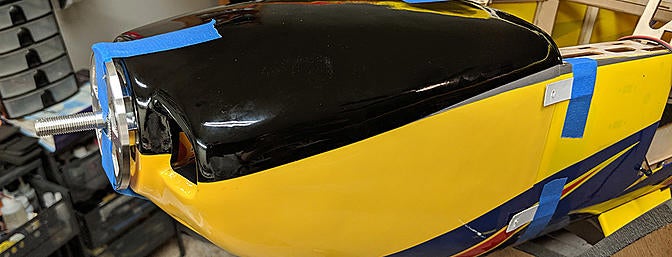
The cowl was mounted painlessly, however there is no real front-to-back adjustment room since the cowl doesn't slide over the main former like some other models do. I used some painters tape to secure the top and bottom in place, as well as some on the spinner backplate for alignment. After centering the cowl to the spinner backplate, I marked the holes and finished mounting the cowl per the manual.
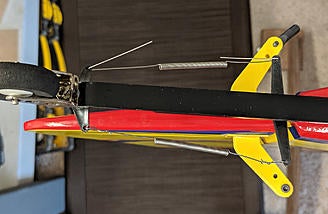
After sliding the wings on for some receiver programming, I discovered I could barely get the wings back off! The wing tube was very tight. Once I finally got them back off, I twisted the tube around inside each wing half, occasionally removing it and wiping the carbon dust off with a paper towel and alcohol. A few minutes of this on each half got it sliding on & off with less resistance.
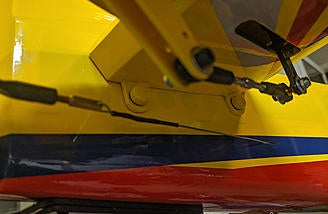

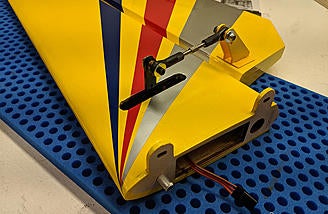
I tried out their claims that field assembly could be done without tools, with the help of their yellow-painted thumb screws. These work great for securing the horizontal stabs, the top hatch and the canopy hatch. I tried to use the last ones to secure the struts, which worked for the wing but did not work for the bottom of the fuselage near the gear. The head of the thumb screw was hitting the wood fairing, and was too tight of an area to get your fingers in there to turn it. I ended up keeping the thumb screws for the wing portion and then the normal M3 bolts on the other end...which honestly go in just as fast and easy.

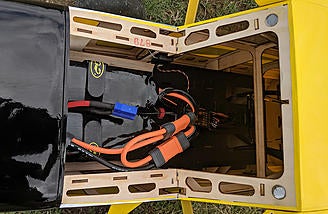
Finally after getting everything mounted, I lifted this beast onto my Great Planes CG Balancer, and then quickly realized that the gear fairings were hitting the uprights of the balancer! So then, with the assistance of my lovely wife, we lifted the wing about 4" back from the leading edge and found it quite tail-heavy even with the batteries against the firewall. I placed some lead weights on the nose, and moved our lifting point back to the 4 1/2"-4 3/4" area until we were able to get the tail to lift off the table. It took about 10oz of weight in the end, which was more than I expected and wanted to add, but I had no fear that the huge motor could pull it around with ease. I put the lead inside the motor box and put new zip-ties around that and the ESC to secure.
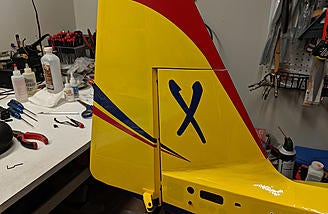
As a final detail, I decided to seal the hinges with strips of clear Monokote which should help increase the aerobatic precision flight characteristics.
Completed Timber 110
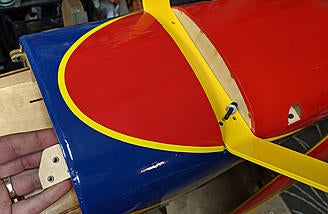
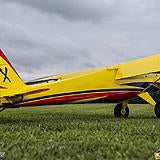
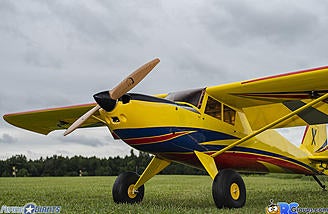
Thanks in large part to the minimal things that needed to be epoxied, it only took me about 10 evenings of a few hours each to complete, which is quite impressive for a plane this size! It has a great presence on the field and in the air, and the bright yellow shows up well in different skies.


Flying
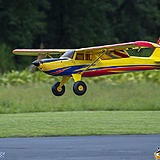
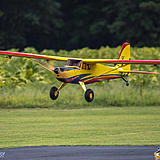
Takeoff & Landing

Given the bush-plane STOL nature of the Timber, it feels just wrong taking it off of the paved runway at our club. But thankfully, we have plenty of grass to use too. Taxiing on the bumpiest areas of our field were no problem with the big 7" tires, just remember to hold up elevator to keep that tail on the ground. With the dynamic power of 12s lipos backing you up, you can roll out nice and gentle, or go STOL by dropping the flaps and jamming the throttle to launch yourself in the air with authority! Tracking is straight and true, but you may need to input some rudder when on paved surfaces to keep your roll-out vector.
Landing this big bird is just like a big trainer. Depending on wind, you can drop half or full flap to help you slow down if needed. The Timber 110 does glide fairly well, but beware especially with full flap of getting TOO slow, as mine does drop a wing in a stall. The glide ratio will drop once you hit full flaps, but this should only be needed for STOL landings or calm conditions on shorter runways. On that note, you will need a fair amount of down elevator mix for full-flaps...I believe I ended up around 30%. Touch and goes on those calm evenings with the golden sun bouncing off that bright yellow airframe is as relaxing as it gets!
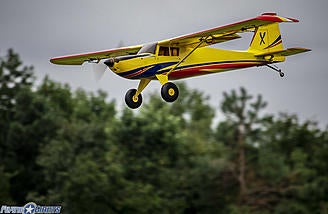
The provided wheels are very dense hard foam that don't absorb a lot of energy, which make it very easy to bounce on landing. The Timber 110 is designed to take those bounces and the landing gear is stout, but the hard wheels tend to bounce you back into the air perhaps more than you expect.
Basic Flight
If you're just looking to draw lazy eights and ovals around the sky, the giant Timber 110 fits the bill just as well as any Cub or Telemaster. With this electric setup, I could easily glide around the pattern at 1/3rd throttle without flaps. That reduced throttle will only lengthen the time you get to enjoy & fly this big bird around the sky. Tracking with the Timber 110 is really nice and doesn't really need any coordinated rudder in turns, and low rates are plenty for this style of flight. Stall tests did show a wing drop, but only after it slowed down to a crawl. Inverted flight needed a light touch of down elevator to maintain level attitude.
STOL (Short Take-Off and Landing)
With the popularity of full-scale STOL contests increasing in popularity at events like EAA Air Venture, it was only natural that that we would try and duplicate the fun in R/C. As mentioned previously in the 'Takeoff & Landing' section, the great power-to-weight ratio of the Timber 110, large flap surfaces and the long wing can get you in the air in a matter of only a few feet and still have power for a vertical climb out! In addition, you can attach the provided leading-edge slats to the wing for improved slow-flight performance. I personally chose not to attach these, and was still impressed with the slow-flight characteristics of the Timber 110. It would be fun to test out the differences and be able to tailor your flights from one to the next, if I could figure out a way to make these easily removable!
Aerobatics
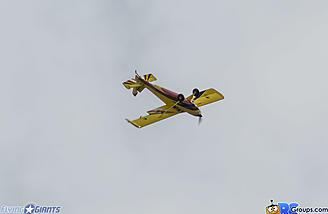
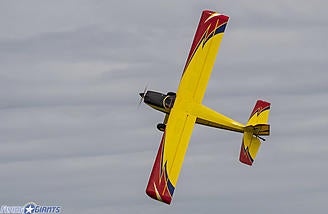
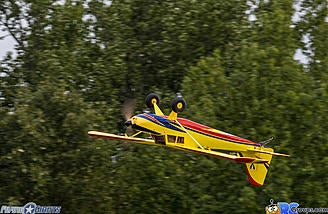
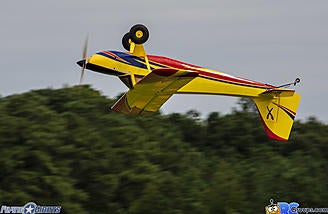
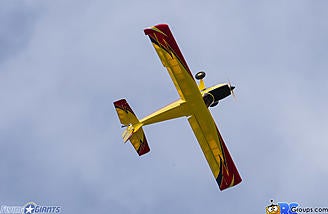
Once the lazy eights get you yawning, simply turn up the rates and turn up the fun! You'd think that with an airplane this much bigger than the popular 1.5m foam versions, that you'd be giving up something...but the Timber 110 is easily just as...no...even MORE aerobatic than its siblings! Even without turning on full-span ailerons, this giant Timber rolls very quick and axial. Knife-edge, loops, snaps and spins were all handled with amazing ease thanks to the big power-to-weight ratio and large control surfaces. But then, flip on the full-span ailerons, hold full right aileron and hold on! 'Cuz that monster Timber will roll with impressive speed! The first time we did it, my pilot and I got a bit giddy!
3D? Ohh yeah, this 110" STOL high-wing plane can do that too! Harriers, hovering, rolling...even pop-tops! The Power 180 and Talon 120 ESC combo puts out some crazy power and the Timber 110 utilizes that power to do some stunts that you would only expect to see from an Extra, Edge, or Laser...not a high-wing plane! Granted, the original Timbers were quite aerobatic, and the new Timber X can 3D quite well...but it kind of makes you do a double take when a giant 9' Timber is keeping pace with the others!
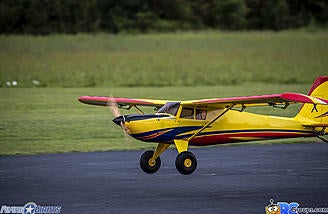
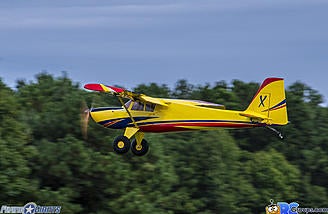
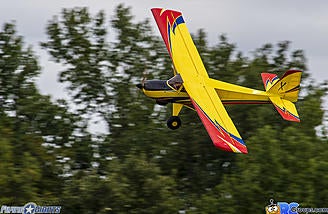
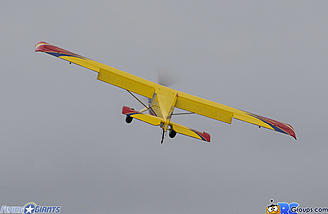
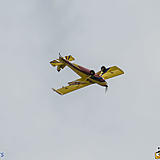
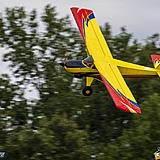
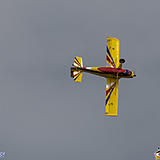
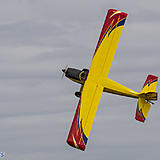
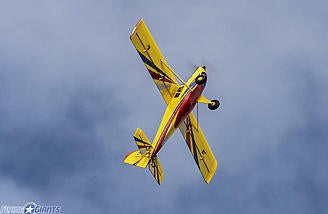
Flight Photo Gallery


Summary
Wow. This is truly a fun do-it-all giant-scale airplane! Whether it be slow, scale patterns with touch & goes, glider towing, sport aerobatics, or low down 3D...the Timber 110 covers the bases and then some. Its light airframe, large control surfaces and extreme power allow this high-wing plane to do things that make you look twice. The bright yellow covering scheme shows up great in a variety of skies, and it overall just has a great presence in the air. I really appreciated the design elements that allowed you to build this beast quickly, like all of the pre-glued hinges. I also like the quick assemble at the field with the thumb bolts and large hatches. Despite the wingspan being over 9', the Timber 110 actually fits in my SUV easier than my 93" Laser. Flight times with the electric setup are reasonable, about 5-7 minutes with mixed flying styles...so lazy flights could potentially hit 10 minutes if desired. Or, higher capacity batteries could extend your flight times and negate the potential need for lead weight up front. With the Timber 110 having such a wide variety of abilities, I can easily see this gaining a large following with pilots of all types!
Hits
- Bright color-scheme for good visibility in a variety of conditions
- Light airframe and powerful electric setup
- Large control surfaces give lots of authority for all types of maneuvers
- Lives up to the reputation & characteristics of its smaller siblings
- Assembles very quickly
- Flies great slow & fast
- Extremely aerobatic for such a large high-wing plane
- Built out of the box to accept other landing gear & float options
- 3 hatches allow give you access to nearly anywhere you need
Misses
- A little confusion between the completion list and what was shown in the instruction steps
- Thumbscrews don't work well on struts when landing gear fairings are attached
- Tailwheel tiller arm plastic is too soft
- Wheel hub broke after a handful of flights
RCGroups.com Review Policies
Our intent is to provide fair and unbiased reviews so that consumers can make informed decisions regarding new products. Some things you should know about our review process:
It is always our intent to provide a place for honest and open commentary, and to put the needs of our visitors first. If you feel that something we've published is inaccurate, please let us know using the contact form.
Last edited by FG_Jason; 11-18-2019 at 09:00 AM..
| Thread Tools |
 11-13-2019, 11:48 AM
|
|
|
|
|
|
United States, FL, Jacksonville
Joined Dec 2007
10,875 Posts
|
Nice job Nick!
|
|
|


|
|
11-13-2019, 12:45 PM
|
||||
|
|
||||
|
United States, MN, Anoka
Joined May 2006
110 Posts
|
timber of another NICK
Quote:
|
|||
|
|
|
|||

|
11-13-2019, 12:53 PM
|
|
|
|
|
|
United States, SD, Rapid City
Joined Jan 2009
72 Posts
|
Great review looks like a fun plane
|
|
|
|
|
11-13-2019, 04:43 PM
|
|
|
|
|
|
United States, OH, Dayton
Joined Apr 2018
55 Posts
|
Nice .. you already know how I feel about mine
|
|
|
|
|
11-13-2019, 04:46 PM
|
||
|
|
||
|
United States, OH, Dayton
Joined Apr 2018
55 Posts
|
Quote:
Anyways I absolutely love mine. |
|
|
|
|
|


|
11-14-2019, 09:27 AM
|
|
|
|
|
|
United States, NC, Raleigh
Joined Apr 2008
459 Posts
|
"Fly it like you STOL it" - haha, love it!
Are those the PR Bush wheels? I'm having difficulties finding good large wheels... |
|
|
|
|
11-14-2019, 01:00 PM
|
||
|
|
||
|
United States, OH, Dayton
Joined Apr 2018
55 Posts
|
Quote:
They fit a 6mm axle which is what is on the timber stock as well. So they would fit the stock landing gear perfect. |
|
|
|
|
|

|
11-15-2019, 03:03 AM
|
||
|
|
||
|
United States, AK, Juneau
Joined Feb 2014
1,611 Posts
|
Quote:
 Nice to see another review with an electric setup! Nice to see another review with an electric setup! 
|
|
|
|
|
|
|
11-15-2019, 03:11 AM
|
|
|
|
|
|
United States, AK, Juneau
Joined Feb 2014
1,611 Posts
|
It's a fun plane for sure. I'm around 5" CG empty.
|
|
|
|


|
11-18-2019, 08:52 AM
|
|
|
|
|
|
United States, NC, Raleigh
Joined Apr 2008
459 Posts
|
Ahh true, thanks for the note....I'll get that fixed.
|
|
|
|
|
12-02-2019, 05:31 PM
|
||
|
|
||
|
Joined Jan 2016
412 Posts
|
Quote:
I had a set made at a new factory and tested them with good results. The issue is getting them mass produced and at a cost where they are sellable? I am still working on it, but no date in sight for them hitting the market. Sorry. If you do manage to find an old set of the Hangar 9 floats out there. They should fit and work on the T110. Regards Ali |
|
|
|
|
|

| Currently Active Users Viewing This Thread: 1 (0 members and 1 guests) | |
| Thread Tools | |

