|
|
|
|
|
Re: Pilot-rc 47% Decathlon Build
I then mounted my Miracle Switch. It has 2 toggle switches which will be used for each ignition, 2 charging ports for charging my (2) 2700 maH 6v ignition Batteries, and a fuel dot which will used for filling my Smoke tank and be connect to the T coming off the smoke clunk line.
|
|
|
|
|
|
|
|
Re: Pilot-rc 47% Decathlon Build
Next I assembled the empennage of the plane. I did this after I ran all the servo leads I made for the 4 elevator servos. First I slid the vertical stab down into place. Then I inserted the 2 CF Stab tubes thru the vertical stab and slid the elevator halves into place and secured them with the 4 socket head cap screws provided and locktite’d them. (Don't forget to connect your servos and heat shrink the leads together before you bolt the stabs on) I then attached the rudder to the vertical stab using the 19-inch long hinge pin sliding it in from the top thru all the hinges till it protruded from the bottom. It was plenty long and I had to cut about 3 inch’s off once fully inserted. I secured the hinge pin in with a small wheel collar that was provided. I then started working the flying wires. There are a bunch of metal brackets provided that are attached to the stabs for the flying wires to attach to. There are also (3) 1 ¾ 4-40 socket head cap screw and self locking nuts provided that are used to attach these brackets to the stabs. The flying wires are swedged together using the brass swedges. It’s a good idea to loop the wire thru these swedges at least once before crimping them and covering them with the heat shrink that is provided as well. I then installed the tail wheel and spring provided. When you install the spring, put a pretty good amount of tention on it as this plane is very heavy and steering can be problematic.
|
|
|
|
|
|
Re: Pilot-rc 47% Decathlon Build
As far as the cowling goes, there wasn’t that much that needed to be done. I opened up the bottom of it for cooling and to ease with access to the chokes and that was about it. O, Its not shown in these pictures but I ended up closing off the big square hole in the lower center of the cowl (just below the landing light) to help with cooling.. It was running way to hot with it open. I also ended up opening the 2 canister tunnel dump holes just behind the gear to aid with cooling as well. I did this with a hot soldering iron. The cowl bolts on easy with 7 socket head cap screws and washers that are provided. The blind nuts for this are already installed; just don’t forget to use locktite. The stock mufflers were about 4 inches to short to clear the cowl. I wound up making 2 extensions out of an old 1” aluminum wing tube. The tube fit snugly inside the muffler down pipes. The extensions I made were 8 inches long. I needed to have 5 inches stick out the bottom of the stock mufflers to clear the cowl and the remaining 3 inches of extension went up inside the ID of the stock mufflers. I coated the extension that was going inside the mufflers with some RTV to form a good seal and drilled a hole thru the center of the muffler after the extensions were already installed to run a bolt thru for added security.
|
|
|
|
|
|
Re: Pilot-rc 47% Decathlon Build
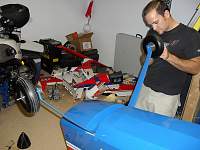
The CF spinner the plane came with worked great. The spinner bolt was about 2 inches to short so I ordered a 6 inch 10-32 bolt from true turn to solve this problem. The Prop I used was a CF 32x10 from Pilot-RC and it works great and will be used for break in on this motor(i've already flown it and it is a good prop!). The CF spinner was already cut out and only required to be drilled for the motor. The Gap around the spinner and prop was fine and looked great. With the cowl mounted, I had a ¼ gap between the cowl and spinner. It really looks good.
|
|
|
|
|
|
Re: Pilot-rc 47% Decathlon Build
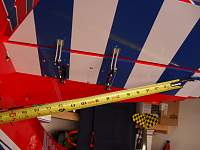
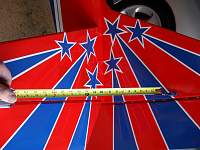
The wings on this plane are massive, nearly 7 ft in length each. I installed 4 servos per wing half…3 on each aileron (over kill) and one on each flap (there are only previsions for one servo per flap)… I would have done 2 and 2…. I used 1 ½ inch servo arms for the ailerons, flaps, and elevators. The wings were easy to set up. I will post more pictures of them later with pictures of the wing strut assembly. I ordered my Decathlon with a navigation light set that Tony sells. This kit includes a landing light, 2 wingtip nav lights, and a vertical stab strobe…The lights can operate anywhere from 6-12vdc. I’m running mine off 6v and they work great….I opted for pilot rc to install them since they were doing to custom scheme and needed to cover a wing any way. The only thing left for me to do was screw on the lens cover (all extensions were made and run in the wing by pilot rc). I was going to glue the lens on but thought if anything happened I want to have access to the light so that swayed my decision to mount the lens with screws. I predrilled the holes and applied some thin CA to the holes to harden them. Then I mounted the lens. All the screws were included. I used 3 screws to mount the lens. I’ve flown it this way and have had no issues.
|
|
|
|
|
|
Re: Pilot-rc 47% Decathlon Build
Mounting the CF Gear on this giant was very straightforward. Place the gear in position so that the gear sweeps forward. The factory has already installed the 4 blind nuts. Locate the (4) 1 ¼ socket head cap screws provided and locktite them into place using washers, tighten the gear snuggly. There is a cover that is also provided that goes on top of the gear and is flush with the bottom of the fuse. Attach this with the 2 screws provided; you will have to drill clearance holes thru the gear for this... For the wheel pants, I measured and found the center of them. Then I used a dremel and cut in a slot the width of the axel 1-½ inches deep. I loosely assembled and installed the axel with the wheel on. The assembly is as follows (from the end of the axel in, toward the axel nut) Wheel collar, wheel, wheel collar, jam nut, wheel pant, gear, axel nut, Axel jam nut (I purchased separately)…I flew it with no jam nut on the axel and the axel spun resulting in a loosened wheel pant. After you have the wheel and wheel pant on, set your spacing and tighten the wheel collars accordingly. Don’t forget to use locktite. once you have your wheel pant in place, i adjusted it to the correct angle and drilled a hole thru the gear and wheel pant. I then inserted a 4-40 blind nut in the wheel pant and tighten it down with a 4-40 screw from the inboardside of the gear. Again...Locktite!!! From the ground to the trailing bottom edge of the wheel pant i measured 1 3/4 inches. This set the wheel pant so it was level in flight.
|
|
|
|
|
|
Re: Pilot-rc 47% Decathlon Build
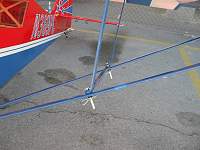
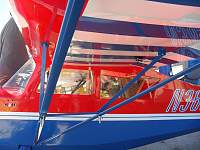
The wing struts are lightweight and of good quality. Mount the 8 strut attaching blocks to the wing with the (16) 4-40 by ½ socket head cap screws. Locktite them in. There are a bunch of aluminum spacers provided. You’ll have to mock up the wing strut with these spacers then temporally install the wing and see how the strut lines up. I used a thick spacer on the forward side of the strut and a thin spacer on the aft side. This might work for you, but I’m sure every wing might be slightly different. The only thing I did differently was I purchased hitch pins from ace hardware so I could quickly assemble and disassemble my wing at the field with no bolting required. I had to drill my struts and strut attachment points on the fuse out accordingly to make this work. I used a rubber o ring and some washers to get the spacing right so when the pins are installed, all is nice and tight. I purchased 3/8 hitch pins and the work great. You’ll see them in the pictures. The attachment hardware for all the strut braces are 4-40 by ¾ long socket head cap screws and lock nuts.
|
|
|
|
|
|
Re: Pilot-rc 47% Decathlon Build
Thanks Bad dog and Bingwing for the nice words! She's big and a blast to fly. Its amazing how slow this beast flys....float float float...especially with the flaps down. She's Definitely aerobatic, knife edges with nearly no rudder and flys inverted nearly hands off.... Got the smoke all set up and gonna give it a go maybe tomorrow weather permitting. I hope you guys have a good week and some great flying.
|
|
|
|
|
|
Re: Pilot-rc 47% Decathlon Build
Dude that is so whack! Your plane is super BAD-A#$ awesome! Hope you enjoy it! It looks like a fun plane to fly just by looking at it! Good luck! Thanks for the great thread!
|
«
Previous Thread
|
Next Thread
»
| Currently Active Users Viewing This Thread: 1 (0 members and 1 guests) | |
| Thread Tools | |


