|
|
|
|
Joined Jul 2008
292 Posts
|
Discussion
Graupner Starlet 2.4m 30cc Build Thread
Got something a little different to put together for xmas this year...and have started on it!
Made by Graupner, the Starlet is marketed as good plane for first time petrol heads, so thought Id share the build process to help those out getting into these fun machines. Nice kit, hardware looks good, and attached are the un packing pics. Nice bonus to have wing covers included, and everything arriving safe from ModelFlight in South Aust (http://www.modelflight.com.au/produc...-11449-10.html) on xmas eve! Glass work on Cowl and spats is great. Looking forward to putting this one together as an easy scalish flyer for fun flys...and maybe eventually put it on a set of floats  Includes Pilot, nice pre-hinged pocket style setup on ailerons and elevators (rod can be removed) Engine will be DLE-35RA with stock exhaust Servos will be Futaba and also some of the New models Scanner RC Digitals we have be trying out. With whole lot running off a couple of 1400mah Liphos batteries on a batt share, with ignition battery eliminator kill switch providing power to the ignition. Specs are 2.4meter wing span 1.54m Long and approx flying weight of 6.5kg Also includes the gear to run as electric if your that way inclined  Dont think this will take too long to put together...so will get started 
|
|
|
|
|
|
|
Joined Jul 2008
292 Posts
|
Elevators
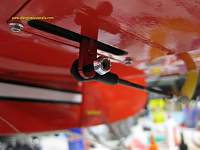
Started with elevators, mounting servos. Gluing in control horns with epoxy.
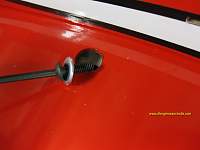
Clean up of excess covering from the slots, and the fit is solid, and accurate. Impressed so far. Servo hatches are well made, and no mods done here, except I used self tapping cap head/washer type screws to mount the servo and the hatch rather than screws supplied. Used 1" MPI Alloy servo arms and they poke through just enough to attach up linkages. Using the outer hole on the control horns still gives plenty of throw and trying to minimise loss of power and resolution from the servo. Using the supplied linkages, but instead of clevis at the servo end, am using dubro 4-40 ball links onto the MPI servo arm. Starting to notice some differences in the manual and what is supplied. Some of the hardware for mounting the wings and elevators is quite different. Seems some updates have been done and the manual not updated. Downloaded the one from Graupner web site and is the same, does not show the different hardware. Will elaborate on those bits when I get to them. |
|
|
|
|
|
looks good scott. look forward to the build
|
|
|
|
|
Joined Jul 2008
292 Posts
|
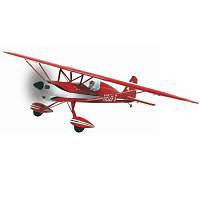
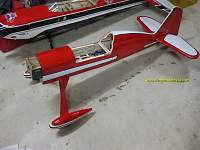
Suppose I should post a pic of what the plane looks like too

|
|
|
|
|
Joined Jul 2008
292 Posts
|
Got the servos fitted in elevators and linkages temp mounted.
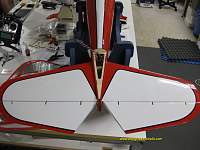
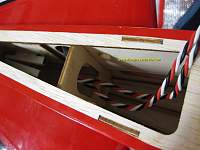
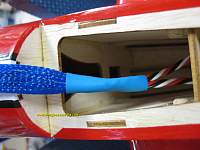
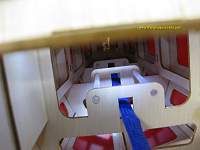
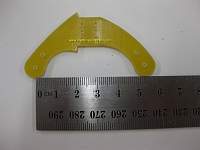
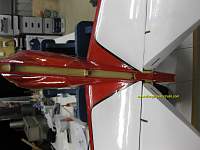
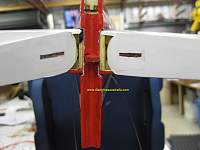
The two elevator halves fit onto an alloy tube and over two plywood tabs re-enforced with epoxy board. Couple of cap head screws lock them in place. The manual shows springs attaching to bolts attached to the stabs to hold it all in place, but not the case with this kit. I prefer the option supplied to the one shown in the manual. Change for the better I think, and simpler, proven method. Easy to remove stabs if you need to remove for transport, as just two bolts and unplug servo leads. The stab tube was about 4mm too long and had to be trimmed down slightly so the stabs would slide all the way home. Better than being too short. But when done all fits nice and snug. Required a set of 800mm servo extension leads to get the distance back to where the rx is going to mount. Some expanding sheath and heatshrink to finish off protects the leads. Handy square cut out in the supports all the way up, so bit of fishing with a length of dowl and a hook on the end to pull it through makes a neat install. |
|
|
|
|
Joined Jul 2008
292 Posts
|
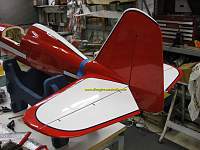
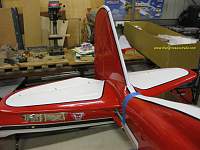
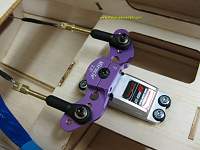
Next decided to mount the rudder and pull pull cables. Again using the supplied hardware, quality seems good here as well.
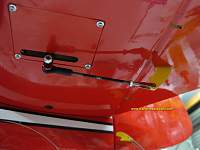
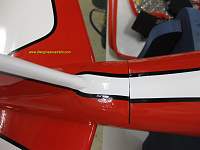
Rudder horn is epoxied in place, Vertical stab is glued to the opening and line up nice, and at 90deg to the stabs without having to modify anything  The rudder is pocket hinged same as other surfaces, hinge rod needs to be removed so rudder can be fitted after the vert stab is glued in place. All fitted nice again, no slop. Bit dissapointed that the covering/trim lines dont quite match up to the fuselage trims on top..will come back to that later if it bugs enough. I added some headshrink to protect the crimps fro the pull pull setup. Using 2.5" alloy double arm, on new model Scanner RC 16.2Kg/cm alloy case digital Servo - Japanese coreless motor/Titanium gear/Futaba output Spline. Attached Dubro 4-40 ball links to second set of holes in from the outside on the double arm to get close to same hole to hole distance as the rudder control horn. Not using the offset holes as set up for direct not crossed over cables to the rudder horn. Set of plastic tubes already mounted to guide the wires down the back and out the sides. Makes rounting the wires easy. Will use the supplied clevises to attach at the rudder end to the epoxy board control horn. |
|
|
|
|
Joined Jul 2008
292 Posts
|
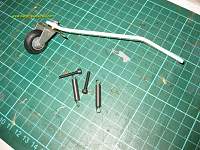
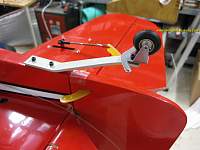
Bolt on the supplied tail wheel.
Pics say it all. Attached to rudder horn with supplied springs. |
|
|
|
|
Joined Jul 2008
292 Posts
|
Now to mount the main landing gear.
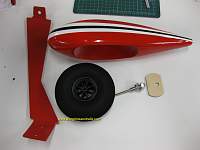
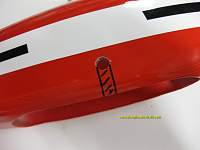
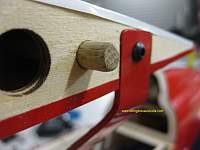
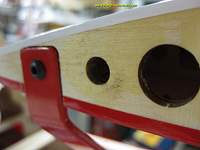
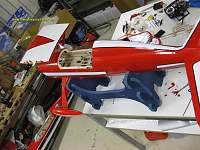
Ply plates need gluing into the wheel spats, then after the glu dries slots cut out to slip onto the axels/mounts. Wheels are pretty large diameter at 115m or ~4", not sure how good the dense foam is though, they are light but not convinced they will be long lasting...but time will tell. Couple of collets hold the wheel centred, ground flat spots using the dremel to suit the position of the grub screws,and a bit of loctite on all threads. Landing gear is aluminium and sprung setup with a couple of stiff springs to a centre mounted bracket. Fair bit of covering has to be cut away to expose the mounting plates. I went over the openings with the covering iron to seal everything down, then a dribble of CA into the balsa to seal it in pace. All the blind nuts are already installed. Didnt like the look of all the exposed wood in the exhaust path, so decided to seal it up. Just happened to have on the shelf a touch up can of red auto paint in a spray can left over from a 1985 Mazda SIII RX7 and used play around with before the kids came along  and the paint matches near on perfect!! to the covering. Sprayed it into the lid of the cap then brushed it on using one of the kids small paint brushes (thats what they get for me having to sell the RX7) and the paint matches near on perfect!! to the covering. Sprayed it into the lid of the cap then brushed it on using one of the kids small paint brushes (thats what they get for me having to sell the RX7)Now it can sit on its feet, pic next to EF 78" Extra for size comparison. The brackets sticking out the side are for the wing struts to attach to. |
|
|
|
|
|
lookin good Scott
|
|
|
|
|
Joined Jul 2008
292 Posts
|
Ive done a bit more...will get the pics up tonight/tomorrow

|
|
|
|
|
Joined Jul 2008
292 Posts
|
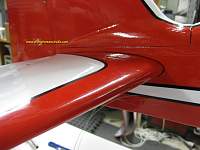
Got the wing centre section and braces mounted.
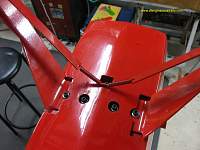
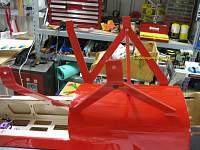
Dont tighten anything up until all in place...or it wont quite fit  tighten up after losely bolting all together and it goes together well and seems to be a fairly accurate fit. tighten up after losely bolting all together and it goes together well and seems to be a fairly accurate fit.I just slotted the covering where the braces go through to help cover things up a bit. One of the wing locating dowls had not been glued and was pushed in. So I ran some wood glue into them all to be sure. Starting to look the goods. |
|
|
|
|
Joined Jul 2008
292 Posts
|
Start to fit up the engine.
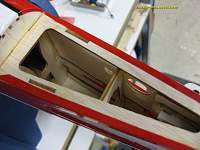
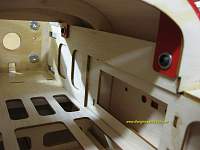
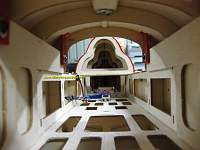
First up I gave the whole engine box area a coat of laminating epoxy resin to fuel proof. Will go over again after everything is drilled out as well witha 2nd coat. The blind nuts already fitted have the correct spacing for DLE-30 / OS33GT but I am using DLE-35RA which has wider spacing on one set of mounts. The blind nuts where 4mm instead of 5mm - bit strange as the bolts supplied with the standoffs in the kit are 5mm - slight mistake at the factory. I removed the blind nuts anyway (screwed in a 4mm bolt the tapped the head of the bolt with a small hammer and this popped them out) as using the DLE Standoffs that come with the engine and bolts through the firewall. They fit quite good and from cowl measurements will put the spinner back plate about 5-6mm in from of the cowl. Normally I would go a fraction less, but a customer has built one of these and told me comes out tail heavy - so the slightly forward engine will help a bit with the CG. I drilled out two holes with a 6mm drill bit and plugged with some dowl, then re-drilled with 35RA template to suit. Quick dry fit of engine, Stock muffler will fit all inside without a problem. Next to work on throttle servo mount/location. I prefer short direct linkage up front rather than mount it back in the factory supplied spot way back behind tank etc. Will also help with the weight a bit forward for CG going on other reports. Will start on this next few nights.. |
|
|
|
|
Joined Jul 2008
292 Posts
|
Bit of an interuption for the last few weeks - but back into now. Engine, tank and throttle servo mounted up. Will post pics very soon.
|
«
Previous Thread
|
Next Thread
»
| Currently Active Users Viewing This Thread: 1 (0 members and 1 guests) | |
| Thread Tools | |
 Similar Threads
|
|||||
| Category | Thread | Thread Starter | Forum | Replies | Last Post |
| Sold | EQ6 with fiber optic kill switch | dvonburger | Electronics | 0 | 05-18-2017 01:44 PM |


