|
|
|
|
|
|
|
|
|
|
|
|
|
Aileron Control Horns
Alright, so I did get a good bit done yesterday
 I was able to get the control horns for the ailerons glued in place, again using the same method as before. Covered the area with masking tape and glued in place with Hysol. As I had mentioned before there are two different control horns for the ailerons, one set for the inboard servo and one for the outboard servo. (tip & root) Once I got them sorted out, I checked their fit in the wings. As mentioned in the manual they may need to be sanded down a bit to fit in the slots pre cut in the aileron. For my wings, it was only the control horns out toward the tip of the wing that needed to be sanded down. To do this I measured how much needed to be removed, and it was equal more or less from one wing to the other. I took all four control horns and taped them together and aligned them with a bolt. Them used a disc sander to remove about an 1/8" from the bottom. After that I rechecked the fit and made sure they were both aligned over the hinge line, I used a long straight edge & the bolt through the horns to confirm. And then did the tape up and glued them in place. I was able to get the control horns for the ailerons glued in place, again using the same method as before. Covered the area with masking tape and glued in place with Hysol. As I had mentioned before there are two different control horns for the ailerons, one set for the inboard servo and one for the outboard servo. (tip & root) Once I got them sorted out, I checked their fit in the wings. As mentioned in the manual they may need to be sanded down a bit to fit in the slots pre cut in the aileron. For my wings, it was only the control horns out toward the tip of the wing that needed to be sanded down. To do this I measured how much needed to be removed, and it was equal more or less from one wing to the other. I took all four control horns and taped them together and aligned them with a bolt. Them used a disc sander to remove about an 1/8" from the bottom. After that I rechecked the fit and made sure they were both aligned over the hinge line, I used a long straight edge & the bolt through the horns to confirm. And then did the tape up and glued them in place.Zach |
|
|
|
|
|
Fuse on its feet
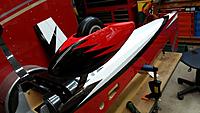
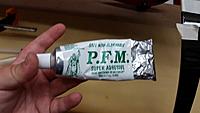
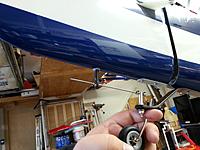
Alright, got the fuselage up on its gear finally! I bolted the landing gear up using Stainless bolts over the stock steel bolts, just personal preference. Got the axles mounted on the gear, something H9 did very nicely, is the axles have flat spots already on the axle in the correct position for the wheel and wheel pant to align perfectly. To mount the wheel pants, I again used Stainless 4x40 Button Heads with #4 Rubber Bonded washer, these with just a drop of Loctite will not come out but still be easy to remove. Also got the gear cuffs mounted, I used PFM which is very similar to shoe goo, loaded some up in the syringe and ran a bead where the cuffs meet the fuse. I also taped the gear off where the cuff ends and put a glob there too. Tail wheel mounting was the same, 4x40 bolts in stainless. Working on a direct drive steering system using the stock tailwheel. I did this before on my H9 QQ Composite Yak, I remove the steering arm at the top of the tail wheel and use a piece of aluminum rod and drill and tap it for 6x32. This then gets screwed down onto the tail wheel with Loctite, and once mounted a second hole is drilled through the top of the rod to run a tiller arm through. Then all that's left is to glue in a ball link to the bottom of the rudder and done. Included some pictures from the previous tail wheel on the yak. Alright, now its time to start installing radio gear and engine. Im flying this plane this weekend!
 Zach |
|
|
|
|
|
just ordered mine today, to replace the other h9 300
|
|
|
|
|
|
Love my 300, think about beefing up that tailwheel I was able to use the stock carbon leaf
|
|
|
|
|
|
Probably didn't need to, but I went with WhiteRose tailwheel on mine. I also went with 3/16" axles on main gear. My originals came as 1/8". Bent them pretty easily on not a very rough landing. I have also been through 2 pairs of the aluminum gear. I sure wish Graph Tech would make some more CF gear for this plane.
|
|
|
||
|
|
Quote:
 . However, the axles in this kit seem to be very high quality as does the tail wheel, which once I make the little mod to direct drive I will keep. As for the gear, on the 300X its pretty lightweight, mine weighed in at only 19oz and change. I have spoken with Graphtech and they will have the gear back in stock soon. However, the CF gear weighs just over 13oz so its not a huge weight savings. . However, the axles in this kit seem to be very high quality as does the tail wheel, which once I make the little mod to direct drive I will keep. As for the gear, on the 300X its pretty lightweight, mine weighed in at only 19oz and change. I have spoken with Graphtech and they will have the gear back in stock soon. However, the CF gear weighs just over 13oz so its not a huge weight savings.Zach |
|
|
|
||
|
|
Quote:
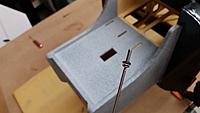
Thanks, the motor box does not come pre painted as shown in my build. That is something I have been doing on my planes for several years now. Its just simple grey primer and a light coat of stone paint. Both can be found at almost any hardware store and Wallmart if you looking.  Zach |
|
|
|
||
|
|
Quote:
 
|
|
|
|
||
|
|
Quote:
|
|
|
|
|
|
|
Wing and Stab Servo Mounting
Hey Guys,
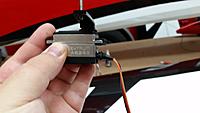
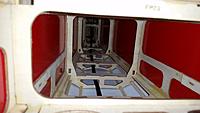
Sorry I haven't been able to post in the last few days, got tied up over the holiday weekend. Over the weekend I managed to get the servos installed in the wings and stabs. I am using the Spektrum 6265 HV servos, which have a detachable servo cable from the case. Because of this some small modifications had to be made to the servo boxes to allow the servos to fit. I used an Xacto blade and file to take some wood off the mounting tabs in the servo boxes as well as use a sanding drum on the dremel to take some wood and foam out of the relief cut in the servo boxes for the wire out of the back of any servos. Once that was done, the wire could be slid into this relief cut, and with the slight amount of wood removed be able to be dropped in at the angle required. After all of that, the standard servo mounting procedure was done; 1/16" drill bit for mounting screws, mounting screws ran in and out of the holes to cut the threads, and thin CA to harden the theads. After they were all dropped in and mounted in place. For the wings and stabs I chose to use the Ashlok connectors, this allows the wings to be connected with only one connector as opposed to two. They also lock into place to one another with a latching type connector. On the stabs, due to the placement of the servo being so close to root I wound the excess servo wire and placed it under the servos in the boxes. For the wings, only an extension for the outboard servo requires an extension, and the extension to run down under the inboard servo at the bottom of the servo box. Also got the extensions for the stabs installed in the fuse, got them wrapped in the black snake skin material and ran them under and through the bulkheads in the fuse to hold them in place. I love how the fuse has the keyed hole at the stab mounting area on the fuse. This keeps the extensions from falling into the fuse. Awesome!! Zach |
|
|
|
|
|
Hi Jim do you think this Epoxy its good enough to glue the control Horns
i order Zap 30 minutes epoxy but still not shipping, i can Buy the 3M in the local Home Depot |
|
|
||
|
|
Quote:
I am not sure I have never used it before. I would check to make sure that its capable and good for bonding different surfaces like wood and fiberglass. Take a look at the package and see what info it may have, also a test piece isn't a bad idea. Or, wait for the Zap, that way you know you are getting a good epoxy designed to work for this application. Zach |
|
«
Previous Thread
|
Next Thread
»
| Currently Active Users Viewing This Thread: 1 (0 members and 1 guests) | |
| Thread Tools | |


